
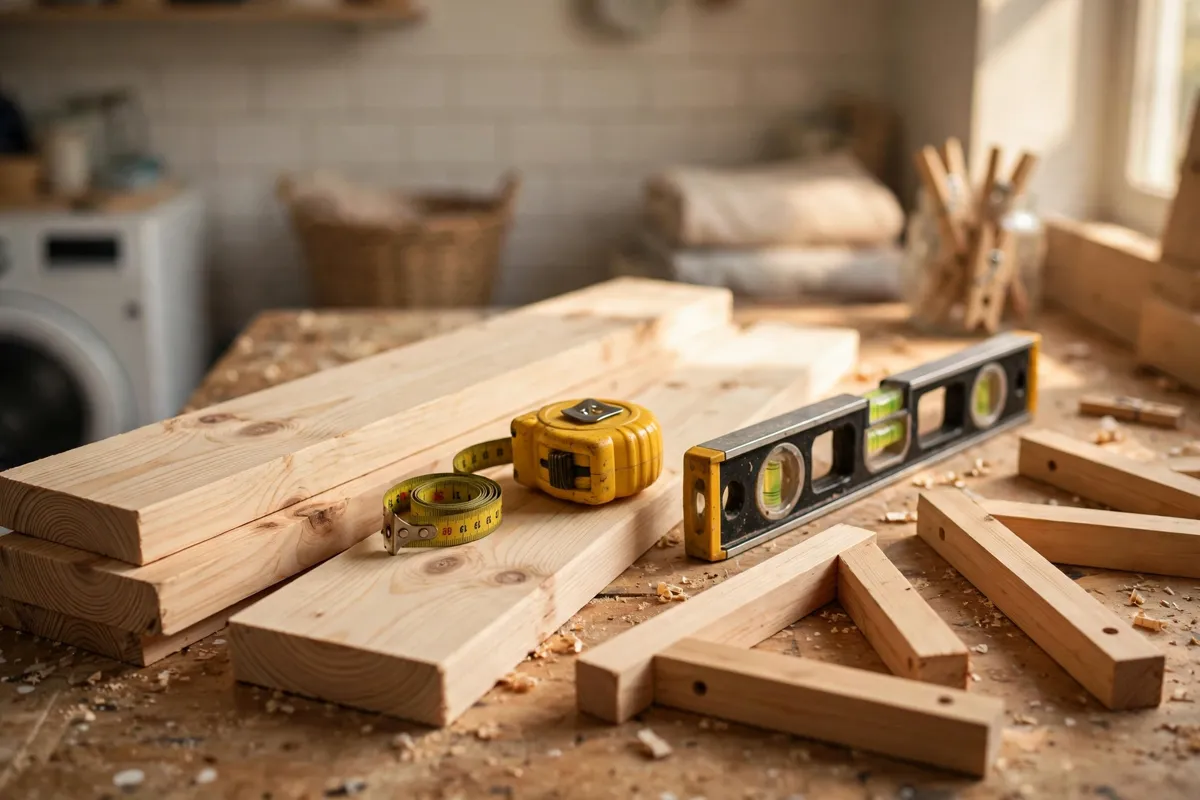
A laundry room without shelves is a room where detergent bottles live on top of the dryer, clean towels pile up on the washer lid, and the one bottle you need is always buried behind three others. Learning how to build a wooden laundry shelf for beginners fixes that in a single afternoon. This measured design gives you two sturdy 60 × 12-inch (152 × 30 cm) bracket shelves spanning a standard washer and dryer pair, with enough clearance for tall detergent bottles, a wooden hanging rod underneath for drip-drying shirts, and solid pine construction that holds real laundry weight. In this guide, you will learn how to measure your laundry pair, find the wall studs, cut a full parts list, build triangular wooden brackets, mount the shelves level, add the hanging rod, and finish the wood so it survives steam, splashes, and years of daily use.
This is the bracket-shelf version of the project, and that distinction matters: these shelves sit on visible wooden brackets screwed into the studs, so they carry far more weight than a floating shelf held by hidden rods. A floating shelf looks cleaner, but a laundry shelf has to hold heavy detergent bottles, a full iron, and a stack of folded towels — bracket shelves are the right tool for that job. If you want a floating look elsewhere in the house, our guide to how to build a wooden floating shelf for beginners covers that build. Most beginners finish this laundry shelf in 3 to 4 hours of hands-on work plus drying time, and it sits comfortably alongside the other storage builds in our easy woodworking projects for beginners that sell collection.
What Is a Wooden Laundry Shelf — and How Is It Different From a Floating Shelf?
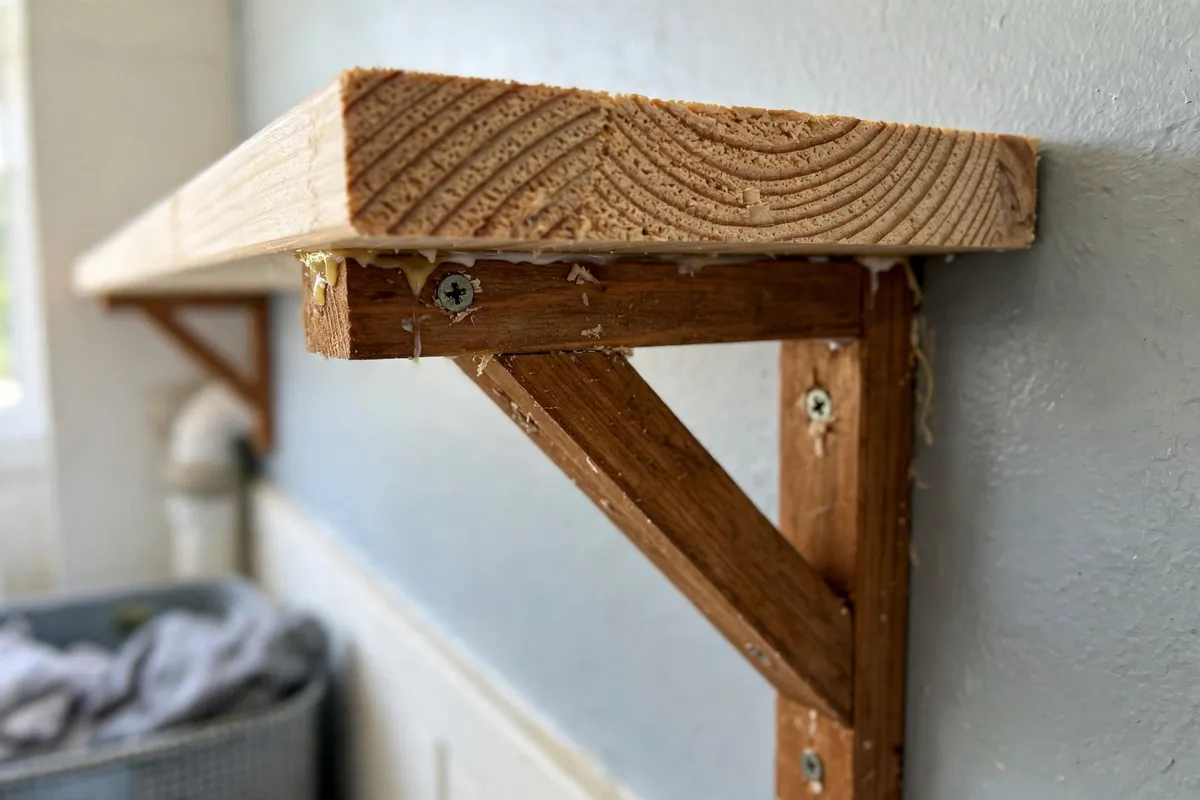
A wooden laundry shelf is a wall-mounted storage shelf built to live directly above a washer and dryer. The version in this guide uses two horizontal pine boards supported by triangular wooden brackets screwed straight into the wall studs. Each bracket is a right triangle of solid wood, with a vertical leg against the wall, a horizontal leg under the shelf, and a diagonal brace that carries the load down into the wall. That triangle shape is why a bracket shelf can hold 30 to 40 pounds (14 to 18 kg) per bracket without sagging, while a floating shelf of the same size starts to droop once the detergent bottles pile up.
A floating shelf, by contrast, hides its support inside the board itself — steel rods slide into holes in the back edge and anchor into the wall. It looks cleaner because you see no hardware, but it depends entirely on the rods and is much easier to overload. In a laundry room, where the shelf holds heavy liquid detergent and an iron, the visible-bracket design wins on strength, forgiveness, and cost. The brackets here are made from the same pine as the shelf, sanded and finished to match, so they look like part of the furniture rather than hardware-store afterthoughts.
This guide builds two shelves: a lower shelf at 54 inches (137 cm) from the floor and an upper shelf at 72 inches (183 cm). The lower shelf is the working shelf — detergent, stain remover, and the things you reach for every wash day. The upper shelf holds the things you use less often: spare towels, folded sheets, and the laundry basket waiting its turn. Under the lower shelf, a wooden hanging rod gives you a drip-dry rail for shirts and delicates. If your laundry room is a bathroom laundry, the same bracket method works there too — our guide to how to build a wooden bathroom shelf for beginners uses a smaller version of the same idea.
How High Should a Laundry Shelf Be?
Shelf height is the single most important measurement in this build, and it is set by two things: the height of your washer and dryer, and the height of the tallest bottle you will store. Most front-loading machines are 38 to 40 inches (97 to 102 cm) tall, and most top-loaders are 42 to 44 inches (107 to 112 cm). You need enough clearance above the machines to lift a detergent bottle on and off the shelf without tilting it, and enough room to open a top-loader lid if you have one.
| Bottle or item | Height | Clearance needed above machines | Shelf bottom height (front-loaders) |
|---|---|---|---|
| Standard detergent bottle | 10 in (25 cm) | 12 in (30 cm) | 52 in (132 cm) |
| Large detergent bottle (150 oz) | 12 in (30 cm) | 14 in (35 cm) | 54 in (137 cm) |
| Fabric softener bottle | 11 in (28 cm) | 13 in (33 cm) | 53 in (135 cm) |
| Stain remover spray | 9 in (23 cm) | 11 in (28 cm) | 51 in (130 cm) |
| Laundry basket (stacked on shelf) | 12 in (30 cm) | 14 in (35 cm) | 54 in (137 cm) |
| Iron standing upright | 12 in (30 cm) | 14 in (35 cm) | 54 in (137 cm) |
This guide puts the bottom of the lower shelf at 54 inches (137 cm) from the floor, which gives about 14 to 15 inches (36 to 38 cm) of clearance above a standard front-loader pair — enough for the largest detergent bottle with room to spare. If you have top-loading machines, measure the lid first: open the lid fully, measure from the floor to the top of the open lid, then add 2 inches (5 cm). If your open lid reaches 56 inches (142 cm), your lower shelf must sit at 58 inches (147 cm) or higher. Never mount a shelf where it blocks the lid — you will hate the shelf within a week.
The upper shelf sits 18 inches (46 cm) above the lower shelf, at 72 inches (183 cm) from the floor. That gap is tall enough for folded towels and spare sheets, and low enough that most adults can still reach the front edge without a step stool. If you are shorter than 5 feet 4 inches (163 cm), drop the upper shelf to 70 inches (178 cm) or skip it entirely — a shelf you cannot reach is just a dust collector. The hanging rod sits below the lower shelf at about 50 inches (127 cm) from the floor, leaving roughly 10 to 11 inches (25 to 28 cm) above the machines — enough for a shirt on a hanger to hang freely.
Choosing the Best Wood for Your Laundry Shelf
For a first laundry shelf, pine is the best choice: cheap, light, easy to cut and sand, and it takes stain and paint beautifully. A two-shelf pine build costs about $25 to $40 in lumber. Buy 1×12 boards (actual size ¾ × 11¼ inches, or 19 × 286 mm) for the shelf boards — one 8-foot (2.4 m) board gives you both 60-inch shelves with a little left over. Buy 1×10 boards (actual size ¾ × 9¼ inches, or 19 × 235 mm) for the brackets: one diagonal cut across a 10-inch square gives you two triangular brackets, so a single 4-foot (1.2 m) board makes all six brackets you need.
Pick straight boards by sighting down each edge, and reject any with large face knots, heavy cupping, or twisting. A knot on the underside of a shelf board is fine; one on the top face will show every time you reach for the detergent. For a deeper dive into species, grain, and cost, read our guide to the best wood for beginner woodworking projects. Avoid reclaimed pallet wood for a laundry shelf: boards vary in thickness, often hide nails, and need far more sanding to become smooth enough for folded towels.
Because a laundry room is humid, the finish matters more than the species. Pine is fine as long as it is sealed properly — three coats of wipe-on polyurethane or a water-based spar urethane keep steam and splashes out of the grain. Never leave a laundry shelf unfinished or finished with plain oil: the first splash of detergent will stain raw pine, and steam from the dryer will raise the grain and make the surface rough within a month. Let the boards acclimatise in your house for two to three days before you cut them — wood that moves after assembly is the number one cause of a shelf that no longer sits level on its brackets.
Tools and Materials You Will Need
You probably own most of these tools already, and the rest can be borrowed or bought cheaply. Do not buy a tool you will use once if a neighbour or a tool library can lend it — but a decent cordless drill and a stud finder are worth owning for every wall-mounted project after this one.
| Item | Details | Typical cost |
|---|---|---|
| Pine 1×12 board | 1 board, 8 ft (2.4 m) long, for the two shelf boards | $12–$18 |
| Pine 1×10 board | 1 board, 4 ft (1.2 m) long, for the six brackets | $6–$9 |
| Pine 1×3 board | 1 board, 8 ft (2.4 m) long, for the back cleats | $4–$7 |
| Hardwood dowel | 1¼ in (32 mm) diameter, 6 ft (1.8 m) long, for the hanging rod | $6–$9 |
| Rod sockets | 2 closet-rod sockets, 1¼ in (32 mm) | $3–$5 |
| Wood screws | 2½ in (64 mm) for brackets into studs, about 18 screws | $5–$8 |
| Wood screws | 1¼ in (32 mm) for shelf boards to brackets, about 12 screws | $4–$6 |
| Wood glue | One 8 oz (237 ml) bottle | $5–$8 |
| Sandpaper | 80, 120, and 220 grit sheets | $5–$8 |
| Finish | Wipe-on polyurethane or water-based spar urethane, 1 pint (0.47 L) | $10–$16 |
| Tools | Circular saw, drill, stud finder, level, tape measure, square, clamps | $0 if owned |
| Total (two shelves, pine) | Lumber, dowel, screws, glue, finish | $60–$94 |
Safety gear matters too: safety glasses, hearing protection for the saw, and a dust mask for sanding — pine dust is an irritant. Apply the finish outside or in a well-ventilated room, and keep oil-soaked rags flat to dry outdoors until stiff, then throw them away — bunched-up oily rags can self-heat. If your laundry room has a gas dryer, turn off the gas supply before you drill into the wall, and never drill blindly where a gas line or water pipe might run.
Cut List for Two 60 × 12-Inch Laundry Shelves
This cut list is for two shelves, each 60 inches (152 cm) wide and 12 inches (30 cm) deep, spanning a standard washer and dryer pair, with three triangular brackets per shelf and a 54-inch (137 cm) hanging rod under the lower shelf. Cut the shelf boards first, then the bracket squares, then the cleats and the dowel — and always measure twice before every cut.
| Part | Material | Size | Quantity |
|---|---|---|---|
| Shelf boards | 1×12 pine | 60 in (152 cm) long | 2 |
| Bracket squares | 1×10 pine | 10 × 10 in (25 × 25 cm) squares | 3 |
| Back cleats | 1×3 pine | 60 in (152 cm) long | 2 |
| Hanging rod | 1¼ in (32 mm) hardwood dowel | 54 in (137 cm) long | 1 |
| Bracket triangles | Cut from the bracket squares on the diagonal | 10 in (25 cm) legs | 6 |
The shelf boards are 60 inches long because a standard washer and dryer pair is about 54 inches (137 cm) wide together, and the extra 3 inches (8 cm) on each side lets the shelf overhang the machines slightly and reach the studs on both sides. The shelf depth is 12 inches because a 1×12 board is actually 11¼ inches (286 mm) wide — deep enough for a detergent bottle and a stack of folded towels, and shallow enough that you can still reach the back of the shelf without leaning over the machines. The three bracket squares are each 10 × 10 inches, and one diagonal cut across each square makes two right-triangle brackets — so three squares give you all six brackets, three per shelf. The back cleats run the full 60-inch length behind each shelf and screw into the studs, which spreads the load across the wall and keeps the shelf from sagging between brackets.
Step 1: Measure Your Machines and Find the Studs
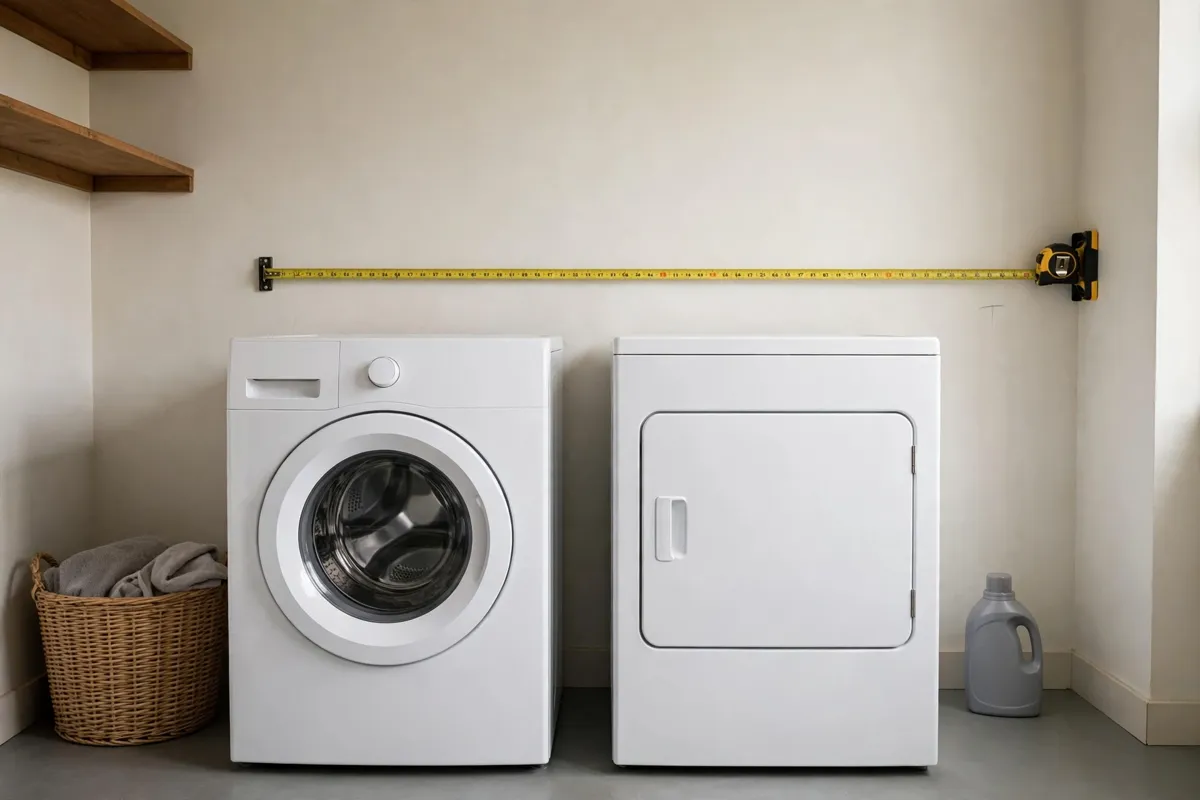
Careful measuring comes first, because every later step depends on it. Start by measuring your washer and dryer pair: the combined width from the outer edge of one machine to the outer edge of the other, and the height from the floor to the top of the taller machine. Write both numbers down. Now measure up from the floor and mark the shelf line at 54 inches (137 cm) — the bottom of the lower shelf — and mark the upper shelf line at 72 inches (183 cm). Check both lines with a spirit level and draw them lightly across the wall in pencil. If you have top-loaders, open both lids fully and measure to the top of the open lid before you mark anything: the lower shelf must clear the open lid by at least 2 inches (5 cm).
Now find the studs. Run a stud finder slowly across the wall at the lower shelf height and mark each stud centre, then repeat at the upper shelf height — studs run vertically, so the marks should line up. Studs are usually 16 inches (41 cm) apart, so across a 60-inch shelf you should find four. Double-check each one by driving a thin nail into the mark: it should hit solid wood after about ½ inch (13 mm) of plaster. If the nail slides through easily, you missed the stud — move half an inch and try again. The brackets must screw into studs, never into plasterboard alone: a bracket held by plasterboard anchors will pull out the first time a full detergent bottle goes on the shelf.
Next, plan the bracket positions. With four studs across 60 inches, put the outer brackets at the first and last studs, about 6 inches (15 cm) in from each end of the shelf, and the middle bracket at the centre stud. Finally, check for pipes and wires: laundry rooms often have water supply pipes and a dryer vent running through the wall. Hold a stud finder with live-wire and metal detection against every bracket mark, and if it beeps for a pipe or a wire, shift the bracket to the next stud position. Never drill into a wall where you suspect a pipe.
Step 2: Cut the Shelves, Brackets and Cleats
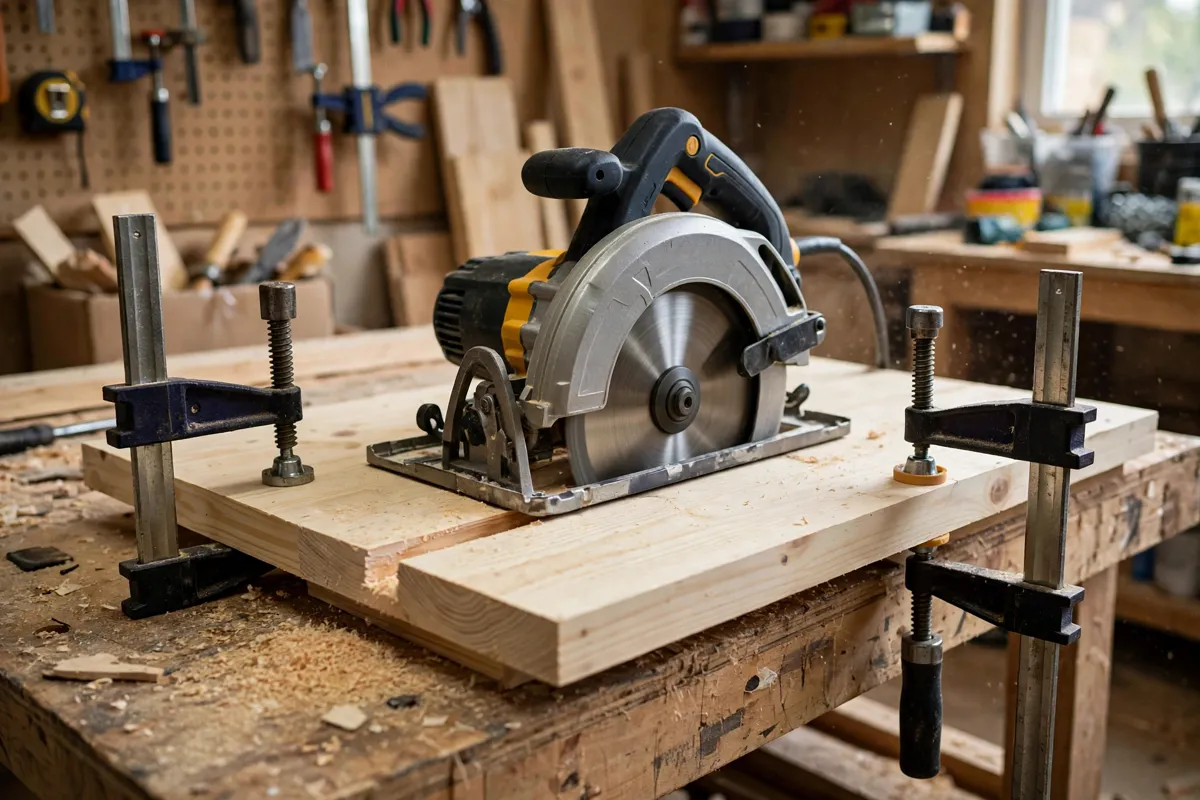
Clamp a straight board or a speed square to your workpiece as a saw guide, and set the circular saw depth so the blade cuts about ¼ inch (6 mm) past the bottom of the board — no deeper. Cut slowly and steadily, letting the saw do the work; pushing hard causes burning and wandering cuts. Cut the two 60-inch shelf boards first — the longest pieces, and the ones where a square cut matters most — then the two 60-inch back cleats, then the three 10 × 10-inch bracket squares, then the 54-inch hanging-rod dowel.
The brackets come from the squares: draw a diagonal line from one corner of each 10 × 10-inch square to the opposite corner, and cut along it. Each square gives you two identical right-triangle brackets, each with a 10-inch vertical leg, a 10-inch horizontal leg, and a diagonal hypotenuse. You need six brackets, so three squares is exactly right. Sand the diagonal cut edge lightly with 80-grit paper to remove splinters and saw marks; the hypotenuse is the edge everyone sees from below, so it should be smooth. Keep your offcuts: a short piece of 1×12 makes a perfect stain test piece.
After cutting, dry-fit the parts on the workbench: lay a shelf board flat, set three brackets underneath it at the positions you marked on the wall, and check that the bracket legs sit square to the board edge. A small error here — even ⅛ inch (3 mm) — is easy to fix now by trimming a bracket, and almost impossible to fix after the brackets are screwed to the wall.
Step 3: Build and Sand the Brackets
The brackets are the load-bearing heart of this project, so build them carefully. Each triangle bracket screws flat against the wall through its vertical leg, the shelf board screws down into its horizontal leg, and the back cleat screws into the wall between the brackets and into the back edge of the shelf board. Start by drilling two pilot holes through the vertical leg of each bracket, one 2 inches (5 cm) from the top and one 2 inches from the bottom, so the screws will not split the pine when they bite into the stud.
Sand every bracket before you mount it — sanding is far easier on the workbench than on the wall. Sand each bracket in three passes: 80 grit to remove saw marks and round the sharp diagonal edge slightly, 120 grit to smooth the faces, and 220 grit for a silky final finish. Always sand with the grain, never across it, and round over the front corner of the horizontal leg where your hand brushes past it reaching for a bottle. Vacuum or wipe the dust off with a tack cloth between grits; dust left behind shows up as rough spots under the finish. Our full guide, how to sand and finish wood for beginners, walks through grit progression and common sanding mistakes in detail.
Dry-fit a bracket and a shelf board together on the bench: set the bracket upright, rest the shelf board on its horizontal leg, and check that the board sits level and the bracket’s vertical leg is square to the board’s back edge. If a bracket rocks, sand the bottom of its horizontal leg until it sits flat. Label each bracket with its position — “Lower Left”, “Lower Middle”, “Lower Right”, “Upper Left”, “Upper Middle”, “Upper Right” — because the brackets look identical and you do not want to mix up a bracket you already checked with one you have not.
Step 4: Mount the Brackets and Fix the Shelves
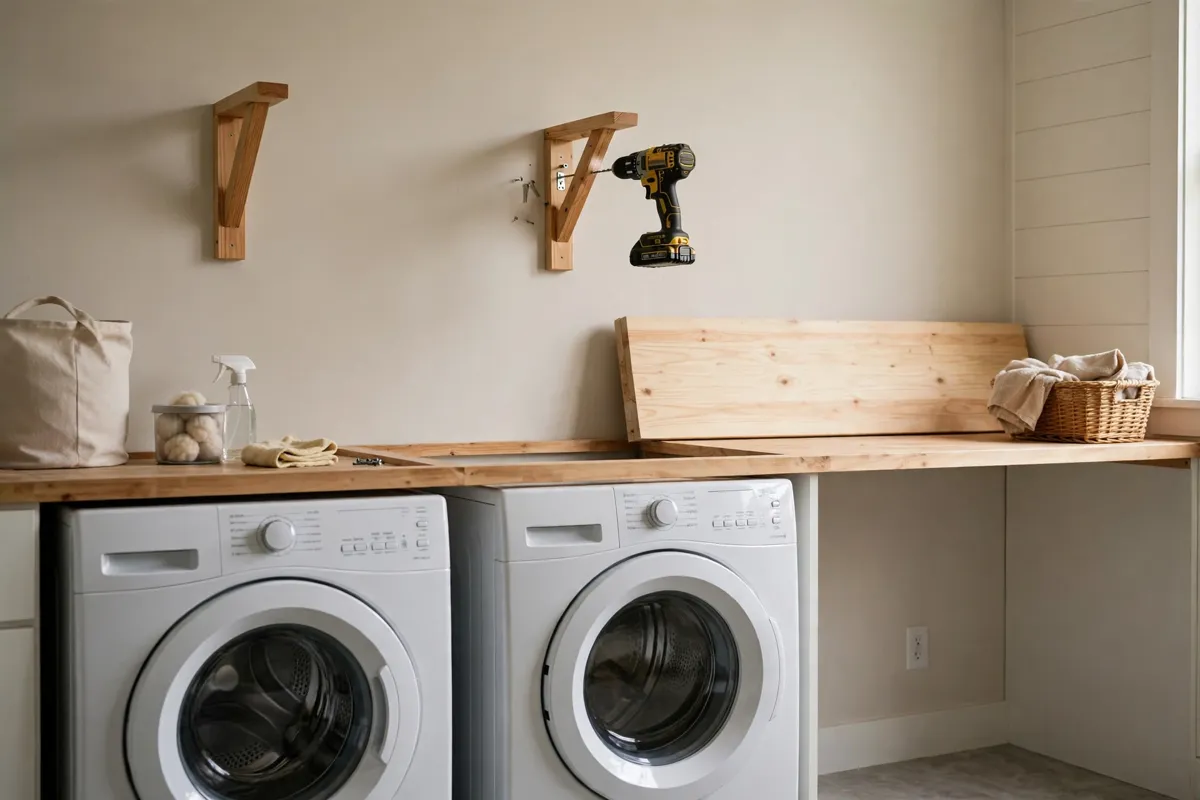
Work from the bottom shelf up. Hold the first lower bracket against the wall on its pencil marks, check it with a spirit level so the horizontal leg is perfectly level, and drive a 2½-inch (64 mm) screw through the top pilot hole into the stud. Check the level again — a bracket that tilts even slightly will show up as a shelf that slopes — then drive the second screw through the bottom pilot hole. Repeat for the other two lower brackets, checking each one with the level as you go. Now lay a long straight board or a 4-foot level across all three bracket tops: they should all touch the level at the same height. If one bracket sits a fraction high, loosen its screws, tap it down with a rubber mallet, and re-tighten.
Next, fix the back cleat. Hold the 60-inch cleat against the wall along the lower shelf line, level it, and drive 2½-inch screws through it into every stud it crosses. The cleat ties the three brackets together and gives the shelf board a second line of support along its back edge. Now set the lower shelf board on the brackets, push its back edge tight against the cleat, and check it with the level in both directions. Drive 1¼-inch (32 mm) screws up through the horizontal leg of each bracket into the underside of the shelf board — two screws per bracket — and drive two more 1¼-inch screws through the cleat into the back edge of the board. Do not glue the shelf board to the brackets: the board needs to move slightly with the seasons, and screws alone let it do that without cracking.
Repeat the whole process for the upper shelf at 72 inches (183 cm): three brackets into the studs, cleat across the studs, shelf board screwed down from below. Stand back and check both shelves with the level once more, then load-test the lower shelf: place a full detergent bottle and a stack of folded towels on it and watch for any sag or movement at the brackets. A properly mounted bracket shelf will not move at all. If a bracket flexes, the screws missed the stud — take the shelf down, re-find the stud, and re-mount that bracket.
Step 5: Add the Hanging Rod Under the Lower Shelf
The hanging rod turns the dead space under the lower shelf into the most useful part of the laundry room: wet shirts, delicates, and freshly ironed clothes hang here to drip-dry instead of draping over doors and chairs. The rod is a 1¼-inch (32 mm) hardwood dowel, 54 inches (137 cm) long, held in two closet-rod sockets screwed to the underside of the lower shelf board. The sockets screw directly to the shelf underside, so the rod sits about 2 inches (5 cm) below the shelf — roughly 50 inches (127 cm) from the floor, with about 10 to 11 inches (25 to 28 cm) of clear air above the machines, enough for a shirt on a hanger to hang freely.
Position the sockets 3 inches (8 cm) in from each end of the shelf board, and 2 inches (5 cm) back from the front edge, so hangers clear the machines below and the wall behind. Screw each socket to the shelf underside with the short screws supplied, then slide the dowel into the sockets — cut the dowel to 54 inches so it fits snugly between the two sockets with a little spring tension holding it in place. Test the rod with five or six wet shirts on hangers: a 1¼-inch hardwood dowel spans 54 inches without sagging under normal laundry weight, but if you plan to hang heavy wet jeans, add a third centre socket to split the span. Never hang wet clothes from the rod before the finish has cured — drips on uncured polyurethane leave permanent marks.
Step 6: Sand and Finish Your Laundry Shelves
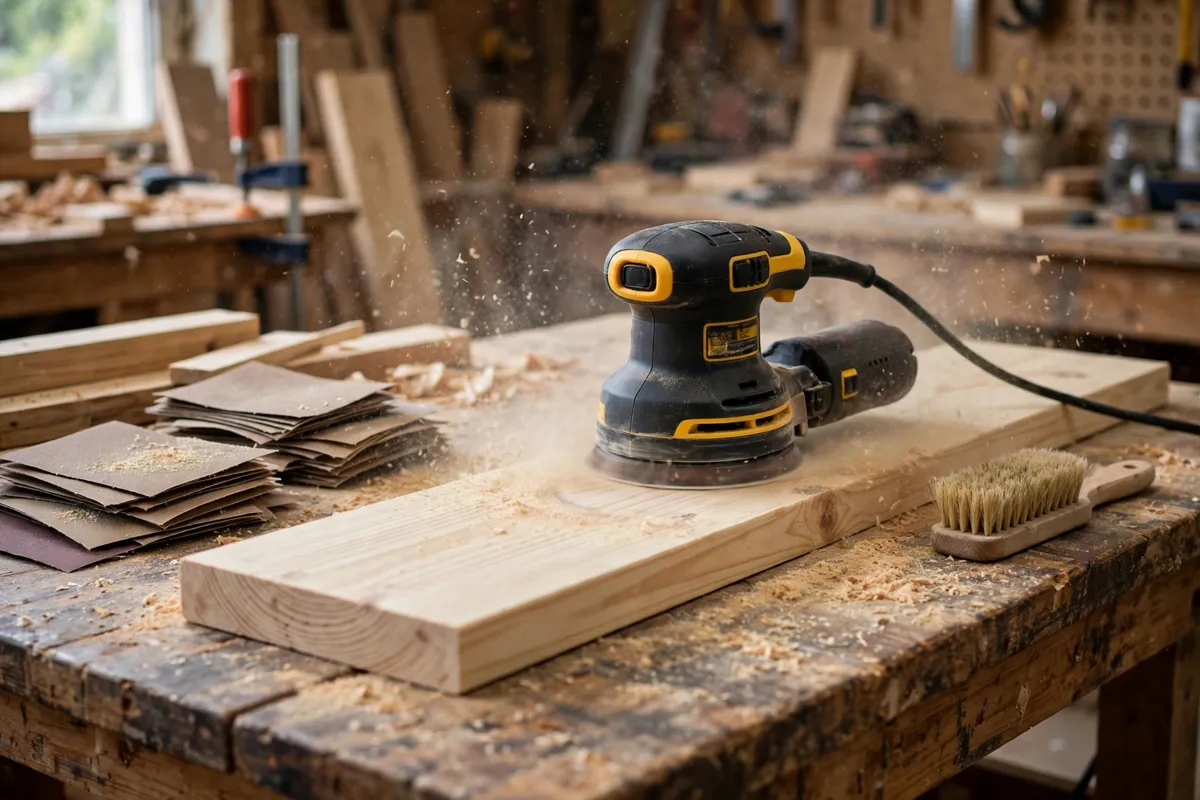
Sand the shelf boards the same way you sanded the brackets: three passes, 80 grit to level the surface and remove saw marks, 120 grit to smooth it, and 220 grit for a silky final finish. Always sand with the grain, never across it, and round over the front edge of each shelf board slightly with 120-grit paper — your hands brush that edge every time you reach for a bottle, and a sharp edge is uncomfortable and splinters easily. Vacuum or wipe the dust off with a tack cloth between grits; dust left behind shows up as rough spots under the finish, and a rough shelf snags folded towels.
A laundry shelf needs a tougher finish than a decorative oil, because it meets steam from the dryer, splashes of detergent, and damp towels every week. A wipe-on polyurethane is the most forgiving choice: it builds a hard, waterproof film that shrugs off splashes and is easy to repair later with a light sanding and one more coat. Apply three thin coats, sanding lightly with 220-grit paper between coats, and pay special attention to the front edge and the top face, where bottles sit and drips land. If you prefer a water-based option, a spar urethane rated for bathrooms works just as well and dries faster with less smell. If you want colour, stain first, let it dry fully for 24 hours, then seal it with polyurethane. Avoid plain Danish oil or wax in a laundry room: they look beautiful but are not waterproof enough for weekly splashes. Let the final coat cure for at least 72 hours before you load the shelves — a finish that feels dry is not the same as a finish that has cured hard, and a bottle set down on soft finish will leave a ring that never comes out.
Bracket Spacing and Weight Limits
How much weight your laundry shelf holds depends on the brackets, the studs, and the spacing — not on the shelf board. The table below shows what each setup safely carries. These are working loads with a safety margin, not breaking points: stay inside them and the shelf will last for years.
| Bracket setup | Bracket spacing | Safe working load per shelf |
|---|---|---|
| 2 brackets, 48 in (122 cm) shelf | 40 in (102 cm) apart | 30 lb (14 kg) |
| 3 brackets, 60 in (152 cm) shelf | 24–28 in (61–71 cm) apart | 60 lb (27 kg) |
| 3 brackets, 72 in (183 cm) shelf | 32 in (81 cm) apart | 50 lb (23 kg) |
| 4 brackets, 72 in (183 cm) shelf | 20 in (51 cm) apart | 80 lb (36 kg) |
| 2 brackets, plasterboard anchors only | Any spacing | 10 lb (5 kg) — do not use |
The 60-inch shelf in this guide, with three brackets screwed into studs, safely holds about 60 pounds (27 kg) — roughly four full large detergent bottles, an iron, and a stack of folded towels, all at once. The most common failure is not the wood but the fixing: brackets screwed into plasterboard anchors instead of studs pull out under load, which is why this guide insists on studs. If your studs do not line up with the bracket positions you want, move the brackets to the studs — never the other way around. A shelf that sags in the middle means the brackets are too far apart; add a fourth bracket at the centre stud and the sag disappears.
Styling Your Finished Laundry Shelves
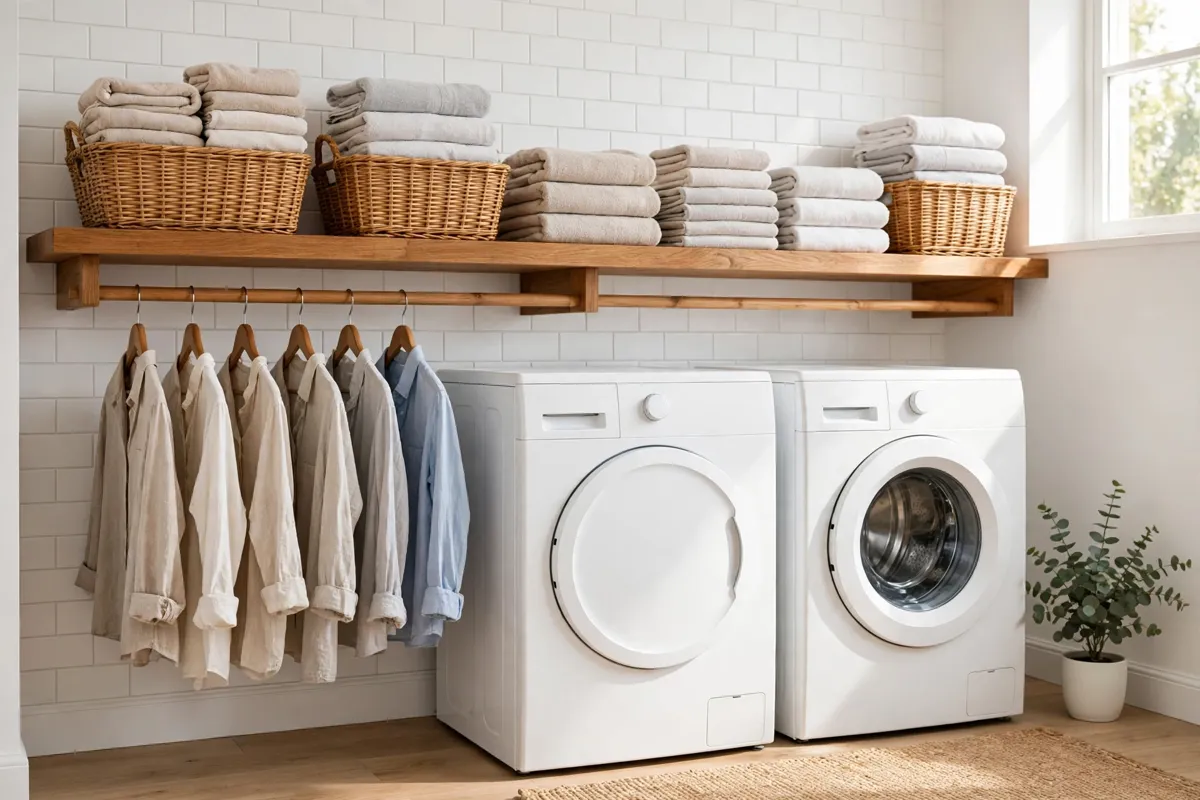
Once the finish has cured, load the shelves the way you will actually use them. Keep the lower shelf for the daily essentials: detergent, fabric softener, stain remover, and a small basket for dryer sheets and clothespins. Put the heavy bottles at the back of the shelf, against the wall, where the brackets carry the load best — and keep the front edge for lighter things you grab often. Use matching baskets or jars for the small items: a row of identical containers looks tidier than a jumble of bottles, and it stops small things from getting knocked off the shelf when you reach past them.
The upper shelf is for the things you use less often: spare towels folded in neat stacks, folded sheets, and the laundry basket waiting for its turn. Roll towels instead of folding them flat if the shelf is shallow — rolled towels take up less depth and are easier to pull out one at a time. Hang five or six shirts on the rod and leave a little space between them so air can circulate and they dry without creasing. If you want more storage above the shelves, our guide to how to build floating shelves for beginners makes a matching set that sits neatly over a folding counter.
To keep the shelves looking new, wipe up detergent drips straight away with a barely damp cloth and dry the spot immediately — dried detergent leaves a chalky mark on polyurethane. Add a fresh coat of polyurethane once a year, or whenever water stops beading on the surface. A shelf built this way will last for years, and because it is sized to your machines, it will fit your next laundry room too — just measure the new pair before you move it.
Adding a Third Shelf and Final Details
The same method scales to a third shelf if your ceiling allows it. A third shelf at 90 inches (229 cm) from the floor works for bulk storage — spare detergent, seasonal bedding, the ironing board cover — as long as you keep a small step stool in the laundry room, because nobody reaches 90 inches comfortably. Never mount a shelf above a doorway or where it blocks a light fitting, and never load a high shelf with heavy bottles you have to lift over your head.
Check the whole installation one last time before you call it done. Push each shelf gently from the front: it should feel solid, with no flex or wobble at the brackets. Pull down on the hanging rod with both hands: it should not move in its sockets. Run your hand along the front edge of each shelf — it should feel smoothly rounded, with no sharp corners or splinters. Set a full detergent bottle on the lower shelf and lift it off again: you should be able to do it without tilting the bottle or bumping the shelf above. If the shelf overhangs the brackets unevenly, loosen the screws, shift the board, and re-tighten. These last ten minutes of checking are what separate a shelf that feels shop-bought from one that feels homemade.
Common Mistakes to Avoid
Most problems come from rushing one of these seven steps — slow down here and the rest of the build goes smoothly.
Mounting into plasterboard instead of studs. A bracket held by plasterboard anchors will pull out under a full detergent bottle. Always screw brackets into studs, and verify each stud with a nail test before you drill.
Setting the shelf too low. A shelf that blocks the top-loader lid or forces you to tilt every bottle is worse than no shelf at all. Measure the open lid and the tallest bottle before you mark the shelf line.
Skipping the level check on every bracket. One bracket a fraction high makes the whole shelf slope, and bottles slide toward the low end. Check each bracket with a spirit level before you drive the second screw.
Finishing with oil or wax in a laundry room. Steam and splashes destroy an oil finish within weeks. Use three coats of wipe-on polyurethane or spar urethane and let it cure fully.
Loading the shelves before the finish cures. A bottle set down on soft finish leaves a ring that never comes out. Wait the full 72 hours, even if the finish feels dry after a day.
Forgetting the acclimatisation. Boards cut the day they arrive will move after assembly. Let them sit in your house for two to three days first, or the shelf may no longer sit level on its brackets.
How Much Does It Cost and How Long Does It Take?
For two 60-inch pine laundry shelves with a hanging rod, expect $60 to $94 in materials if you already own the tools — roughly a quarter of a comparable solid-wood laundry storage system in a shop, sized exactly to your machines and your room. A single-shelf version costs closer to $40 to $60, and adding a third shelf adds about $15 to $20 in lumber and screws. Time-wise, plan 3 to 4 hours of hands-on work over one weekend: half an hour to measure and find the studs, half an hour to cut, half an hour to build and sand the brackets, an hour to mount the brackets and shelves, half an hour to add the rod, and half an hour to sand and finish, plus 72 hours for the final coat to cure. The same skills transfer directly to your next storage project — a bathroom shelf, floating shelves, or a garage storage wall all use the same measuring, bracket, and levelling steps.
Frequently Asked Questions
How high should a wooden laundry shelf be above the washer and dryer?
The bottom of the lower shelf should sit at 54 inches (137 cm) from the floor for front-loading machines, which gives about 14 to 15 inches (36 to 38 cm) of clearance above the machines — enough for the largest detergent bottle with room to spare. If you have top-loaders, open the lid fully, measure to the top of the open lid, and add 2 inches (5 cm); your shelf must clear that height.
How do I find studs in a laundry room wall?
Run a stud finder slowly across the wall at shelf height and mark each stud centre, then verify by driving a thin nail into the mark — it should hit solid wood after about ½ inch (13 mm) of plaster. Studs are usually 16 inches (41 cm) apart, so across a 60-inch shelf you should find four. Always screw brackets into studs, never into plasterboard alone.
How much weight can a wooden laundry shelf hold?
A 60-inch pine shelf on three triangular brackets screwed into studs safely holds about 60 pounds (27 kg) — roughly four full large detergent bottles, an iron, and a stack of folded towels. With two brackets the safe load drops to about 30 pounds (14 kg), and brackets held only by plasterboard anchors should never carry more than 10 pounds (5 kg).
What is the best wood for a laundry shelf?
Pine is the best wood for a first laundry shelf: it is cheap, light, easy to cut and sand, and it takes stain and paint well. Use 1×12 boards for the shelves and 1×10 boards for the brackets. Seal it with three coats of wipe-on polyurethane or water-based spar urethane, because a laundry room is humid and plain oil or wax will not survive the steam and splashes.
Can I build a laundry shelf without a table saw?
Yes. A circular saw with a straight-edge guide makes every cut in this project, including the diagonal cuts that turn 10 × 10-inch squares into triangular brackets. Many lumber yards will cut boards to length for a small fee, so you can have the shelf boards and cleats cut at the store and do the brackets and assembly at home with only a drill.
Should I use floating shelves or bracket shelves in a laundry room?
Use bracket shelves in a laundry room. A floating shelf hides its supports inside the board and depends entirely on hidden rods, so it is easy to overload with heavy detergent bottles. A bracket shelf carries far more weight, is easier to level, and costs less — and the wooden brackets in this build look like part of the furniture once they are sanded and finished to match.
How do I stop my laundry shelf from sagging?
Put a bracket at every stud the shelf crosses — three brackets for a 60-inch shelf — and screw a back cleat into the studs along the full length of the shelf. If the shelf still sags in the middle, add a fourth bracket at the centre stud. Never span more than 28 inches (71 cm) between brackets on a shelf that holds heavy bottles.
Recommended Products for This Project
As an Amazon Associate, I earn from qualifying purchases.

DEWALT 20V MAX Drill/Driver Kit DCD771C2
Drives every bracket screw into the studs and every shelf screw up through the brackets — and pre-drills clean pilot holes so the thin pine brackets never split.

Titebond III Ultimate Wood Glue 1413 (8 oz)
Strong waterproof wood glue that locks the triangular bracket joints tight while the screws hold them in place — important in a laundry room where machine vibration works joints loose over time.
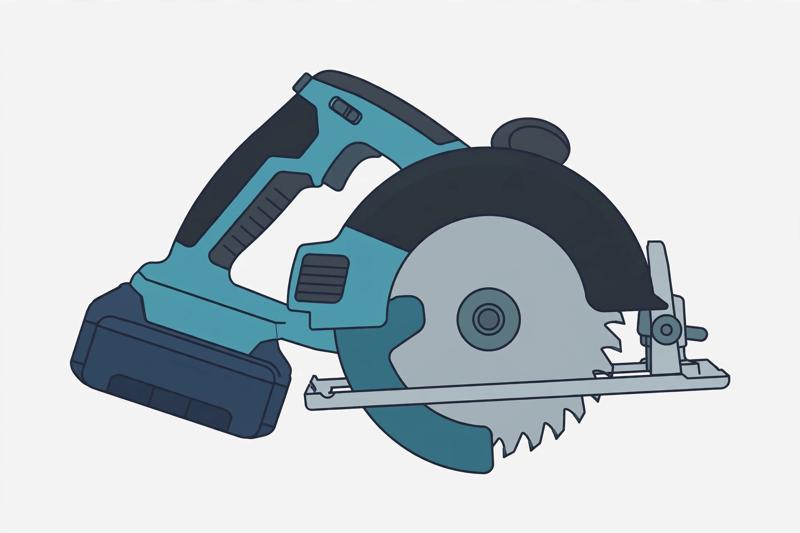
DEWALT 20V MAX Circular Saw DCS391B, 6-1/2-inch
Cuts the 60-inch shelf boards and back cleats to length, and makes the diagonal cuts that turn the 10 × 10-inch squares into triangular brackets.

IRWIN QUICK-GRIP Woodworking Clamps Set, 8-piece (IRHT83220)
Holds the shelf board steady on the brackets while you drive the screws up from below, and clamps the straight-edge guide in place for every circular-saw cut.

DEWALT Random Orbit Sander DWE6423, 5-inch
Sands the shelf boards and every bracket silky smooth through the 80, 120, and 220 grit passes, and rounds over the front edge your hands brush past reaching for a bottle.


