
A circular saw is the first power saw most woodworkers should buy. It is cheaper than a table saw, far more portable, and — with one simple guide — far more accurate than beginners expect. If you are searching for the best circular saw for beginners woodworking, you are probably asking three questions at once: should I buy corded or cordless, how much power do I actually need, and can a handheld saw really cut straight enough for furniture? This guide answers all three, in plain language, without brand hype.
Here is the short answer up front. For most beginners, a 7-1/4-inch corded circular saw is the best first buy: it has all the power you will need for plywood, pine, and hardwood boards up to two inches thick, it never runs out of charge halfway through a cut, and good models are surprisingly affordable. A cordless saw is the better choice only if you will regularly work away from an outlet, on a job site, outdoors, or on a deck — and only if you already own, or are willing to buy into, a battery platform. Whichever you choose, your results will depend less on the brand on the housing and more on three things you control: the blade, the guide, and your stance. Get those right and even a modest saw will produce clean, straight, furniture-ready cuts.
The Short Answer: Which Circular Saw Should a Beginner Buy First?
If you want a single recommendation, start here. A 7-1/4-inch corded saw with a 15-amp motor is the classic beginner workhorse for a reason. It spins a full-size blade, cuts 2x lumber at 90 degrees and at a 45-degree bevel, and costs less than most cordless kits once you add batteries and a charger. Models that recur in beginner discussions — such as the DeWalt DWE575SB, the SKIL 5280-01, and Makita’s cordless range — all illustrate the same trade-offs, and we compare them honestly below. None of them is magic, and none of them will fix a dull blade or a wobbly freehand cut.
Buy cordless if portability matters more than price. A modern 18V or 20V cordless saw with a 6-1/2-inch or 7-1/4-inch blade will handle plywood, shelving boards, and framing lumber perfectly well, and it frees you from dragging a cord around a garage or garden. The catch is cost and stamina: a bare tool looks cheap until you add two batteries and a fast charger, and a single small battery will fade on long rips in hardwood. If you already own batteries for drills or other tools from the same brand, cordless suddenly becomes much better value, because you are only buying the saw itself.
Buy corded if you mostly work in one workshop, want maximum power per pound spent, or plan to cut a lot of sheet goods. You will never wait for a battery, never watch a cut slow down as charge drops, and never wonder whether your spare battery is charged. The only real downsides are the cord itself — you must plan its path so it never snags or crosses your cut line — and the fact that the saw stays tethered to the wall. For a beginner building easy woodworking projects for beginners that sell, from shelves and crates to small tables, that is a very good trade.
One more honest note before we go further: a circular saw does not replace a table saw for everything. It is superb for breaking down plywood sheets, crosscutting boards, and cutting bevels, but it is slower for repeated identical rip cuts, and it needs a guide for precision work. Think of it as the saw that lets you build almost everything, while a table saw — if you ever buy one — makes repetition faster. Starting with a circular saw is not a compromise. It is the sensible order.
How to Choose: Size, Power, Weight, Brake, and Bevel

Choosing a circular saw gets easier when you ignore marketing and check five specifications in order. First, blade size. The standard is 7-1/4 inches, and that is what you want. It is the most common size, so blades are cheap and easy to find, and it cuts 2x material at 90 degrees with room to spare. Smaller 6-1/2-inch saws are lighter and handier, especially in cordless form, but they cut slightly less deep and limit your blade choice. Larger saws exist, but they are heavier and unnecessary for beginner projects.
Second, power. Corded saws are rated in amps; look for 13 to 15 amps. That range powers through plywood and pine without bogging down, and handles hardwood if you feed at a sensible pace and use a sharp blade. Cordless saws are rated by voltage and battery amp-hours instead; an 18V or 20V saw on a 5.0Ah battery is a good beginner baseline, while a 4.0Ah battery is acceptable for shorter sessions. Do not judge a cordless saw by voltage alone — the blade, the motor design, and the battery size matter just as much.
Third, weight and balance. A saw that feels heavy in the shop will feel twice as heavy at the end of a long cut, and tired hands make crooked cuts. Most full-size saws weigh between 8 and 11 pounds. If you can, hold the saw before buying: the handle should let your wrist stay straight, the base plate should sit flat without rocking, and the saw should not feel nose-heavy. Left-blade versus right-blade designs also matter here. Right-blade saws (the blade on the right of the motor, viewed from behind) are the traditional layout and suit right-handed users who watch the cut line from the left. Left-blade saws put the blade closer to your line of sight, which many beginners find easier to follow. Neither is objectively better; visibility and comfort beat convention.
Fourth, the electric brake. This is a safety feature worth paying a little extra for. A brake stops the blade within a couple of seconds of releasing the trigger, instead of letting it spin down for ten seconds or more. That means less waiting with a live blade, less temptation to set the saw down too early, and a safer workshop overall. If two otherwise equal saws differ mainly on the brake, choose the one that has it.
Fifth, bevel and depth adjustment. Every decent saw tilts to at least 45 degrees for bevel cuts and adjusts cutting depth with a lever. Check that both levers move smoothly, lock firmly, and can be operated without a tool. A saw whose depth lever slips mid-cut is a saw you will not enjoy. Also look for a clear depth scale, a sturdy base plate (stamped steel is fine, cast magnesium is lighter and flatter), and a dust port you can connect to a shop vacuum. Those small details add up to a saw you reach for happily rather than reluctantly.
Corded vs Cordless: An Honest Comparison
The corded-versus-cordless debate is really a debate about where you work and how you buy tools. Corded wins on power, price, and endurance. Cordless wins on freedom, speed of setup, and working outdoors. Everything else — cut quality, accuracy, safety — is essentially equal once the blade and guide are the same, because both types use the same cutting principle.
Consider a typical beginner weekend. You are in a garage, cutting plywood for shelves and pine boards for a small bench. A corded saw does all of it, all day, for the price of the saw alone. A cordless saw does all of it too, but you will probably need a second battery for a full afternoon, and you will pay noticeably more for the kit. Now change the scene: you are building a deck, repairing a fence, or helping a friend cut boards in a driveway with no nearby outlet. The cordless saw is suddenly the only sensible choice, and its extra cost is money well spent.
There is also the platform question. Power tool brands design batteries to fit only their own tools. If you already own a drill, driver, or sander from one brand, staying with that brand for your saw means your batteries and charger work across everything, which saves real money. If you own nothing yet, do not let a single saw lock you into a platform you dislike — compare the drill, driver, and sander you might buy next, and choose the platform as a whole. And if you buy corded, none of this matters at all, which is one more reason corded is the simpler first purchase.
A final practical point: cord management is a skill, not an afterthought. With a corded saw, route the cord behind you, over your shoulder, or away from the cut path before you start, and keep it clear of sawhorses and offcuts. A cord that snags mid-cut can pull the saw off line or jerk your hand. With a cordless saw, the equivalent discipline is battery discipline: start with a full battery, keep a spare charged, and never force a dying saw through hardwood. Both habits take ten seconds and prevent most beginner frustration.
Beginner Saw Comparison Table
The table below compares five saws that beginners commonly encounter. Prices move with sales and bundles, so treat the price band as a guide, not a quote, and always check what is included — cordless prices in particular swing wildly depending on whether batteries are in the box.
| Saw | Type | Blade | Power | Weight (approx.) | Best for | Watch out for |
|---|---|---|---|---|---|---|
| DeWalt DWE575SB | Corded | 7-1/4 in | 15 amp | ~8.8 lb | All-round first saw, bevel work, electric brake | Cord management; slightly premium price |
| SKIL 5280-01 | Corded | 7-1/4 in | 15 amp | ~8.7 lb | Best budget corded pick, plywood and pine | Basic dust port; check brake on your variant |
| Makita cordless (18V range) | Cordless | 6-1/2 or 7-1/4 in | 18V battery | ~7–10 lb depending on battery | Portability, outdoor and site work | Battery and charger cost; buy a 5.0Ah battery |
| Generic 20V cordless kit | Cordless | 6-1/2 in | 20V battery | ~7 lb | Light use, already owning that battery platform | Small blade depth; avoid no-name blades |
| Compact corded saw | Corded | 7-1/4 in | 13 amp | ~8 lb | Smaller hands, lighter framing cuts | Less power in thick hardwood; check base flatness |
Read that table as a starting point, not a ranking. The DeWalt DWE575SB earns its reputation as a dependable, well-balanced corded saw with a useful brake and a clear line of sight, but it costs more than a beginner strictly needs. The SKIL 5280-01 is the classic budget answer: a full-size 15-amp saw that cuts everything a beginner needs, at a price that leaves money for blades, a guide, and safety gear. Makita’s cordless saws are consistently well-made and comfortable, and they shine if you are already in the Makita battery system — but priced as a bare tool they can mislead, so always total the kit. The honest conclusion is that any saw in this table, fitted with a sharp fine-tooth blade and used with a guide, will outperform a premium saw fitted with a dull blade and used freehand.
The Straightedge Guide: How a Circular Saw Cuts Precisely
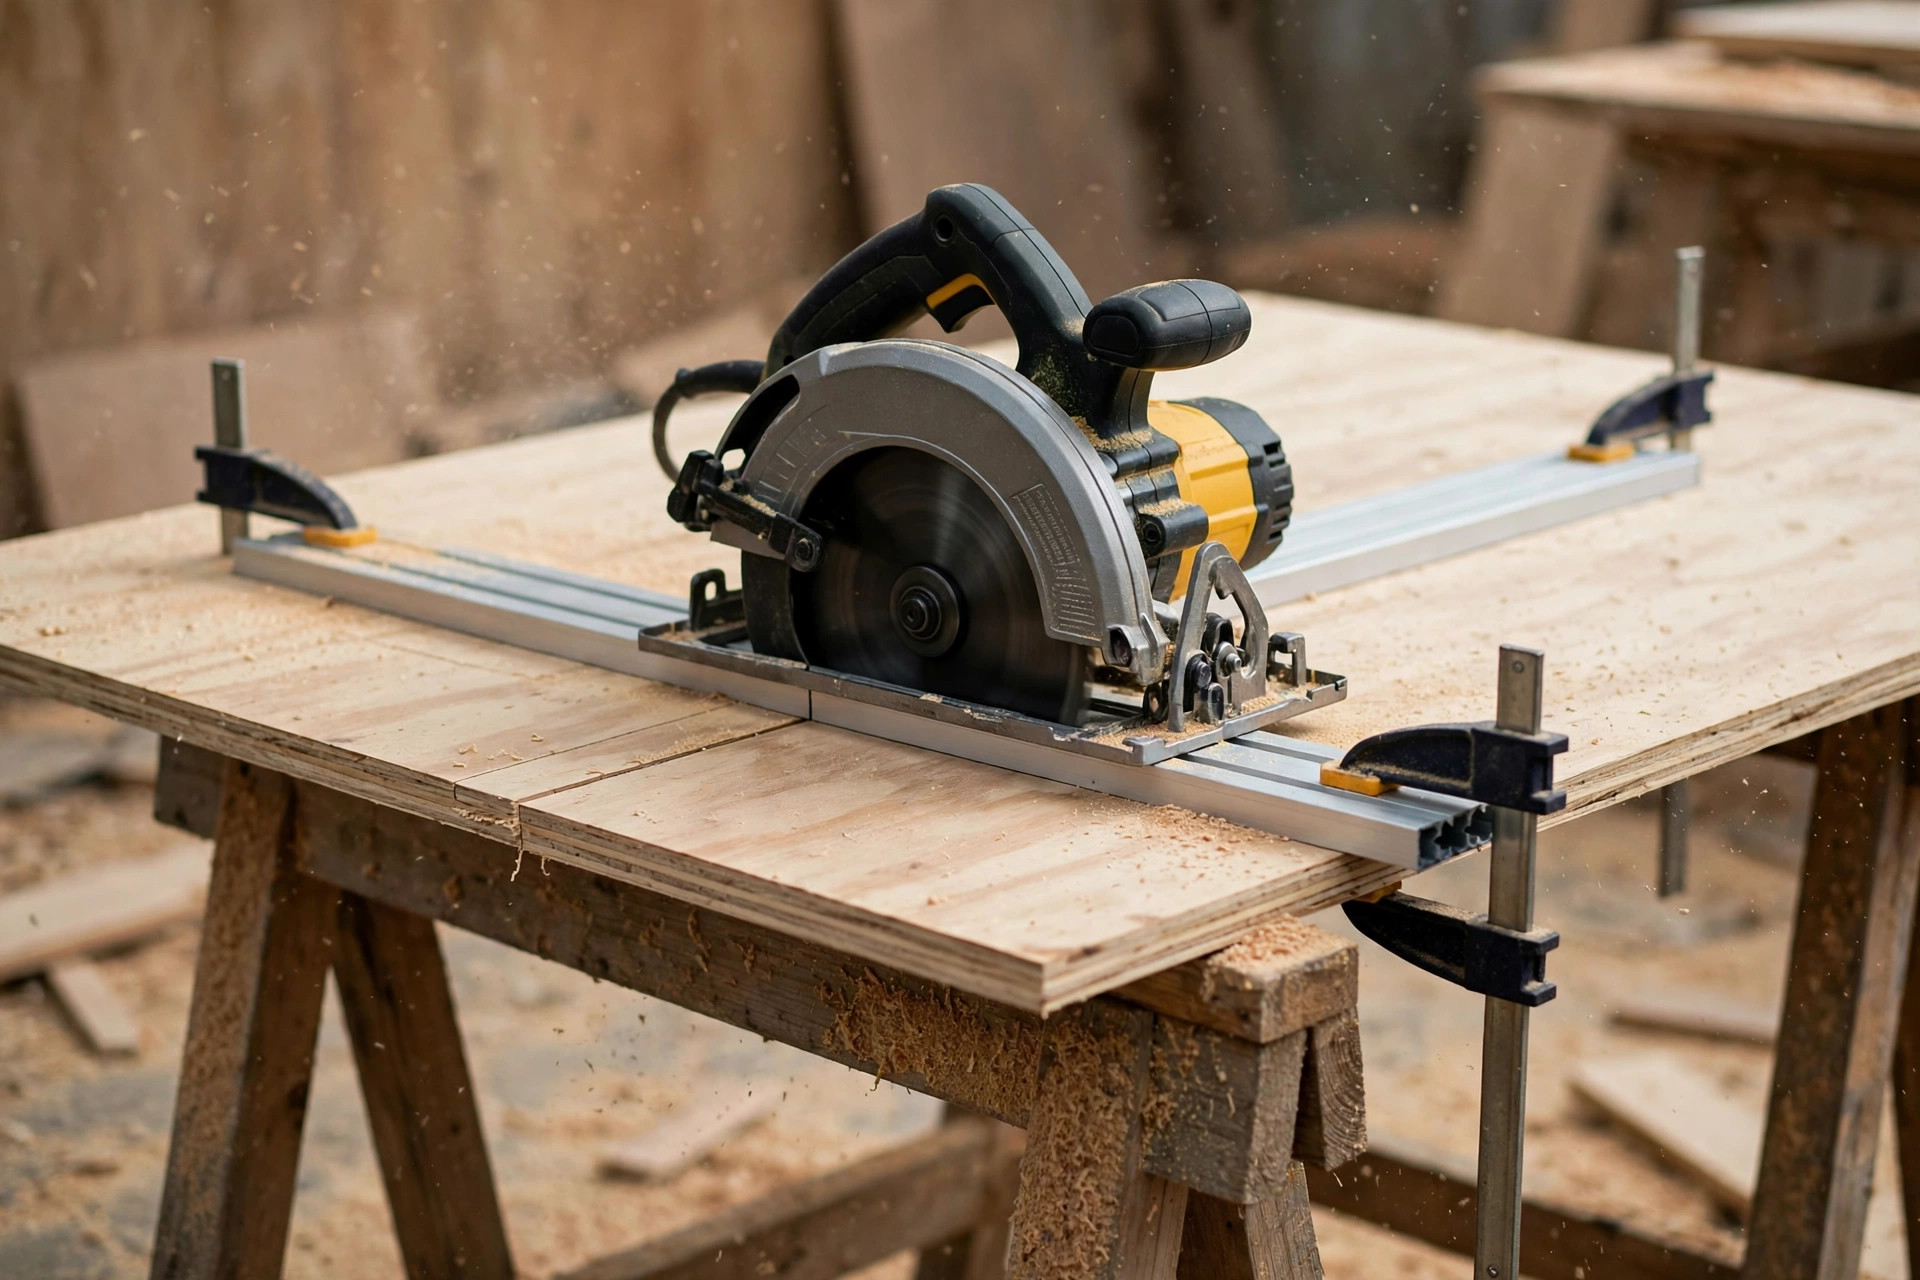
This is the technique that changes everything. A circular saw looks imprecise only when it is used freehand, following a pencil line by eye. Clamp a straightedge guide to your board and the saw has no choice but to cut straight, because its base plate rides along the guide for the entire cut. Professional carpenters break down full plywood sheets this way every day, and you can too, with a guide you make yourself in twenty minutes.
First, understand the offset. The distance from the edge of the saw’s base plate to the blade is fixed for your saw — typically around an inch and a half, but you must measure your own saw rather than trusting a number from the internet. That offset is the key to the whole method: you place the guide that distance away from your cut line, and the blade lands exactly on the line. Mark it once, write it on a piece of tape stuck to the saw, and you will never measure it again.
Here is the step-by-step method. Measure and mark your cut line across the board, then measure the offset distance from that line and mark a second line for the guide edge. Lay a factory-straight board, a long spirit level, or a purpose-made guide along the guide line, and clamp it firmly at both ends — and in the middle for long cuts, because a guide that flexes produces a curved cut. Set the saw depth so the blade extends about a quarter inch below the board; deeper settings increase kickback risk and tearout for no benefit. Rest the saw’s base plate flat against the guide, check that the cord or battery clears everything, and make sure the offcut side can fall away freely without pinching the blade.
Now cut with a steady, unhurried feed. Let the blade do the work; pushing hard does not make the cut faster, it makes the motor strain, the blade wander, and the edge burn. Keep both hands on the saw, keep the base plate pressed against the guide and flat on the board, and do not stop halfway through a cut if you can avoid it — a stopped blade can leave a mark and, on restarting, can kick. When the cut finishes, release the trigger, wait for the blade to stop (or for the brake to engage), and only then lift the saw. Check the edge: it should be straight, square, and clean enough that you barely need sanding.
You can also make a dedicated saw guide, sometimes called a shoot board or track guide, from a strip of plywood with a fence glued underneath. The advantage is that you cut the strip once with your own saw, and from then on the edge of the strip is exactly your cut line — no offset measuring ever again. Lay the strip’s edge on your mark, clamp, and cut. If you build one thing this weekend besides a project, build this guide. It is the single highest-value accessory for a beginner with a circular saw, and it costs almost nothing.
Blade Choice: The Cheapest Upgrade That Matters Most
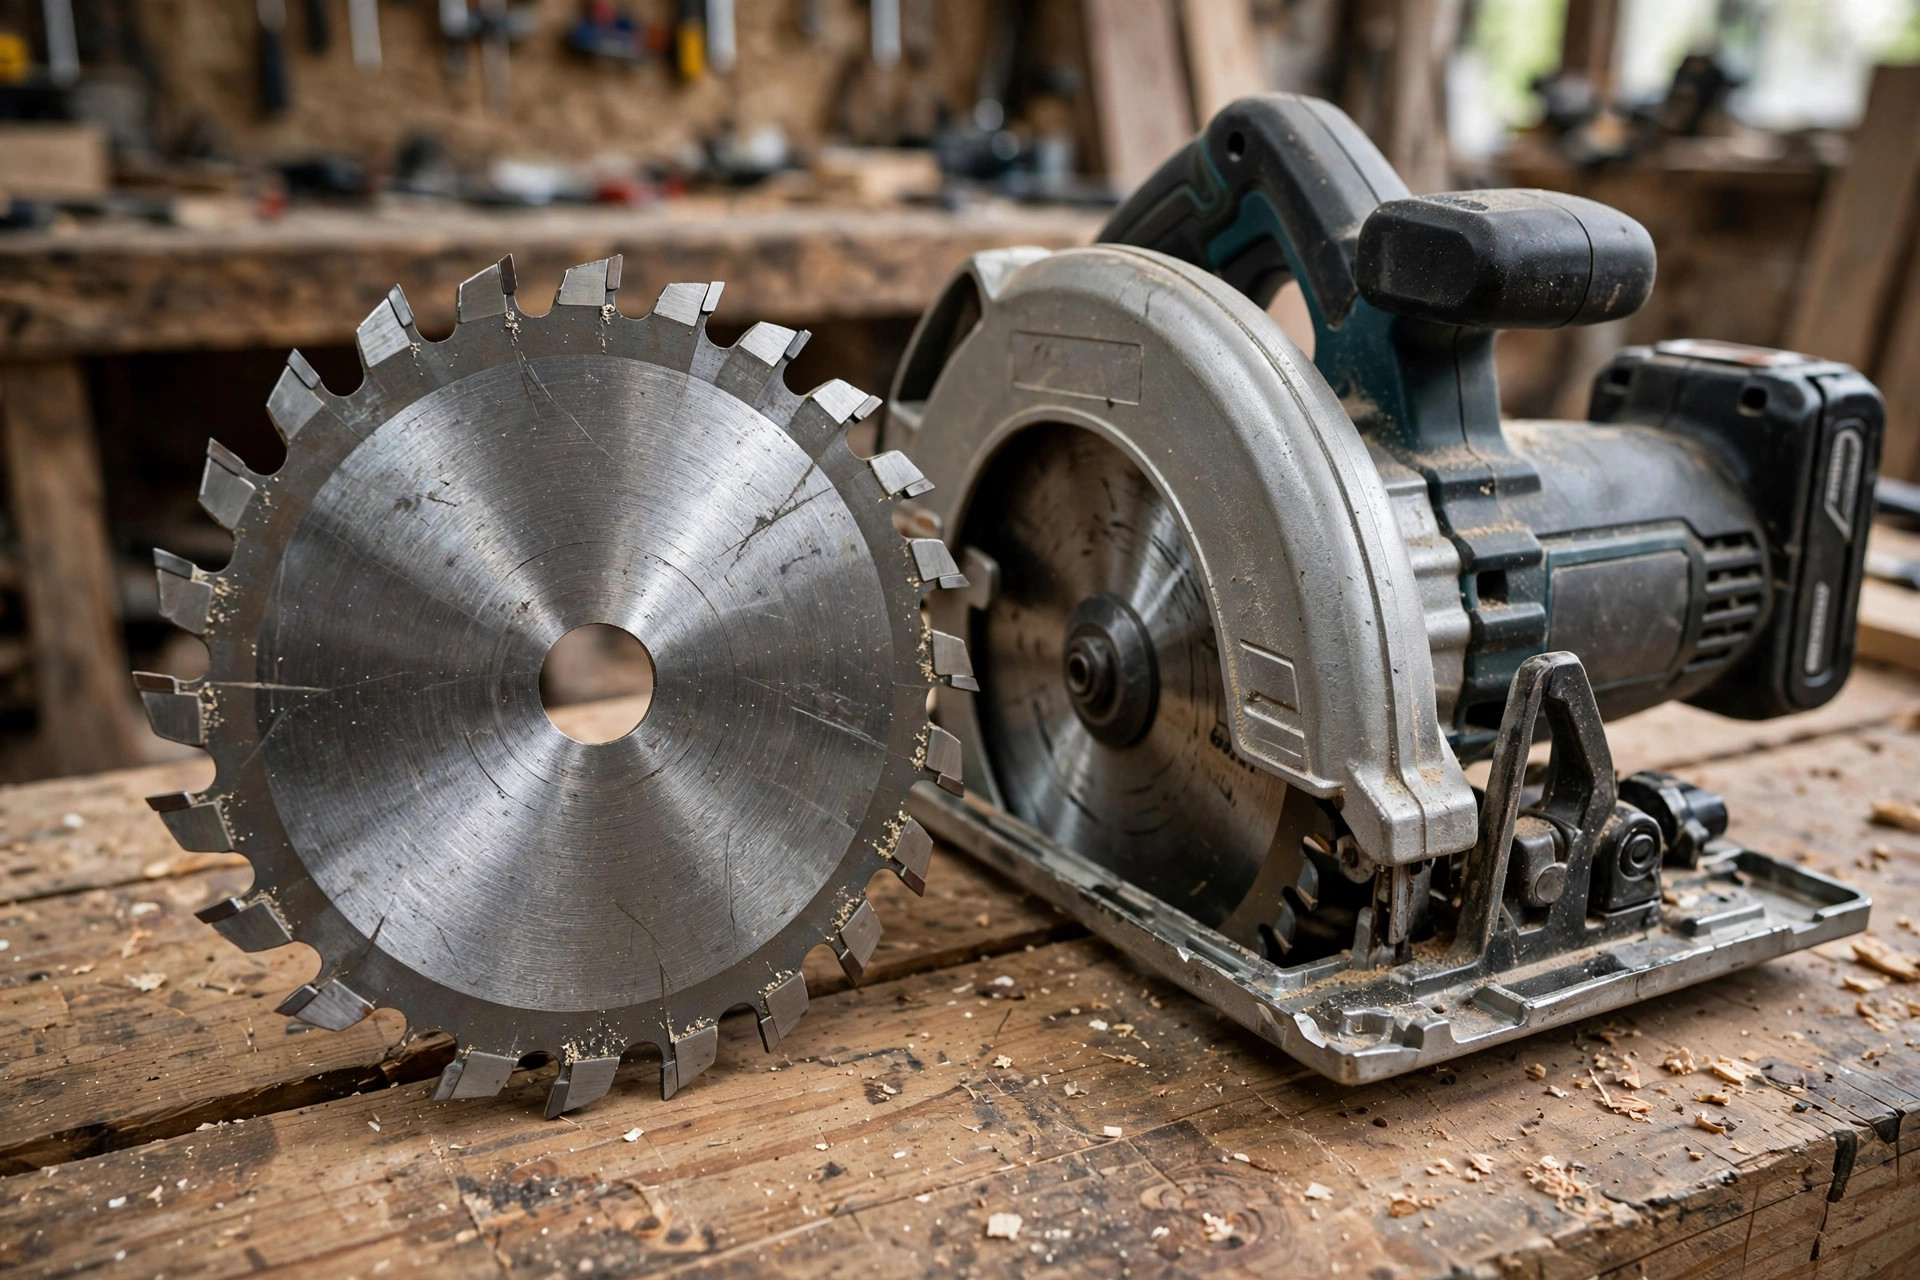
Most saws ship with a general-purpose blade that is adequate for framing and rough cuts but mediocre for plywood and furniture boards. Replacing it is the cheapest, most dramatic upgrade you can make. Blades differ in tooth count, tooth shape, and kerf (the width of the cut), and choosing the right one for the material is what separates a fuzzy, splintered edge from a clean one.
Tooth count is the headline number. Fewer teeth (around 24) cut fast and clear waste well, which suits ripping solid lumber along the grain and framing work. More teeth (40 to 60) cut slower but smoother, which suits crosscutting boards and cutting plywood, where tearout is the enemy. A 40-tooth general-purpose blade is the best single blade for a beginner who builds furniture and shelves, while a 24-tooth blade is a good second blade for fast rips. Keep the blade that came with the saw for rough work and demolition, and save your good blade for visible cuts.
The blade table below covers the combinations a beginner actually needs. Kerf deserves a quick mention: thin-kerf blades remove less wood, so they cut faster and strain a smaller motor less, which makes them a good match for cordless saws and lower-powered corded saws. Full-kerf blades are stiffer and more stable for heavy ripping, but they demand more power. For most beginner work, a thin-kerf blade from a reputable brand is the right call.
| Blade | Teeth | Best for | Avoid for |
|---|---|---|---|
| 24-tooth rip / framing | 24 | Fast rips in pine and framing lumber | Plywood faces, visible furniture edges |
| 40-tooth general purpose | 40 | All-round beginner blade: plywood, pine, crosscuts | Very fast rough ripping |
| 60-tooth fine finish | 60 | Clean plywood and hardwood edges, shelving | Thick ripping, where it will cut slowly and overheat |
| 24-tooth thin-kerf | 24 | Cordless saws, fast cuts with less strain | Fine finish work |
| Diamond / masonry (only if needed) | Varies | Concrete board, tile (with correct saw setup) | Wood — never use the wrong blade type for the material |
A dull blade is dangerous as well as disappointing. If you have to push hard, if the cut smells burnt, if the edge is fuzzy or the motor strains on pine, the blade is telling you it needs replacing or sharpening. For beginners, replacing a standard blade is simpler and safer than learning to sharpen circular saw blades, so keep a spare sharp blade in the shop. Never use a blade with missing or chipped carbide teeth, a cracked plate, or a bore size that does not match your saw — and never remove the blade guard to fit a blade that does not belong.
Kickback, Safety, and Dust: The Rules That Keep You Safe
Kickback is the one word every circular saw beginner must understand before the first cut. It happens when the blade binds in the cut — usually because the offcut pinches the blade, the board sags and closes the kerf, or the saw twists — and the saw is thrown violently backwards toward the user. It is fast, startling, and entirely preventable with a few habits. Support the board properly so the offcut falls away freely and never pinches. Never cut with the board supported only in the middle, where both halves can sag onto the blade. Keep the blade sharp, the depth shallow, and both hands on the saw. Never reach across the blade, never cut above shoulder height, and never, ever remove or wedge open the blade guard.
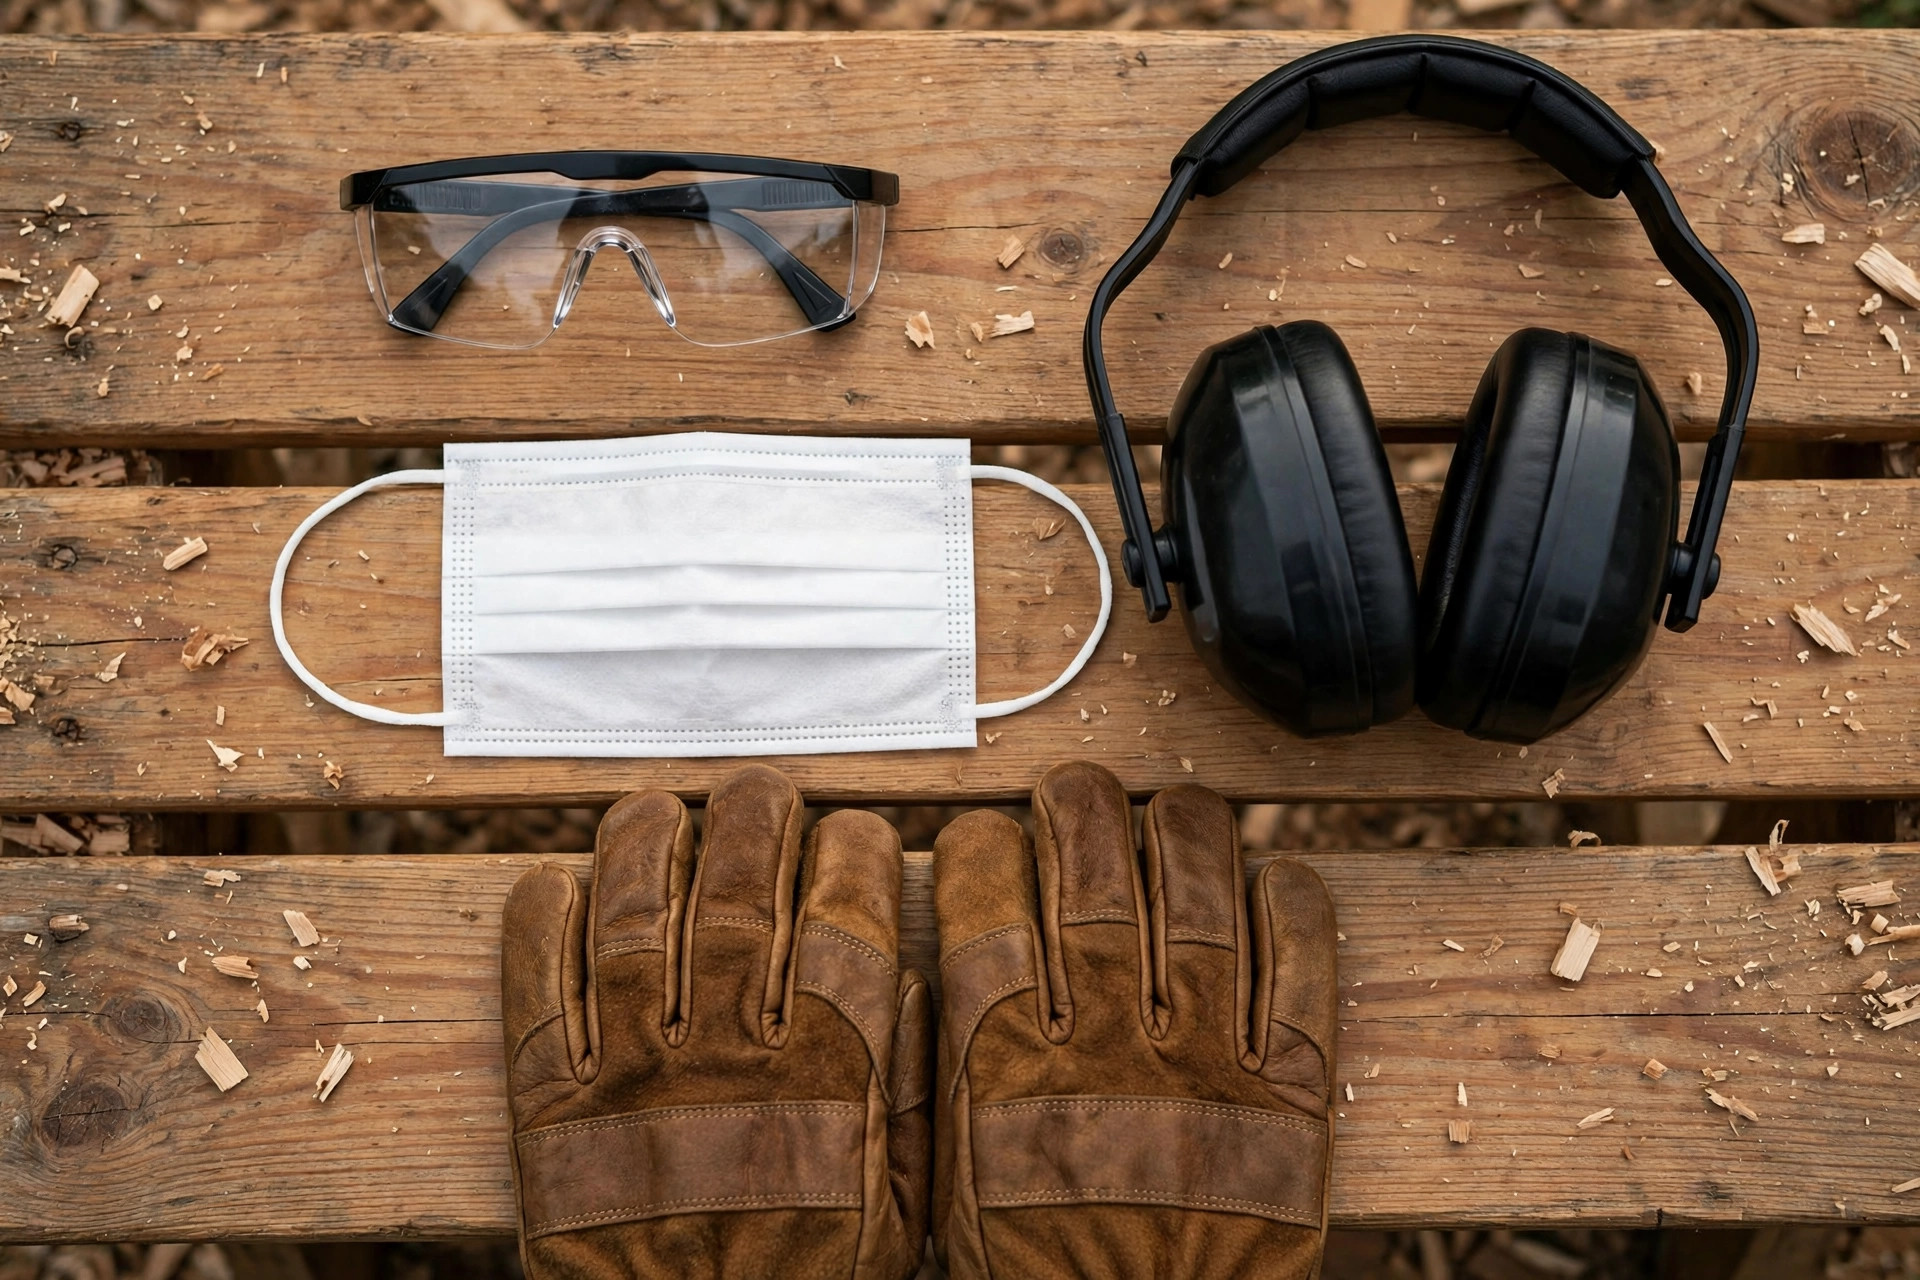
Before every session, run through the safety checklist in our guide to woodworking safety tips for beginners. Wear safety glasses that seal reasonably well — ordinary spectacles are not enough — and hearing protection, because a circular saw is loud enough to damage hearing over time. Wear a dust mask for plywood and MDF, which produce fine dust you should not breathe, and tie back long hair, remove loose sleeves and jewellery, and keep gloves off while the saw is running; gloves near a spinning blade can catch and pull a hand in, which is why many experienced woodworkers do not wear them for sawing at all. Keep the work area clear, the floor free of offcuts you could trip on, and a first-aid kit within reach.
Dust Control and Cleanup
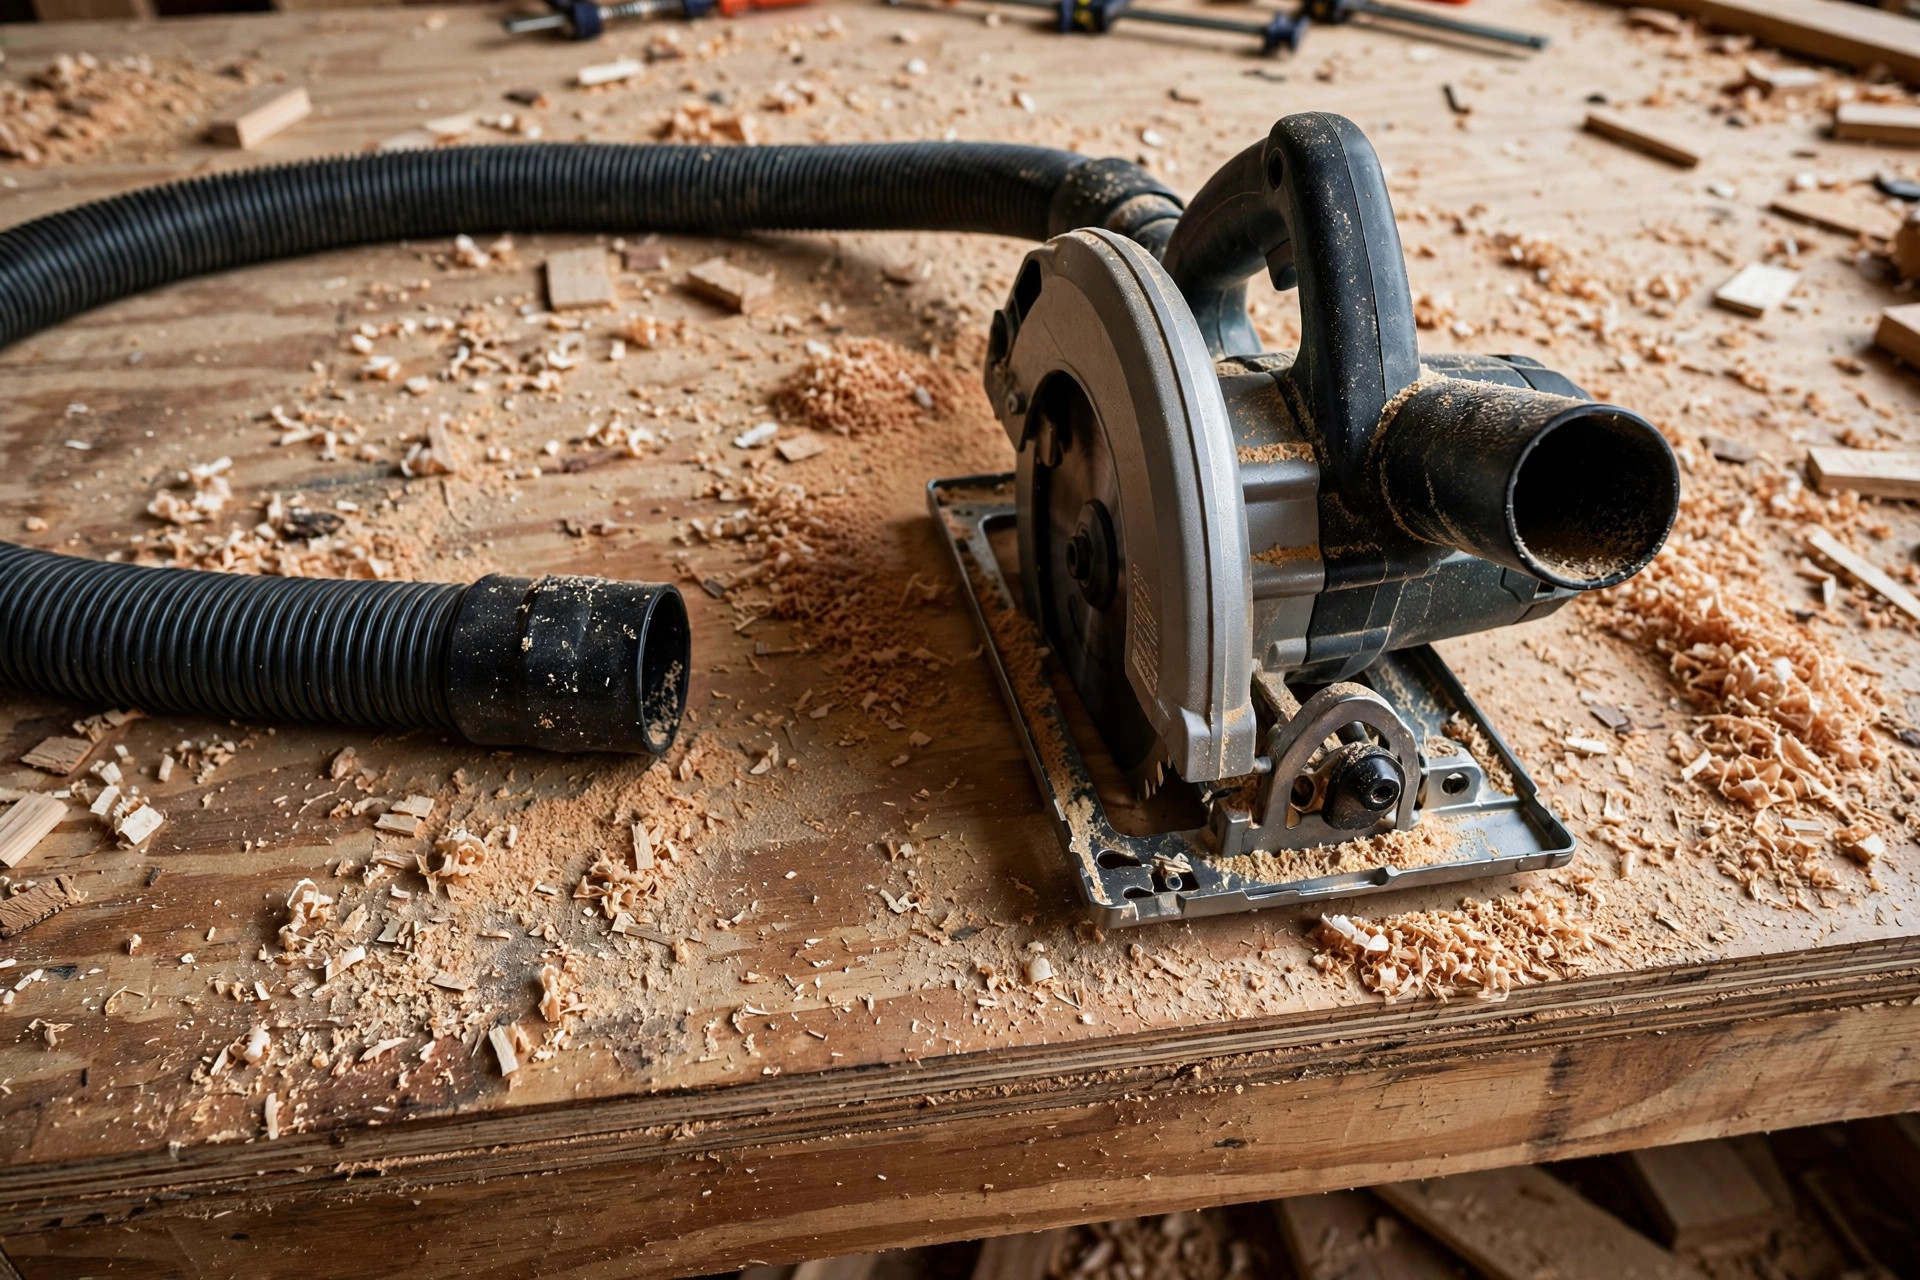
Dust control matters for health and for cut quality. A circular saw throws a surprising amount of dust, and a shop vacuum connected to the dust port catches much of it. If your saw has no port, or the port is small, cut outdoors or in a well-ventilated space when you can, and sweep up between cuts so dust does not build up under the board and tilt it. For a fuller setup, see our guide to DIY dust collection for a small workshop — even a simple vacuum connection and a clean bench make a visible difference to both your lungs and your edges.
One more safety habit deserves emphasis: unplug the saw, or remove the battery, whenever you change a blade, adjust the base, or clear a jam. Every year, injuries happen not during cutting but during blade changes on a saw someone thought was off. Treat the saw as live until the power source is physically disconnected. Teach that rule to anyone else who uses your workshop, and make it automatic for yourself. It costs five seconds and removes an entire category of accident.
Common Beginner Mistakes (and How to Fix Them)
Most beginner circular saw problems are not saw problems at all — they are setup problems, and they all have simple fixes. Cutting freehand and wondering why the edge wanders is the most common: fix it with a straightedge guide, every time, until straight cuts become automatic. Cutting with a dull blade and blaming the saw is next: fix it with a fresh 40-tooth blade and notice how much lighter the saw feels. Setting the blade far too deep is another classic — deep blades increase kickback risk, tearout, and dust for no gain, so set the blade a quarter inch below the material and no more.
Other mistakes are about support and stance. Cutting a plywood sheet balanced on a single sawhorse, so the sheet sags and pinches the blade, is asking for kickback; support the sheet on foam insulation board on the floor, or on multiple sawhorses, so the cut line is supported on both sides and the offcut drops free. Standing in line with the blade, so that any kickback comes straight at you, is also easy to fix: stand slightly to the side, with a balanced stance, and keep your body out of the blade’s path. Rushing the cut, stopping halfway, or lifting the saw before the blade stops all leave marks or create risk; a slow, continuous feed and a patient finish are faster in the end, because they produce an edge you do not have to fix.
Finally, do not buy your way out of practice. A premium saw, an expensive track system, and a drawer of blades will not replace ten practice cuts on scrap plywood. Before your first real project, spend half an hour cutting scrap: straight cuts with a guide, crosscuts, a 45-degree bevel, and a rip in pine. Measure each cut, look at the edge, and adjust your feed rate and guide setup. That half hour teaches more than any review, and it builds the confidence that makes the first project enjoyable instead of stressful.
First Projects to Build With Your New Circular Saw
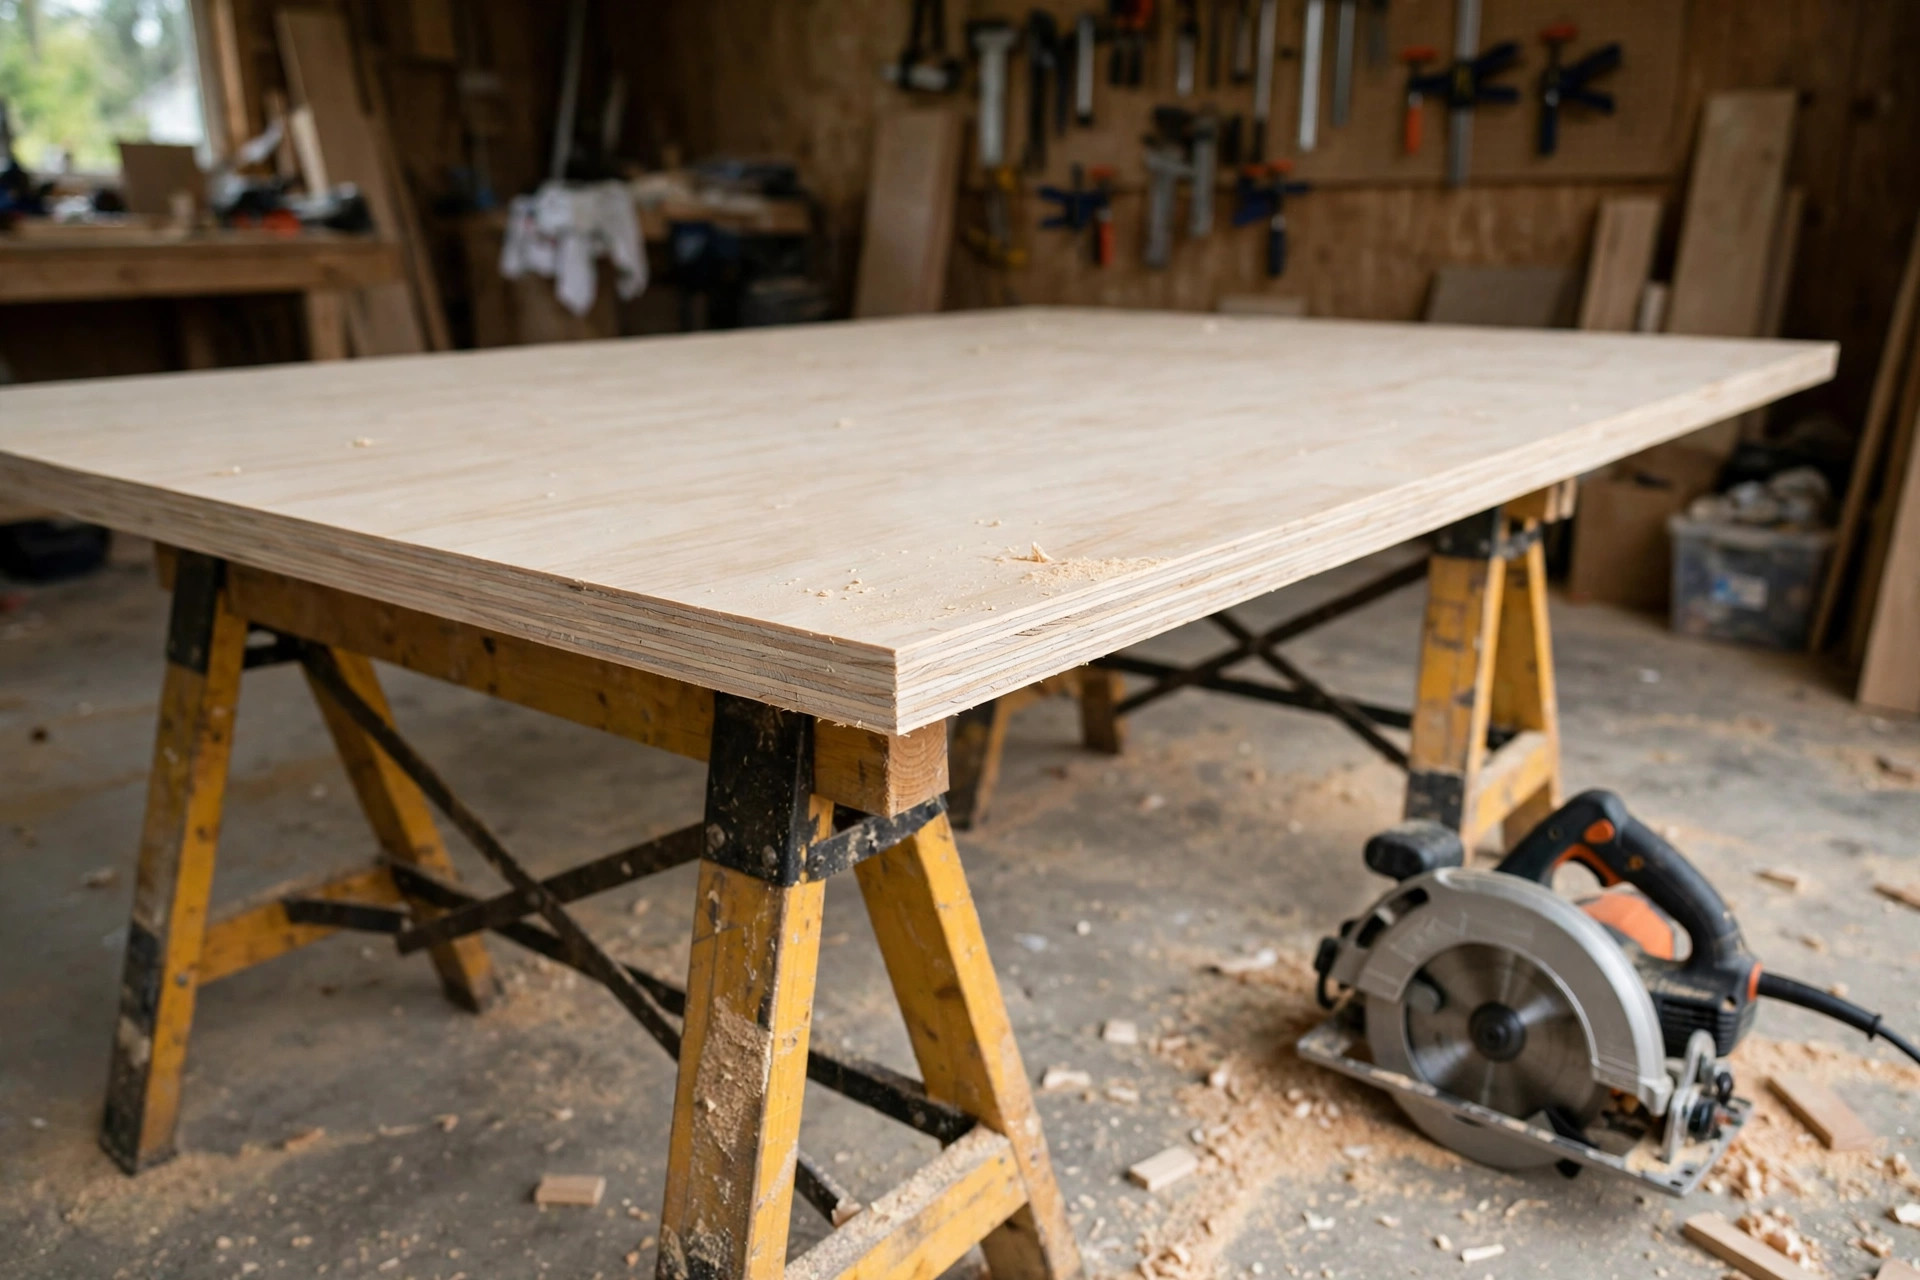
Once you can cut straight, a circular saw opens up a surprising range of first projects. Start with shop furniture: a simple workbench, a pair of sawhorses, or a plywood storage shelf. These projects forgive small errors, teach measuring and assembly, and improve your workshop at the same time. Our guide to how to build a simple workbench for beginners is a perfect second project, because the bench itself then makes every later cut easier and safer.
Next, try a wall shelf, a crate, or a small side table — all classic beginner builds that rely on straight plywood and pine cuts, simple butt joints or pocket screws, and a finish you can be proud of. Cut all your pieces first, label them with pencil, dry-fit before gluing, and sand the edges lightly before assembly; that order prevents the common beginner trap of assembling first and discovering a piece is a quarter inch short. As your confidence grows, add bevel cuts for a picture ledge, a plywood bookshelf with a face frame, or a small stool. Each project adds one new skill — a bevel, a dado-like groove made with repeated passes, a mitred edge — while reusing the straight-cut skill you have already mastered.
Keep a simple rule for project choice: if a project needs ten different cuts you have never tried, simplify it; if it needs one new cut plus nine you know, build it. That ratio keeps learning steady without turning a weekend project into a frustration. And remember that selling beginner projects is a realistic goal once your cuts are clean and consistent — buyers notice straight edges, smooth finishes, and square assembly far more than they notice the brand of saw that made them.
Frequently Asked Questions
What is the best circular saw for beginners woodworking?
For most beginners, a 7-1/4-inch corded saw with a 15-amp motor is the best first buy, because it offers full power, a common blade size, and a low total cost. Choose cordless if you work away from outlets or already own batteries for that brand.
Should a beginner buy corded or cordless first?
Buy corded if you mainly work in one workshop and want the most power for your money. Buy cordless if portability matters, you work outdoors or on site, or you already own compatible batteries and a charger.
Can a circular saw cut straight enough for furniture?
Yes, with a straightedge guide. Freehand cuts wander, but a clamped guide forces the saw’s base plate along a straight line, producing edges clean enough for shelves, tables, and cabinets with minimal sanding.
What blade should a beginner use for plywood?
Use a 40-tooth general-purpose blade for most plywood work, or a 60-tooth fine-finish blade for the cleanest visible edges. Keep the stock blade for rough cuts, and replace a dull blade rather than forcing it.
How do I avoid kickback with a circular saw?
Support the board so the offcut falls away without pinching the blade, set the blade only a quarter inch below the material, keep the blade sharp, hold the saw with both hands, stand to the side of the blade path, and never remove the blade guard.
Final Verdict
The best circular saw for beginners is not the most expensive saw, and it is not the one with the longest feature list. It is the saw that fits your workshop, your budget, and your hands — fitted with a sharp blade, guided by a straightedge, and used with patient, safe habits. A corded 7-1/4-inch saw is the default recommendation for good reason, a cordless saw is the right answer when freedom matters, and either one will serve you well for years if you respect the blade, the guide, and the safety rules in this guide. Buy the saw, build the guide, practise on scrap, and then build something you are proud of. That first straight, clean cut is the moment woodworking stops feeling intimidating and starts feeling like a craft you own.



Pingback: Best Miter Saw for Beginners: First Saw Guide