
A table saw is the most capable tool most beginners will ever buy, and the most intimidating. It can rip a board to an exact width in seconds, repeat that cut twenty times without variation, and turn rough lumber into furniture parts with a speed no handheld saw can match. It can also bite: a table saw demands respect, a clear method, and one specification that most beginner roundups barely mention. If you are searching for the best table saw for beginners woodworking, the single most important question is not the motor, the brand, or the price. It is the fence.
Here is the short answer up front. For most beginners, the best first table saw is a compact or jobsite saw with a rack-and-pinion rip fence, a 10-inch blade, and a riving knife that stays on for every through cut. The fence matters more than anything else because it is the fence that decides whether your cuts are straight, square, and repeatable. A powerful saw with a fence that drifts, flexes, or locks out of parallel will produce tapered boards, burnt edges, and dangerous kickback — no matter how good the motor is. A modest saw with a fence that locks dead parallel every single time will produce clean, consistent rips from your very first day, and that consistency is what turns a beginner into a woodworker who actually finishes projects.
This guide explains the difference in plain language. You will learn how fences work, why rack-and-pinion fences are the beginner-friendly choice, how much rip capacity you really need, how jobsite and compact saws compare, and how to set up and make your first rip safely. No brand hype, no jargon left unexplained, and no safety detail skipped. By the end, you will know exactly what to look for, what to avoid, and what your first afternoon with a table saw should look like.
Why the Fence Is the Make-or-Break Beginner Spec
Most beginner buying guides rank table saws by motor power, blade size, or price, and treat the fence as a line item. That order is backwards. Think about what a table saw actually does. The blade spins in a fixed position, and you push the board through it, guided by the fence. The fence is the only thing keeping the board straight and the cut width constant from the front of the blade to the back. If the fence is even slightly out of parallel with the blade — closer at the back than at the front, for example — the board gets pinched between the blade and the fence, the cut tapers, the edge burns, and the risk of kickback climbs sharply. A fence that locks a fraction of a millimetre differently each time you move it means every board comes out a slightly different width, which means joints that do not close, drawers that do not fit, and shelves that wobble.
That is why experienced woodworkers test a fence before anything else. A good fence locks with one smooth motion, stays perfectly parallel to the blade, and does not flex when you press a board against it. A bad fence needs two hands and a prayer: you lock the front, the back swings, you tap it into place, you lock again, and you still check it with a tape measure because you do not trust it. Beginners feel this difference immediately, even if they cannot name it, because a bad fence makes every cut a small argument with the tool. A good fence makes cutting feel almost boring, in the best possible way — you set it, lock it, push the board through, and the board comes out exactly the width you wanted.
There are two common fence designs on beginner saws, and understanding them will save you from a frustrating purchase. The first is the rack-and-pinion fence. A toothed rail runs along the front of the saw, and a gear (the pinion) on the fence engages it, so the fence moves smoothly and stays square as you slide it. Turn a knob or squeeze a handle, and the fence glides to the new width and locks. It is the most beginner-friendly design because it removes the fiddly alignment step: the gearing keeps the fence parallel for you. The second is the clamp-style fence, common on budget saws, where the fence slides on a rail and clamps at the front only. It can work well, but it demands that you check parallelism every time you move it, and cheaper versions flex under pressure. Some clamp fences are excellent — high-end cabinet saws use a related design — but on beginner-priced saws, the rack-and-pinion fence is the safer bet for consistent results.
Before you buy, test the fence if you possibly can. Slide it to a width, lock it, measure the distance from the fence to the blade at the front of the blade and again at the back. The two measurements should match. Unlock it, move it, lock it again, and measure once more. A fence that repeats the same measurement three times in a row is a fence you can trust. A fence that wanders by a millimetre or more each time is a fence that will fight you on every project. If you are buying online and cannot test, read reviews specifically for fence comments, not overall star ratings — a saw can have four stars overall and a fence section full of complaints, and it is the fence section that predicts your experience.
Rack-and-Pinion Fence: How It Works and Why Beginners Love It
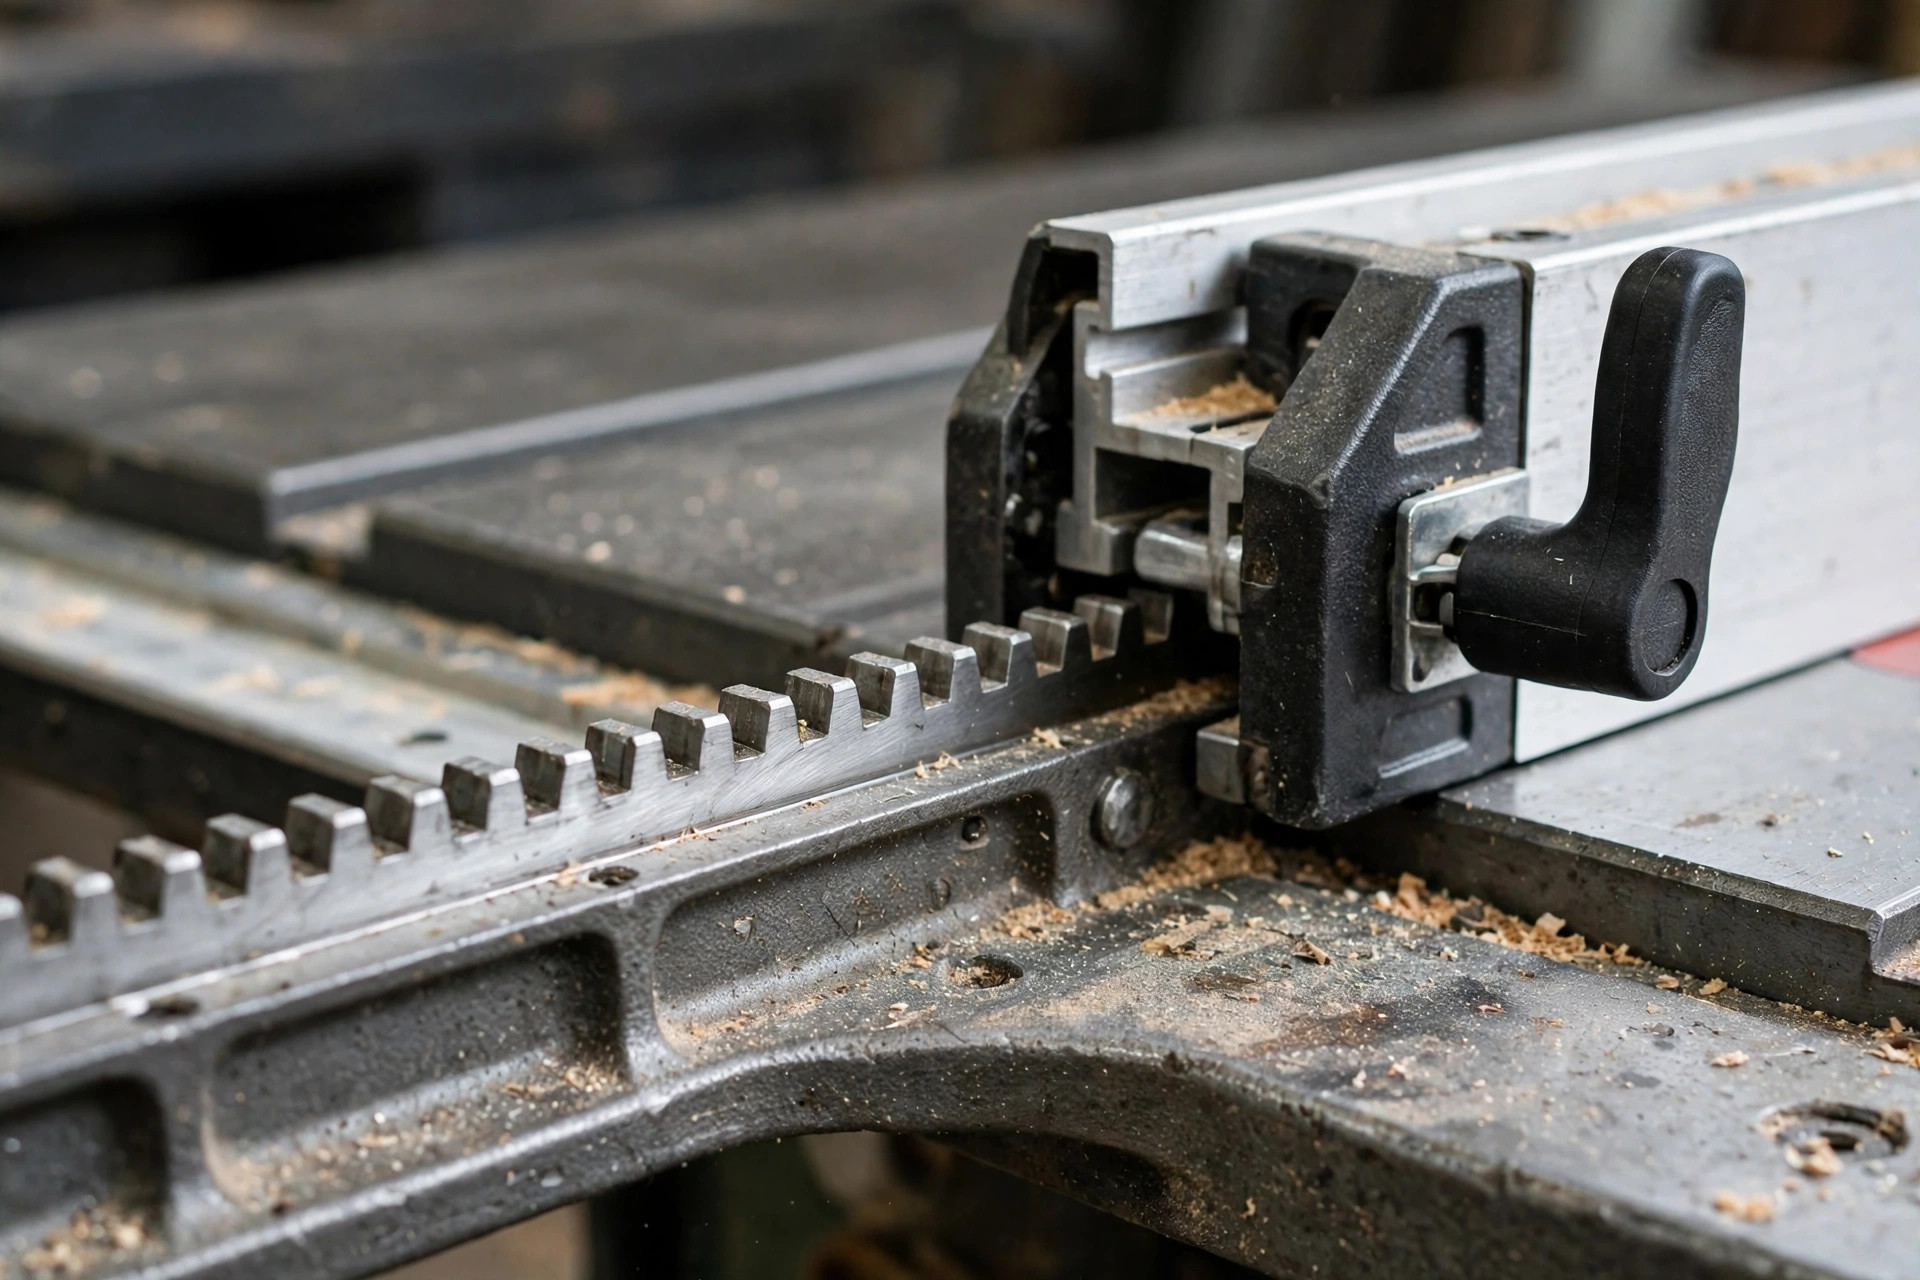
A rack-and-pinion fence works like a tiny railway. Along the front edge of the saw table sits a horizontal toothed rail — the rack. The fence itself carries a small gear — the pinion — that meshes with those teeth. When you turn the adjustment knob or squeeze the release handle, the gear rolls along the rack and carries the fence with it, and because the gear engages teeth on both sides of the mechanism, the fence cannot twist out of square as it moves. When you lock it, it stays where you put it. The movement feels smooth, almost mechanical in a satisfying way, and the position is repeatable: set the fence to 150 mm, unlock it, move it away, bring it back to 150 mm, and it lands in the same place.
For a beginner, that repeatability is worth more than extra horsepower. Furniture building is mostly repetition: four identical legs, six identical shelf boards, eight identical drawer sides. A rack-and-pinion fence lets you cut the first piece, cut the second piece, and trust that both are the same width without re-measuring each time. That trust changes how you work. Instead of measuring every board after every cut and creeping up on a width with test cuts, you set the fence once, cut all your pieces, and move on to assembly. It also reduces the most common beginner error, which is cutting a board, measuring it, finding it a hair off, adjusting the fence, and cutting again — a loop that wastes wood and patience.
There are a few things to check even on a good rack-and-pinion fence. First, the scale. The fence usually carries a measuring scale that reads the distance from the blade. Check it against a tape measure at a few widths, because a scale that is off by a millimetre will quietly make every board wrong. Many saws let you adjust the scale’s zero position, and spending ten minutes calibrating it when the saw is new pays off for years. Second, the lock. It should engage firmly with one motion and not need a second tightening. If the fence can be wiggled after locking, it will move under the pressure of a board, and your cuts will vary. Third, the fence face. It should be flat and straight along its full length. Sight along it like you would sight along a board: any bow or twist will push your workpiece off line.
One more honest note: a rack-and-pinion fence is not magic, and it does not excuse skipping setup. You still need to check that the fence is parallel to the blade when the saw is new, and re-check it occasionally, because shipping, bumps, and temperature changes can shift things. The difference is that checking a rack-and-pinion fence is a quick verification, while fixing a bad clamp fence is a recurring chore. For a beginner, that distinction is the difference between a tool you enjoy and a tool you dread.
Jobsite vs Compact: Which Type Suits a Beginner?
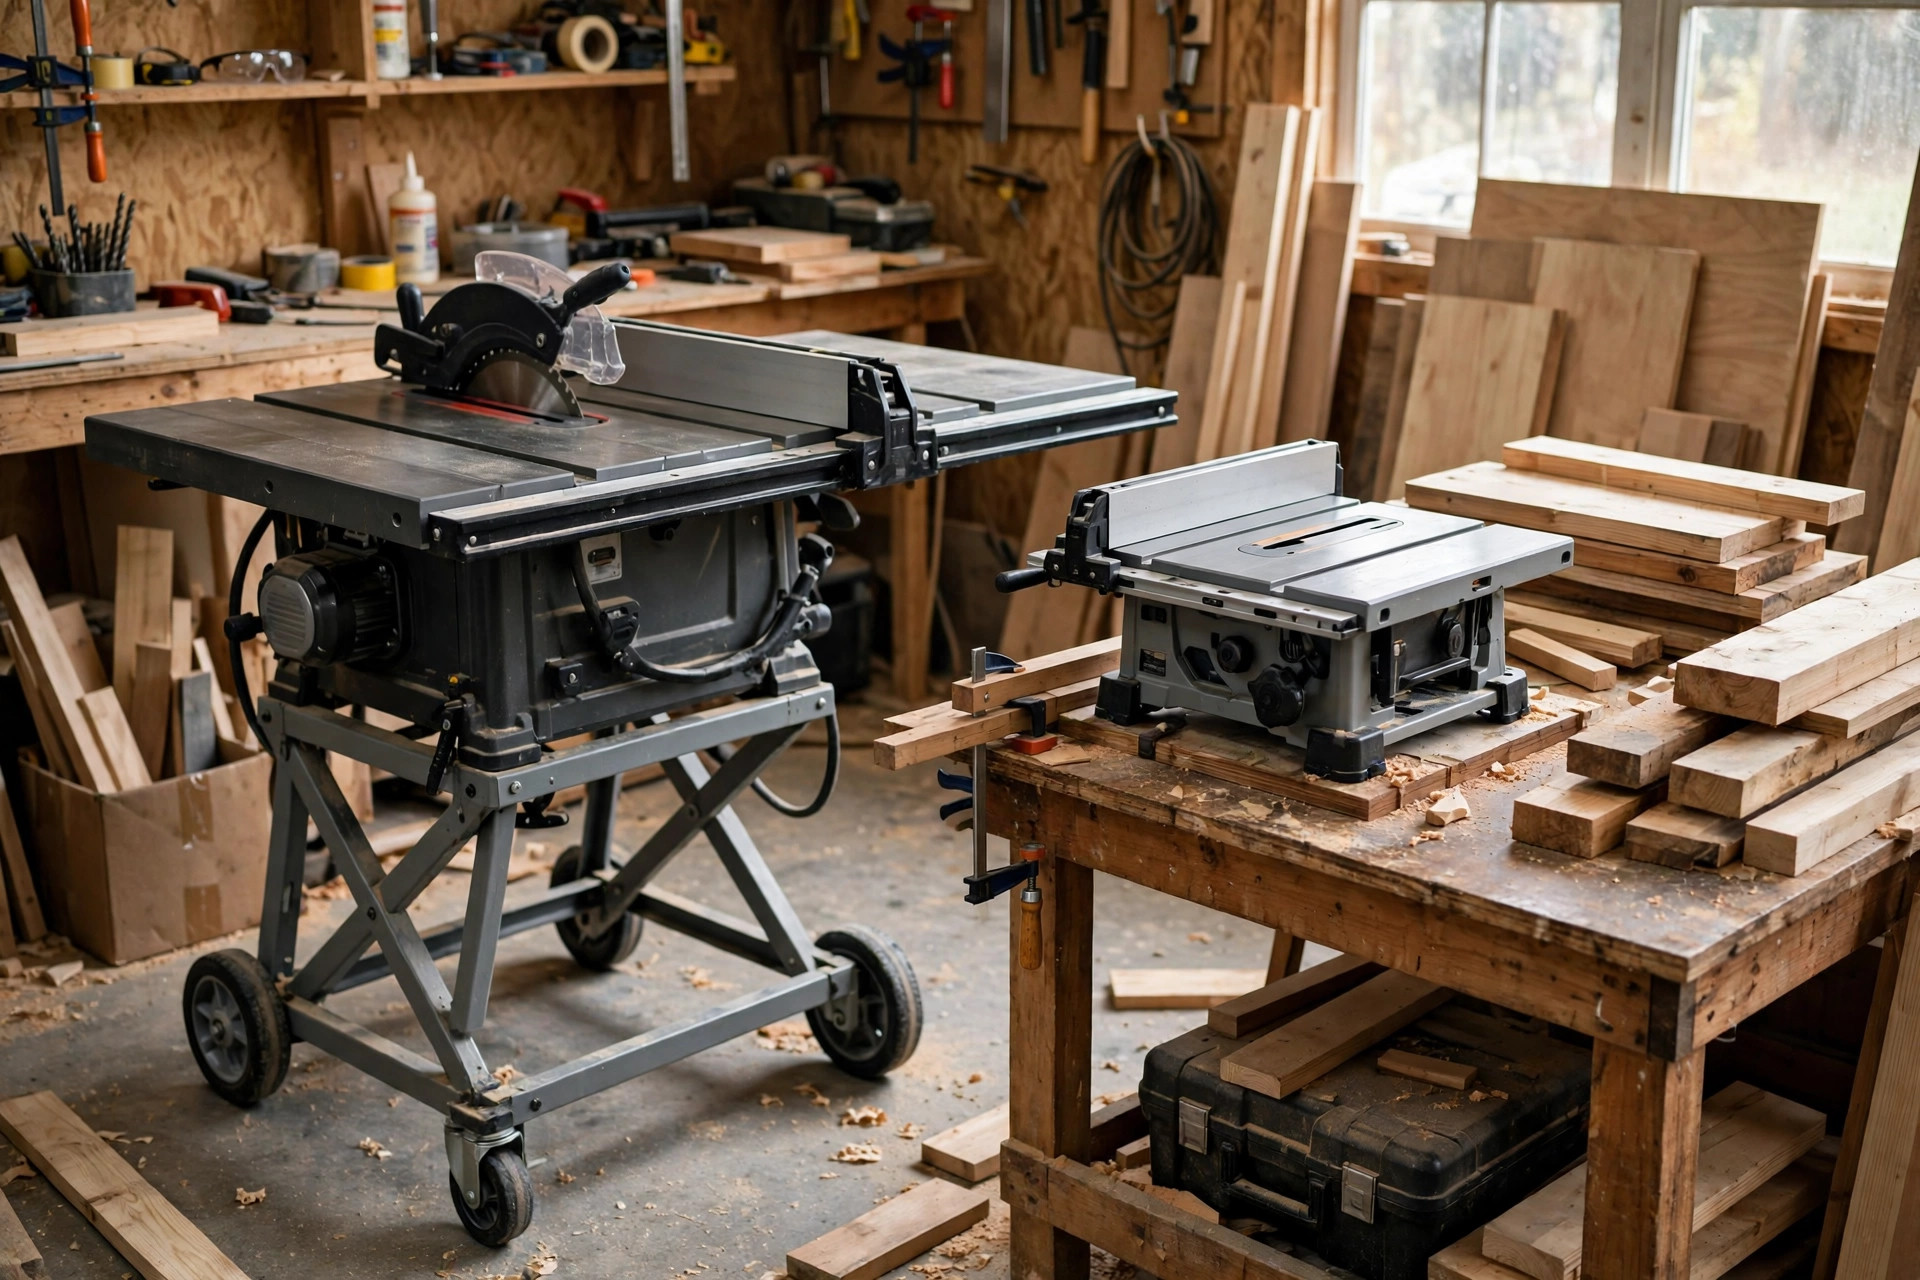
Beginner table saws fall into two broad types, and the right one depends on your space and how you work. Jobsite saws are built to be carried to a work site: they have a folding stand with wheels, a reasonably large table, and a motor that can handle site work, and they typically cost more. Compact (or benchtop) saws are smaller, lighter, and designed to sit on a workbench or a simple stand. They take up less room, cost less, and are easier to store in a small garage or shed. Both use a 10-inch blade on most models, both can cut the same range of beginner projects, and the choice between them is mostly about space, portability, and budget — not capability.
Choose a jobsite saw if you have the floor space for a stand, you want a larger working surface, or you plan to move the saw around — between garage and driveway, or to a friend’s house for a build day. The stand is a real advantage: a table saw at a comfortable working height, with the table at roughly hip level, is far easier and safer to use than one perched on a low bench, because you can feed boards with a balanced stance and good control. Jobsite saws also tend to have slightly better fences and larger rip capacities, which brings us to the next section. The downsides are price, weight, and footprint. A jobsite saw with its stand open takes up a meaningful chunk of a small workshop, and folding it away after every session gets old quickly.
Choose a compact saw if space is tight, your budget is smaller, or you already have a solid workbench to put it on. A compact saw on a sturdy bench — ideally the bench you built following our guide to how to build a simple workbench for beginners — works just as well as a jobsite saw for shelves, crates, small tables, and picture frames. The trade-offs are a smaller table, which means less support for long boards, and a smaller rip capacity on some models. Both can be managed: use roller stands or a helper for long boards, and check the rip capacity number before buying (see below). The compact saw’s great advantage is that it disappears when you need the bench for something else, which matters a lot in a shared garage.
There is also the question of dust collection, which is worth thinking about before you buy. Table saws produce a lot of dust, fast, and a dust port that connects to a shop vacuum makes a huge difference to both your lungs and your visibility of the cut line. Most jobsite and compact saws have a dust port; check its size and whether it matches your vacuum hose, and plan for a simple collection setup from day one. Our guide to DIY dust collection for a small workshop covers practical options that do not require an expensive extractor.
Whichever type you choose, check the table itself. A cast aluminium table is the norm on beginner saws; it should feel flat and solid, not flexy or wobbly. A table that rocks or dips makes accurate cutting harder and feeding less safe. Also check the mitre gauge — the sliding guide that runs in a slot on the table for crosscuts. A basic mitre gauge is fine for a beginner, but it should slide smoothly without slop in the slot, and its angle stops should feel positive. You will upgrade it eventually; it does not need to be perfect on day one, but it should not be sloppy.
Rip Capacity, Blade Size, and Motor Power: What the Numbers Mean
Three numbers dominate table saw specifications, and beginners often over-weight two of them and under-weight the third. Rip capacity is the maximum distance between the blade and the fence — in other words, the widest board you can rip. On beginner saws this typically ranges from about 300 mm (12 inches) on small compact models to 600 mm (24 inches) or more on jobsite saws. For most beginner projects — shelves, crates, small tables, picture frames — a rip capacity of 600 mm is plenty, because you rarely rip a board wider than that, and plywood sheets are usually broken down with a circular saw first (see our guide to the best circular saw for beginners) before the table saw finishes the pieces to exact width. A smaller rip capacity is not a deal-breaker, but it is a limit you will bump into sooner: you cannot rip a 500 mm wide panel on a saw whose fence only reaches 300 mm. If you can stretch to a saw with 600 mm or more, do it; it is one of the few specifications that genuinely buys you freedom.
Blade size is simpler. Most beginner saws use a 10-inch blade, and that is what you want. It cuts up to about 75–80 mm deep at 90 degrees, which handles 2x lumber and thick boards, and it tilts to 45 degrees for bevel cuts. Smaller 8-1/4-inch blades appear on some very compact saws; they cut less deep and limit your blade choice, so avoid them unless space or budget forces the issue. Blade choice matters as much here as it does for a circular saw: a 40-tooth general-purpose blade is the best single blade for a beginner, with a 24-tooth rip blade as a useful second blade for fast cuts along the grain. Keep the stock blade for rough work and put a good blade on for visible cuts.
Motor power is the number beginners over-weight. Jobsite and compact saws typically run 15-amp universal motors (or the equivalent in other markets), and that is enough for everything a beginner builds: plywood, pine, hardwood boards up to two inches thick, and sheet goods. A bigger motor helps on very thick hardwood or long ripping sessions, but it will not fix a bad fence, a dull blade, or poor technique, and a modest motor with a sharp blade and a sensible feed rate will outperform a powerful motor with a dull blade every time. Do not pay a large premium for a small power increase. Spend that money on a good blade, a push stick, and a featherboard instead — accessories that improve every cut you make.
| Specification | What to look for | Why it matters for beginners |
|---|---|---|
| Fence type | Rack-and-pinion preferred | Locks parallel and repeats the same width every time |
| Rip capacity | 600 mm (24 in) or more if possible | Widest board you can rip; limits panel work if too small |
| Blade size | 10 inch standard | Deepest cuts, widest blade choice, bevel to 45 degrees |
| Motor | 15 amp (or equivalent) | Plenty for plywood, pine, and hardwood up to 2 in thick |
| Riving knife | Included, stays on for through cuts | Prevents the kerf closing on the blade — the main kickback guard |
| Dust port | Fits your shop vacuum | Visibility, lung health, and a cleaner workshop |
| Mitre gauge | Slides smoothly, positive angle stops | Accurate crosscuts until you upgrade it later |
Table Saw Comparison: Beginner Models Side by Side
The table below compares the types of saws beginners commonly encounter, rather than ranking specific models that change with stock and sales. Prices move, bundles change, and a model that is a bargain this month may be overpriced next month, so treat the price band as a guide and check what is included — a stand, a blade, and a mitre gauge may or may not be in the box.
| Saw type | Fence | Rip capacity (typical) | Best for | Watch out for |
|---|---|---|---|---|
| Jobsite saw with rack-and-pinion fence | Rack-and-pinion | 600–800 mm | All-round first saw, larger panels, stand included | Price, weight, floor space with stand open |
| Compact benchtop saw, rack-and-pinion | Rack-and-pinion | 300–600 mm | Small workshops, bench use, tighter budgets | Smaller table, less support for long boards |
| Compact benchtop saw, clamp fence | Clamp, front-locking | 300–600 mm | Lowest purchase price | Check parallelism every time you move the fence |
| Contractor-style saw (if budget allows) | Usually excellent, T-square style | 750 mm+ | A long-term buy if you have space and budget | Heavy, needs a permanent spot, higher cost |
Read that table with the fence rule in mind. The first two rows are the beginner sweet spot, and the fence column is the reason: a rack-and-pinion fence is the feature that makes a beginner saw forgiving. The third row can still be a good saw — many woodworkers learned on clamp fences — but it asks more of you on every cut, and that extra effort is exactly what a beginner does not need while also learning feed rate, blade choice, and safety. The fourth row is not a beginner necessity; it is the saw you buy when you know you love the craft and have the space. Starting with a compact or jobsite saw is not a compromise. It is the sensible order, and a good one will serve you for years before you ever feel its limits.
One more buying note: buy the saw from a seller with a clear returns policy, and keep the box until you have tested the fence, the scale, and the blade alignment. A saw that arrives with a bent fence rail, a warped table, or a motor fault is rare, but it happens, and discovering it on day one is much better than discovering it after a month of wondering why your cuts are off. Test before you build, and you will never have to guess whether the saw or your technique is at fault.
Setting Up Your Saw: Alignment Checks Before the First Cut
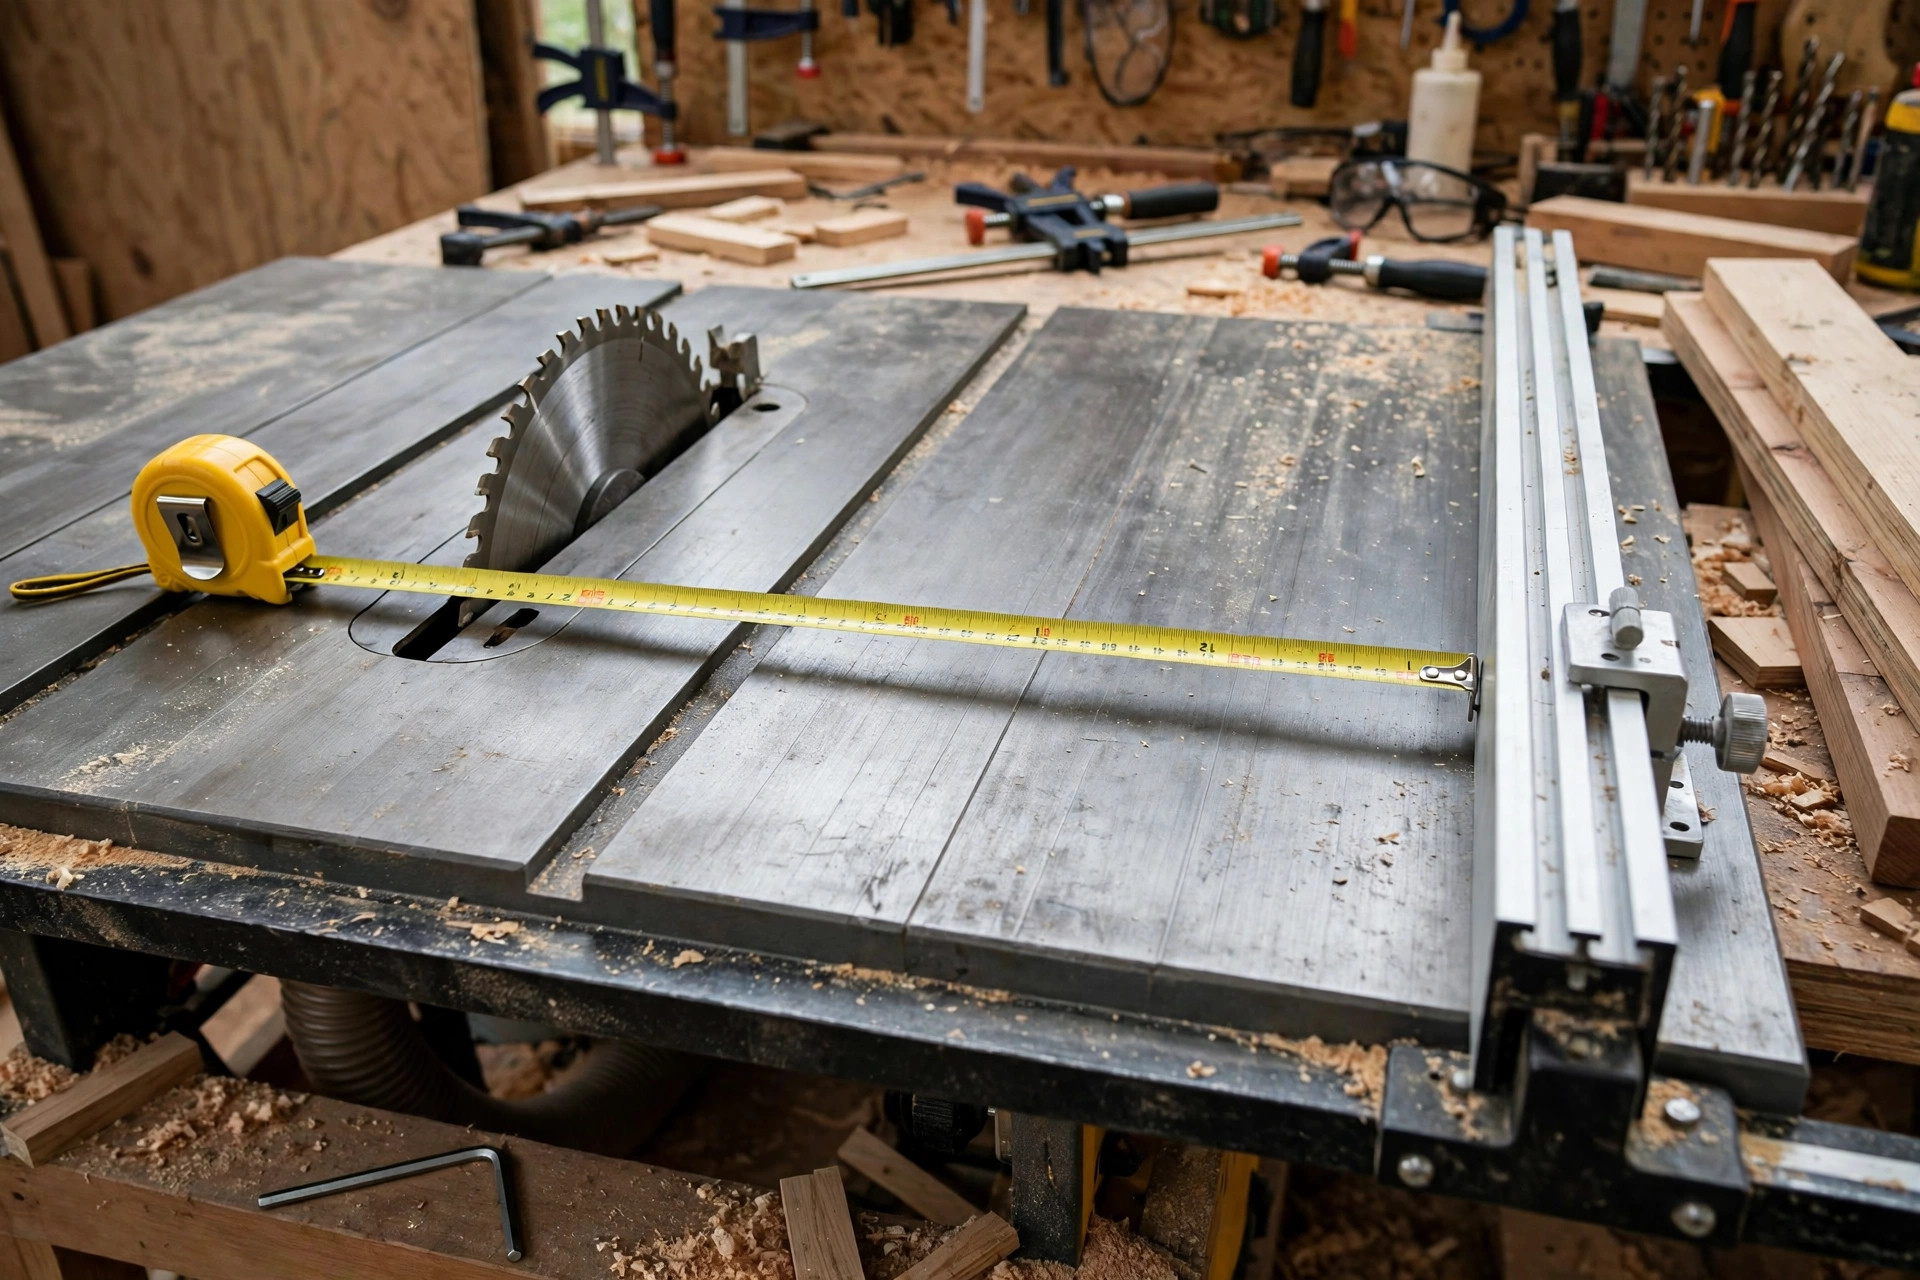
Unboxing day is setup day, and an hour spent here saves months of frustration. Work through these checks in order, with the saw unplugged. First, the blade and the mitre slot. The blade must be parallel to the mitre slot, because every crosscut references that slot and every rip references the fence, which itself references the blade. Most manuals explain the adjustment; if yours is off, adjust it now, because everything else you calibrate depends on it. Second, the fence and the blade. Set the fence to a width, lock it, and measure from the fence to the blade at the front of the blade and at the back. The two numbers should match, or be within a hair of each other. Many fences have adjustment screws for exactly this. Third, the fence scale. Measure the actual distance from blade to fence at several widths and compare it with the scale reading; adjust the scale’s zero position until they agree.
Fourth, the blade height and tilt stops. Check that the blade returns to exactly 90 degrees when you set it square — a small square held against the blade and the table will tell you — and that the 45-degree stop is close. You will check squareness before important cuts anyway, but starting from a true zero makes that check quick. Fifth, the riving knife. It should sit directly behind the blade, in line with it, and slightly below the top of the blade for through cuts. It should not be bent, and it should move up and down with the blade. If your saw arrived with the riving knife removed or packed separately, fit it before anything else. It is not an optional accessory, and this guide will explain why in the safety section.
Finally, the workspace around the saw. A table saw needs clear space in front for feeding and behind for the board to exit — at least the length of the longest board you plan to cut, plus room to stand comfortably. Nothing should block the outfeed path, because a board that hits an obstruction mid-cut can stop suddenly and kick back. Set up an outfeed support — a roller stand, a small table, or even a sawhorse at table height — before you cut long boards, because a board that tips off the back of the saw as it exits is a board you cannot control. Keep the floor clear of offcuts, the dust port connected, and safety glasses and hearing protection within arm’s reach. Setup is not glamorous, but it is the difference between a workshop that feels safe and one that feels like a hazard.
Your First Rip: Step by Step
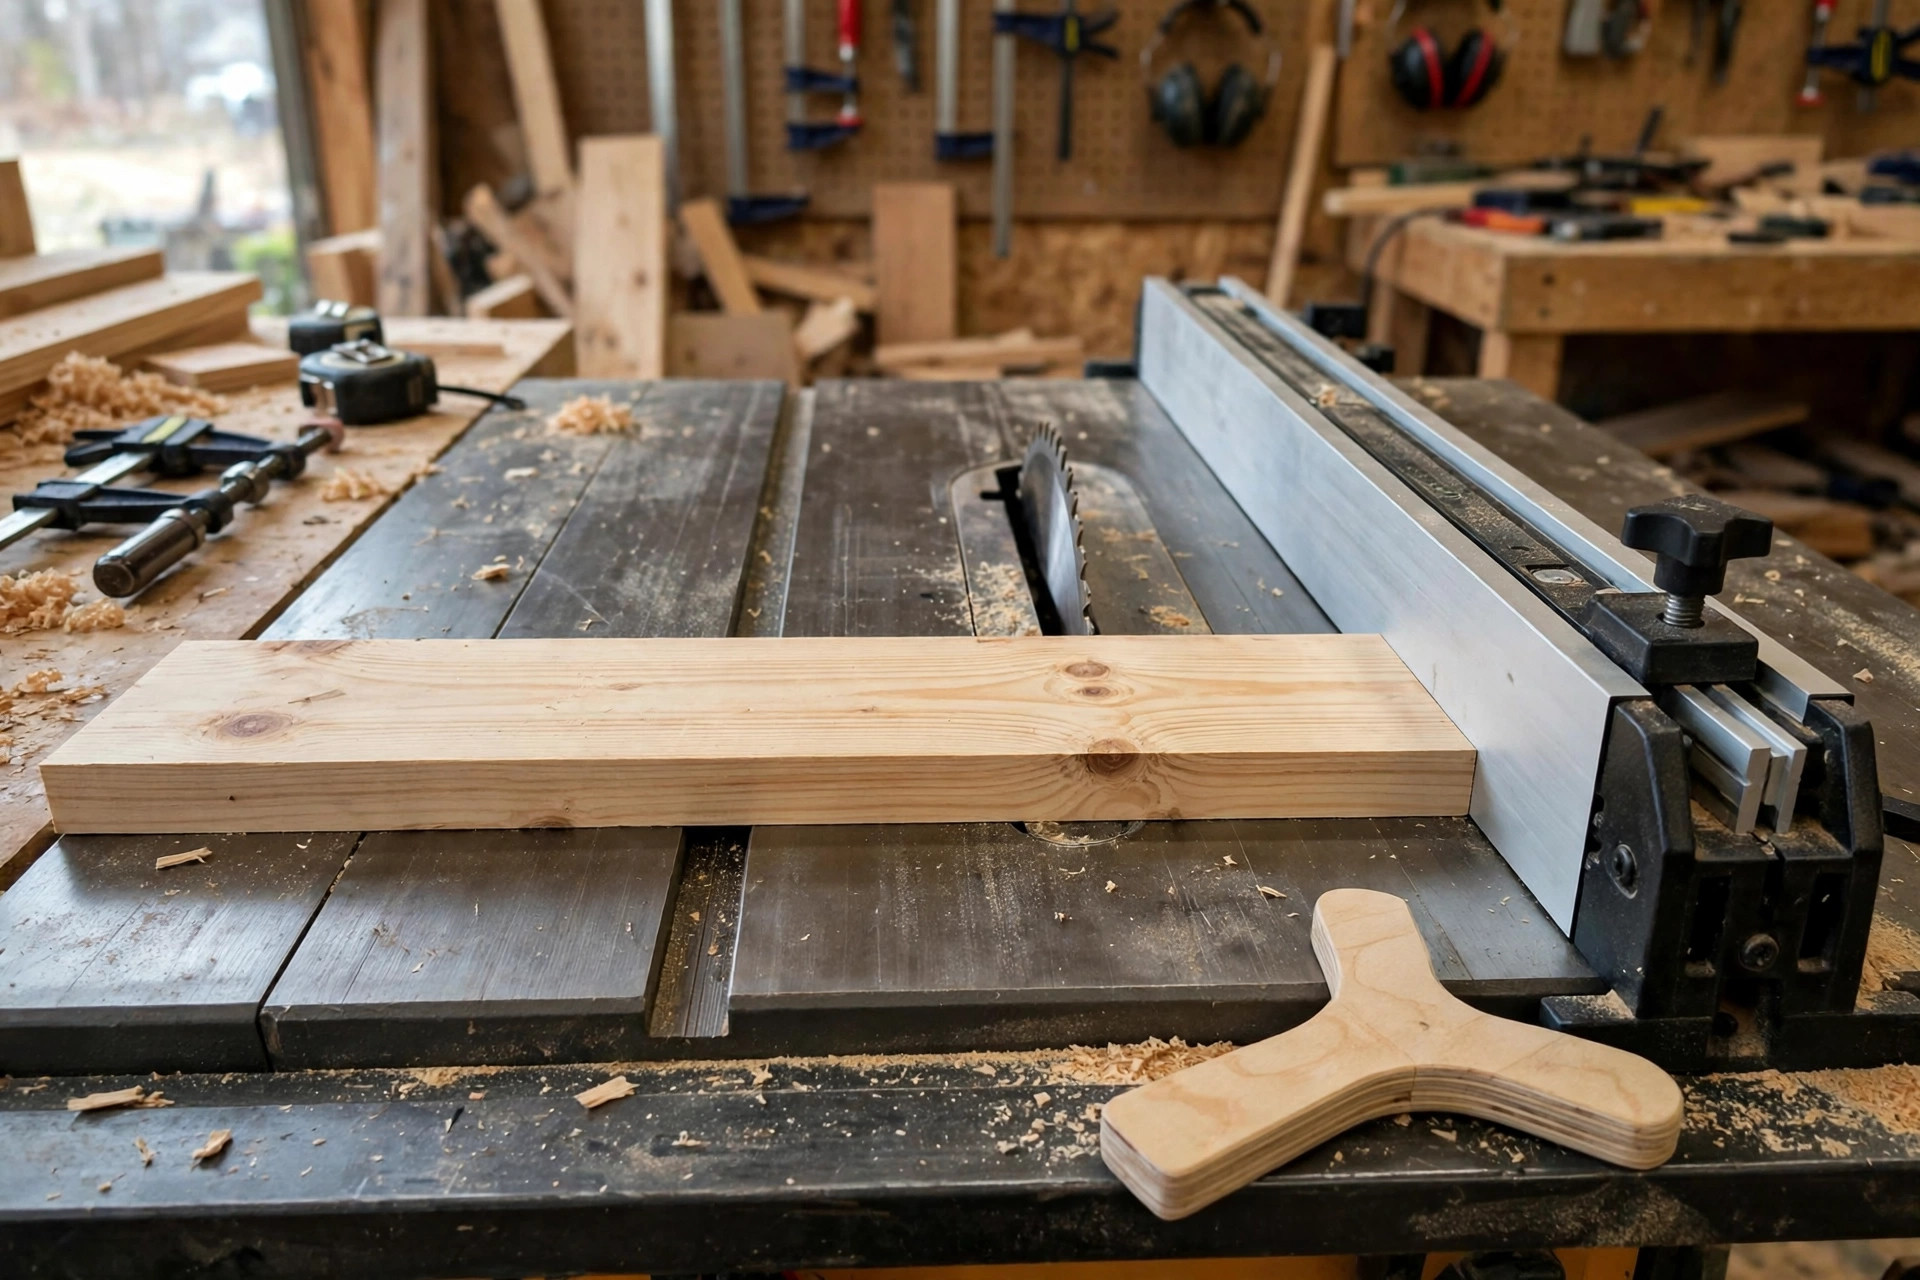
Here is your first cut, broken into steps you can follow exactly. Use a straight, flat pine board about a metre long and 150 mm wide, and plan to rip it to 100 mm. Work with the saw unplugged until the setup steps are done.
- Check the board. Sight along both edges. If the board is bowed, twisted, or cupped, do not rip it on the table saw yet — a board that does not sit flat will rock during the cut. Choose a flatter board for your first rip and save the tricky board for later.
- Set the fence. Unlock the fence, slide it until the scale reads 100 mm, and lock it. Measure from the fence to the blade with a tape measure to confirm: the distance at the front of the blade and at the back should both be 100 mm. This is the fence check you will do every time you move the fence, and it takes ten seconds.
- Set the blade height. Raise the blade so its top sits about 6 mm (a quarter inch) above the top of the board. A blade set far too high exposes more teeth than necessary and increases risk; a blade set just above the board cuts cleanly and safely. This is one of the most important habits in table saw work.
- Check the riving knife and guard. Confirm the riving knife is in place behind the blade and the blade guard is fitted if you are using it. For a first through cut, keep both on. Do not remove them because they feel inconvenient.
- Stand correctly. Stand slightly to the left of the blade’s path — not directly behind it — with your feet balanced and your body clear of the line the board will travel. If kickback ever happens, it travels straight back along that line, and you do not want to be standing in it.
- Start the saw and wait. Switch on and let the blade reach full speed before touching the board to it. A blade still spinning up will grab and burn rather than cut.
- Feed with a push stick. Push the board forward with steady, even pressure, keeping it tight against the fence with your left hand (well clear of the blade) and feeding with your right hand using a push stick once your hand approaches the blade. Never let your fingers come within 150 mm of the blade. Keep the feed rate steady: too fast strains the motor and burns the edge, too slow scorches the wood.
- Finish the cut safely. As the board’s end passes the blade, keep pushing with the push stick until the board is fully past the blade and clear of it. Do not reach over or behind the blade to grab the offcut. Switch the saw off, wait for the blade to stop completely, and only then collect your pieces.
- Measure the result. Check the ripped board’s width at both ends and in the middle. On a well-set saw with a good fence, all three measurements should match. If they do, your fence is true, and you have just made a furniture-grade cut. If they do not, re-check the fence parallelism before cutting again.
Repeat this cut on scrap a few times, at different widths, until setting the fence and feeding the board feel routine. That routine is the whole skill. Everything after this — bevels, crosscuts, dados, joinery — builds on a rip you can trust, and a rip you can trust starts with a fence you can trust.
Safety: Riving Knife, Push Sticks, and Kickback
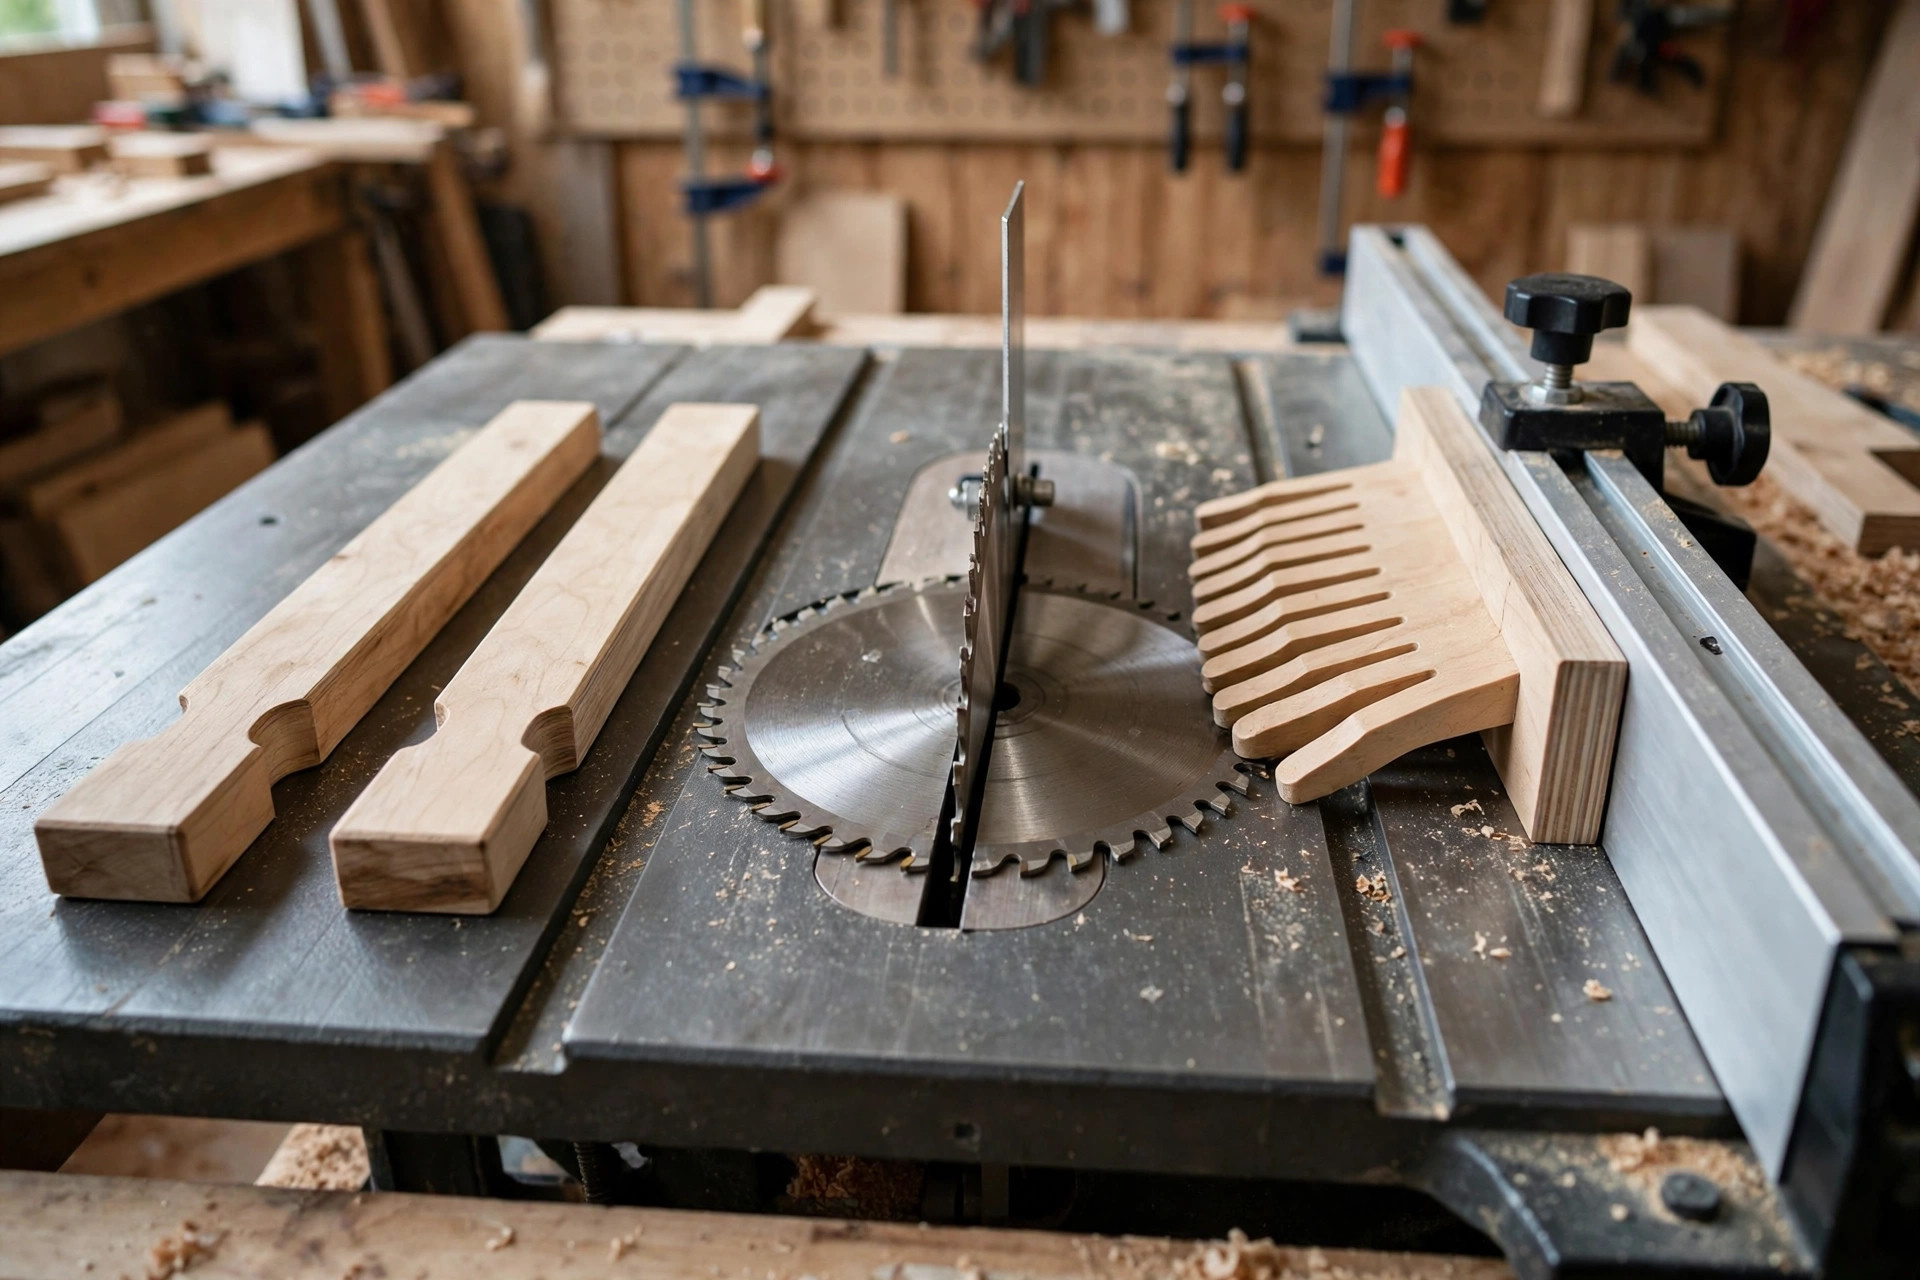
Generic roundups underplay table saw safety, and that is a dangerous omission for beginners, so this section is deliberately thorough. The central danger is kickback: the board is thrown back toward you, violently and without warning. It happens when the board binds on the blade — most often because the kerf (the slot the blade cuts) closes up behind the blade as internal stresses in the wood release, pinching the blade, or because the board twists away from the fence and catches the back teeth of the blade, which are rising toward you. Kickback can happen in a fraction of a second, and it can throw a board with enough force to cause serious injury. Almost all kickback is preventable, and the prevention rests on three things: the riving knife, the fence, and your hands’ position.
The riving knife is the thin metal plate that sits directly behind the blade, in the same plane. Its job is simple and vital: it keeps the kerf open behind the blade so the two sides of the cut cannot close onto the blade and pinch it. That single function prevents the most common cause of kickback. This is why the riving knife must stay on for every through cut, and why removing it “for convenience” is the most dangerous shortcut a beginner can take. Older saws had splitters that did a similar job but had to be removed for non-through cuts; a modern riving knife rises and falls with the blade and stays in place for through cuts, so there is no reason to remove it. If your saw’s riving knife is bent, missing, or does not align with the blade, fix or replace it before cutting anything. Before every session, confirm it is there, straight, and aligned — the same habit as checking the fence.
Push sticks and push blocks are the second layer. They keep your hands away from the blade when the board gets narrow or the cut gets near the end. Use a push stick whenever your hand would come within 150 mm of the blade, and use a push block — a wider, flat-bottomed block with a handle — for narrow rips, where a thin push stick alone does not give enough control. Keep several push sticks by the saw, not in a drawer across the workshop, because a push stick you have to go and find is a push stick you will skip. A featherboard — a small board with flexible fingers that presses the workpiece against the fence — is the third layer for repeated rips: it holds the board tight to the fence before the blade, so the board cannot drift, and it resists kickback by gripping if the board tries to move backwards. For a beginner doing repeated rips, a featherboard is one of the best small purchases you can make.
The rest of the safety picture is habit, and it is worth stating plainly because beginners often learn it only after a scare. Always use the blade guard where it does not prevent the cut. Never reach over or behind a spinning blade. Never cut freehand — the board must always be guided by the fence or the mitre gauge, never by hand alone, because an unguided board will twist and kick. Never cut a board that is warped, cupped, or twisted. Never stand directly behind the blade. Always wait for the blade to stop before reaching for offcuts. Always unplug the saw, or remove the battery on a cordless model, before changing a blade or clearing a jam. And run through the full safety checklist in our guide to woodworking safety tips for beginners before your first session — it covers eye and hearing protection, dust masks, clothing, and workshop layout in one place, and it is worth reading before you switch the saw on for the first time.
One more point that generic guides rarely make: a table saw is not the tool for every cut. Do not use it to cut a full plywood sheet alone — break the sheet down with a circular saw first, then finish pieces on the table saw. Do not cut very small pieces on it; small offcuts near the blade are hard to control and easy to kick. Do not cut round stock, like dowels, without a proper jig, because round stock rolls into the blade. Knowing what not to cut on a table saw is as important as knowing how to cut on one, and it is what separates a careful beginner from a lucky one.
Common Beginner Mistakes (and How to Fix Them)
Most beginner table saw problems trace back to a small set of errors, and all of them have simple fixes. The most common is trusting the fence scale without measuring. The scale is a guide, not a guarantee; always verify with a tape measure after moving the fence, especially on a new saw. Next is setting the blade too high. A blade towering above the board looks powerful and feels wrong for a reason — it exposes more teeth, increases kickback risk, and tears the top edge. Set it a quarter inch above the board, every time. Third is feeding too fast or too slow. A fast feed strains the motor and leaves a rough, sometimes burnt edge; a slow feed scorches the wood and dulls the blade. The right feed rate feels unhurried and lets the blade cut without labouring; you will recognise it after a few practice cuts on scrap.
Other mistakes are about the board and the setup. Ripping a warped board and wondering why it binds is a board problem, not a saw problem — choose flat stock, or flatten it first. Cutting without an outfeed support and watching a long board tip off the back of the saw is a setup problem — a roller stand or a helper fixes it instantly. Removing the riving knife because it “gets in the way” is the most dangerous mistake on this list, and the fix is simply to leave it on. Forgetting to check fence parallelism after moving the fence is the quietest mistake — nothing goes dramatically wrong, but every board comes out slightly tapered, and joints slowly stop fitting. And buying the cheapest saw without checking the fence is the mistake this whole guide exists to prevent: a saw is only as good as its fence, and a fence that wanders will cost you more in wasted wood and frustration than the price difference to a better saw.
Finally, do not buy your way out of practice. A premium fence, a featherboard set, and a drawer of blades will not replace an hour of practice cuts on scrap pine. Before your first real project, rip a dozen boards at different widths, crosscut a few with the mitre gauge, and cut a 45-degree bevel. Measure every piece, look at the edges, and adjust your feed rate and fence checks. That hour teaches more than any review, and it builds the calm, methodical rhythm that makes table saw work enjoyable instead of frightening.
First Projects to Build With Your New Table Saw
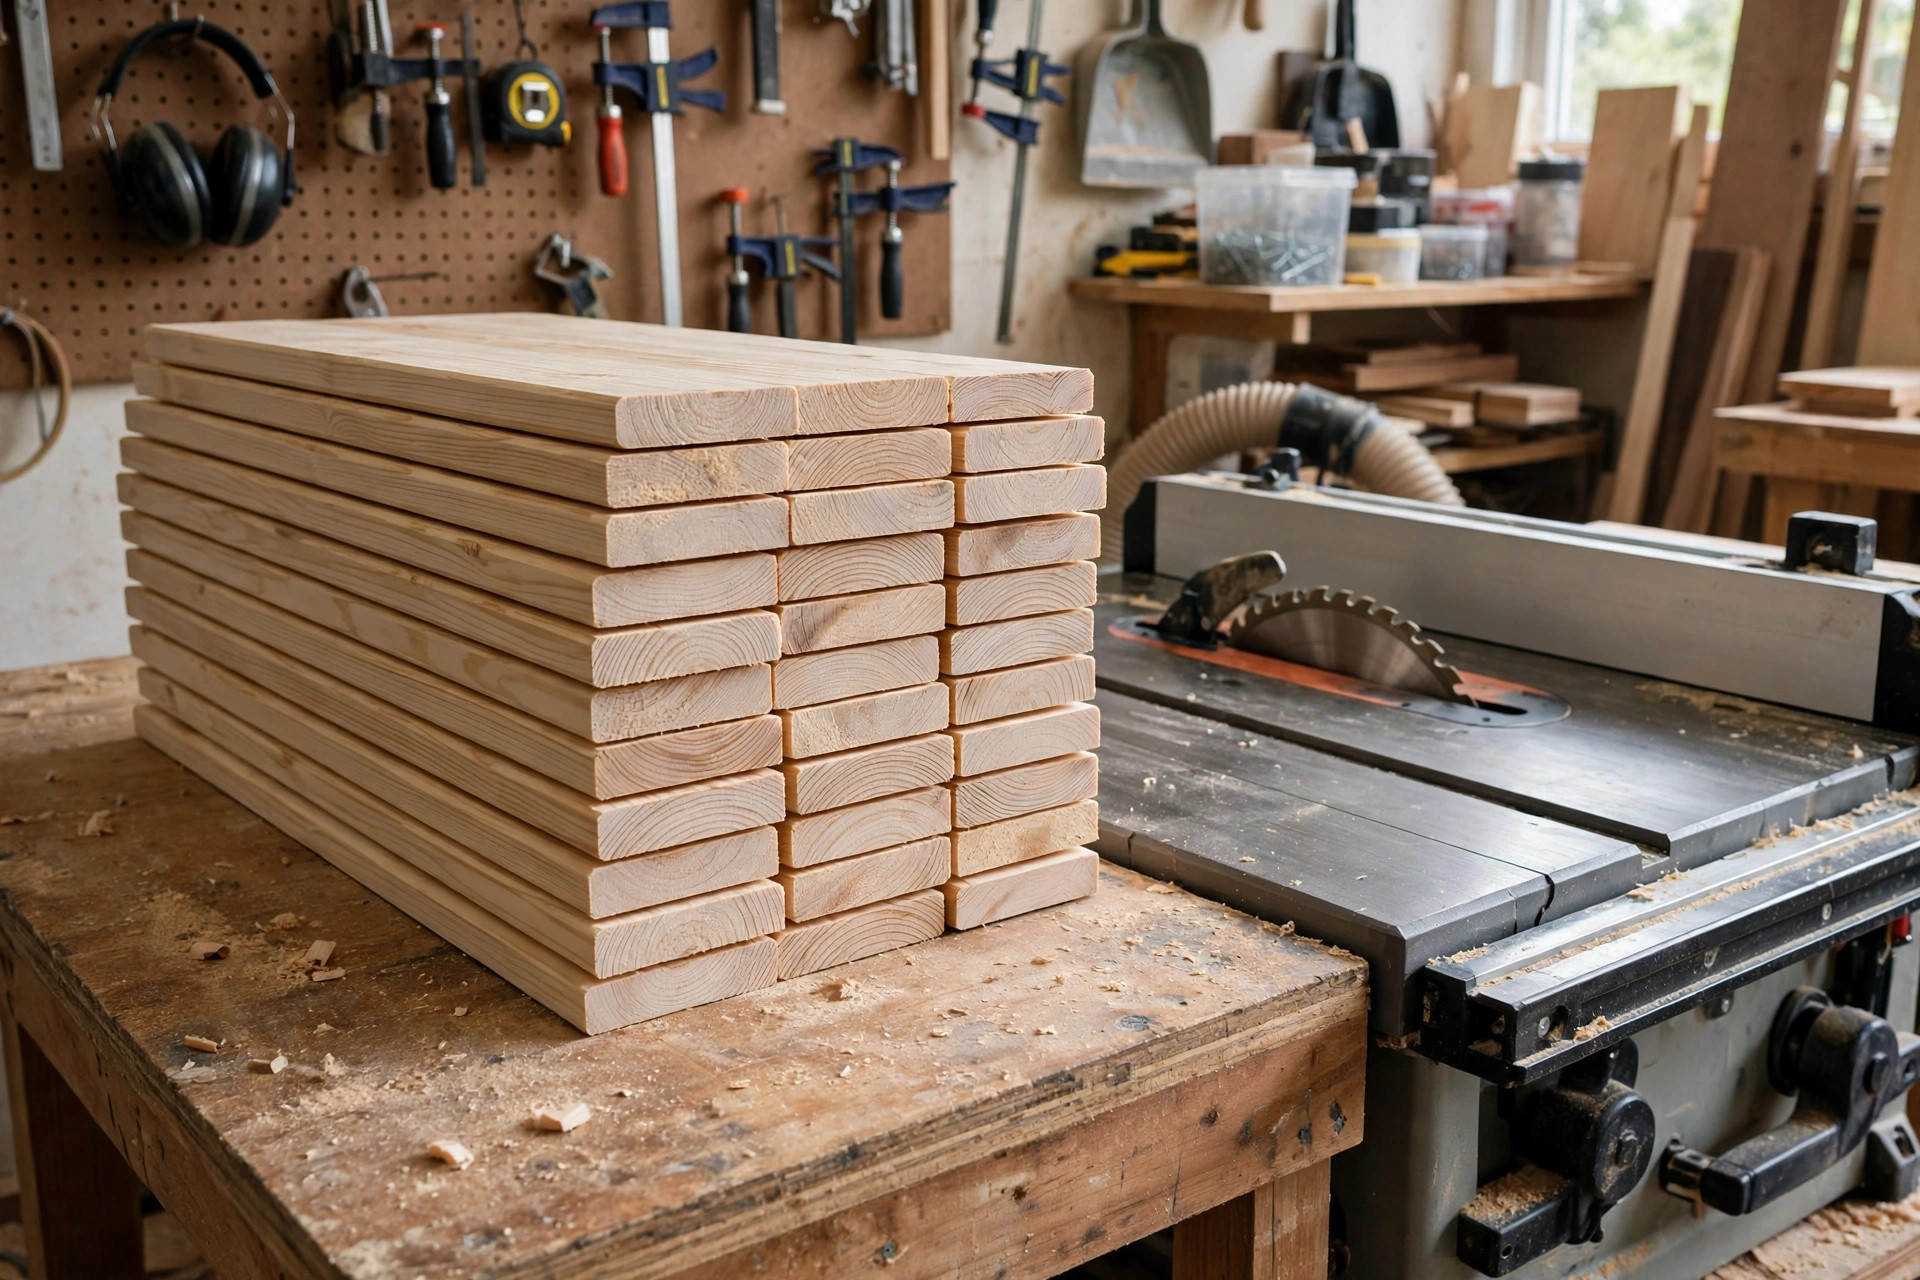
Once you can rip consistently, a table saw opens up the projects that define beginner woodworking. Start with a simple bookshelf or a storage crate: both are mostly straight rips and crosscuts, they forgive small errors, and they teach measuring, assembly, and finishing in one weekend. A wall shelf with a face frame is the natural next step, because the table saw’s repeatability shines when you need six identical shelf boards. After that, try a small side table or a picture frame — projects where identical widths and square cuts are not just nice but necessary, and where you will feel the benefit of a good fence in every joint.
For project ideas that turn those skills into things you can sell, start with our pillar guide to easy woodworking projects for beginners that sell. Shelves, crates, small tables, and plant stands are all table-saw-friendly projects, and buyers notice straight edges, consistent widths, and square assembly far more than they notice the brand of saw that made them. Cut all your pieces first, label them with pencil, dry-fit before gluing, and sand edges lightly before assembly. That order prevents the common beginner trap of assembling first and discovering a piece is a fraction off. Keep a simple rule for project choice: if a project needs ten cuts you have never tried, simplify it; if it needs one new cut plus nine you know, build it. That ratio keeps learning steady without turning a weekend project into a frustration.
As your confidence grows, the table saw will teach you joinery: a dado stack or repeated passes for grooves, a simple crosscut sled for perfect 90-degree cuts, a taper jig for table legs. Each jig adds one new capability while reusing the rip skill you have already mastered. But none of that is needed on day one. Day one needs a flat board, a true fence, a sharp blade, a push stick, and the patience to measure twice. Get those right and the rest follows.
Frequently Asked Questions
What is the best table saw for beginners woodworking?
For most beginners, a compact or jobsite saw with a 10-inch blade and a rack-and-pinion fence is the best first buy, because the fence locks parallel and repeats the same width every time. That consistency matters more than motor size or brand.
Why is the fence so important on a beginner table saw?
Because the fence controls the cut width from the front of the blade to the back. A fence that locks out of parallel produces tapered boards, burnt edges, and kickback risk, while a fence that locks true produces identical boards every time.
What is a rack-and-pinion fence?
It is a fence that moves on a toothed rail using a gear, so it stays square and parallel as it slides and locks in the same position repeatedly. It is the most beginner-friendly fence design because it removes the fiddly alignment step of clamp-style fences.
How much rip capacity does a beginner need?
A rip capacity of 600 mm (24 inches) or more covers most beginner projects, including shelves, crates, and small tables. Break down full plywood sheets with a circular saw first, then finish pieces to exact width on the table saw.
What is a riving knife and why must it stay on?
A riving knife is a thin plate behind the blade that keeps the cut open so the wood cannot close onto the blade and pinch it. It prevents the most common cause of kickback and must stay on for every through cut.
How do I avoid kickback on a table saw?
Keep the riving knife on, keep the fence parallel to the blade, use flat stock, use a push stick and a featherboard for narrow or repeated rips, stand to the side of the blade path, and never cut freehand or reach behind a spinning blade.
Final Verdict
The best table saw for beginners is not the most powerful saw, and it is not the one with the longest feature list. It is the saw whose fence locks parallel every time, whose rip capacity covers your projects, and whose riving knife stays on for every cut — used with a sharp blade, a push stick, and the patient habit of measuring after every fence move. A rack-and-pinion fence is the single feature most worth paying for, because it turns a table saw from a tool you argue with into a tool you trust. Buy the saw, check the fence, practise on scrap, and then build something you are proud of. That first board that comes out exactly the width you set, at both ends and in the middle, is the moment woodworking stops feeling intimidating and starts feeling like a craft you own.


