
Joinery is the quiet skill behind every piece of furniture that still stands straight after ten years. You can buy the nicest lumber and own a garage full of tools, but if the corners are weak, the project will wobble, rack, or fall apart the first time someone leans on it. The good news is that you do not need to master every joint at once. A handful of simple, forgiving joints will carry you through most of your early builds, and the fancy ones can wait until your sawing and measuring are dialed in.
This guide walks you through the 12 most useful woodworking joinery types for beginners, ordered from the simplest to the most demanding. For every joint you will learn what it is, how strong it really is, how hard it is to cut, exactly which tools you need, and when to reach for it. At the end you will find a when-to-use chart that lets you pick the right joint in seconds, plus a step-by-step learning path so you always know what to practice next. Pair this knowledge with a few easy woodworking projects for beginners that sell, and you will have both the skills and the project ideas to keep your workshop busy all year.
1. Butt Joint
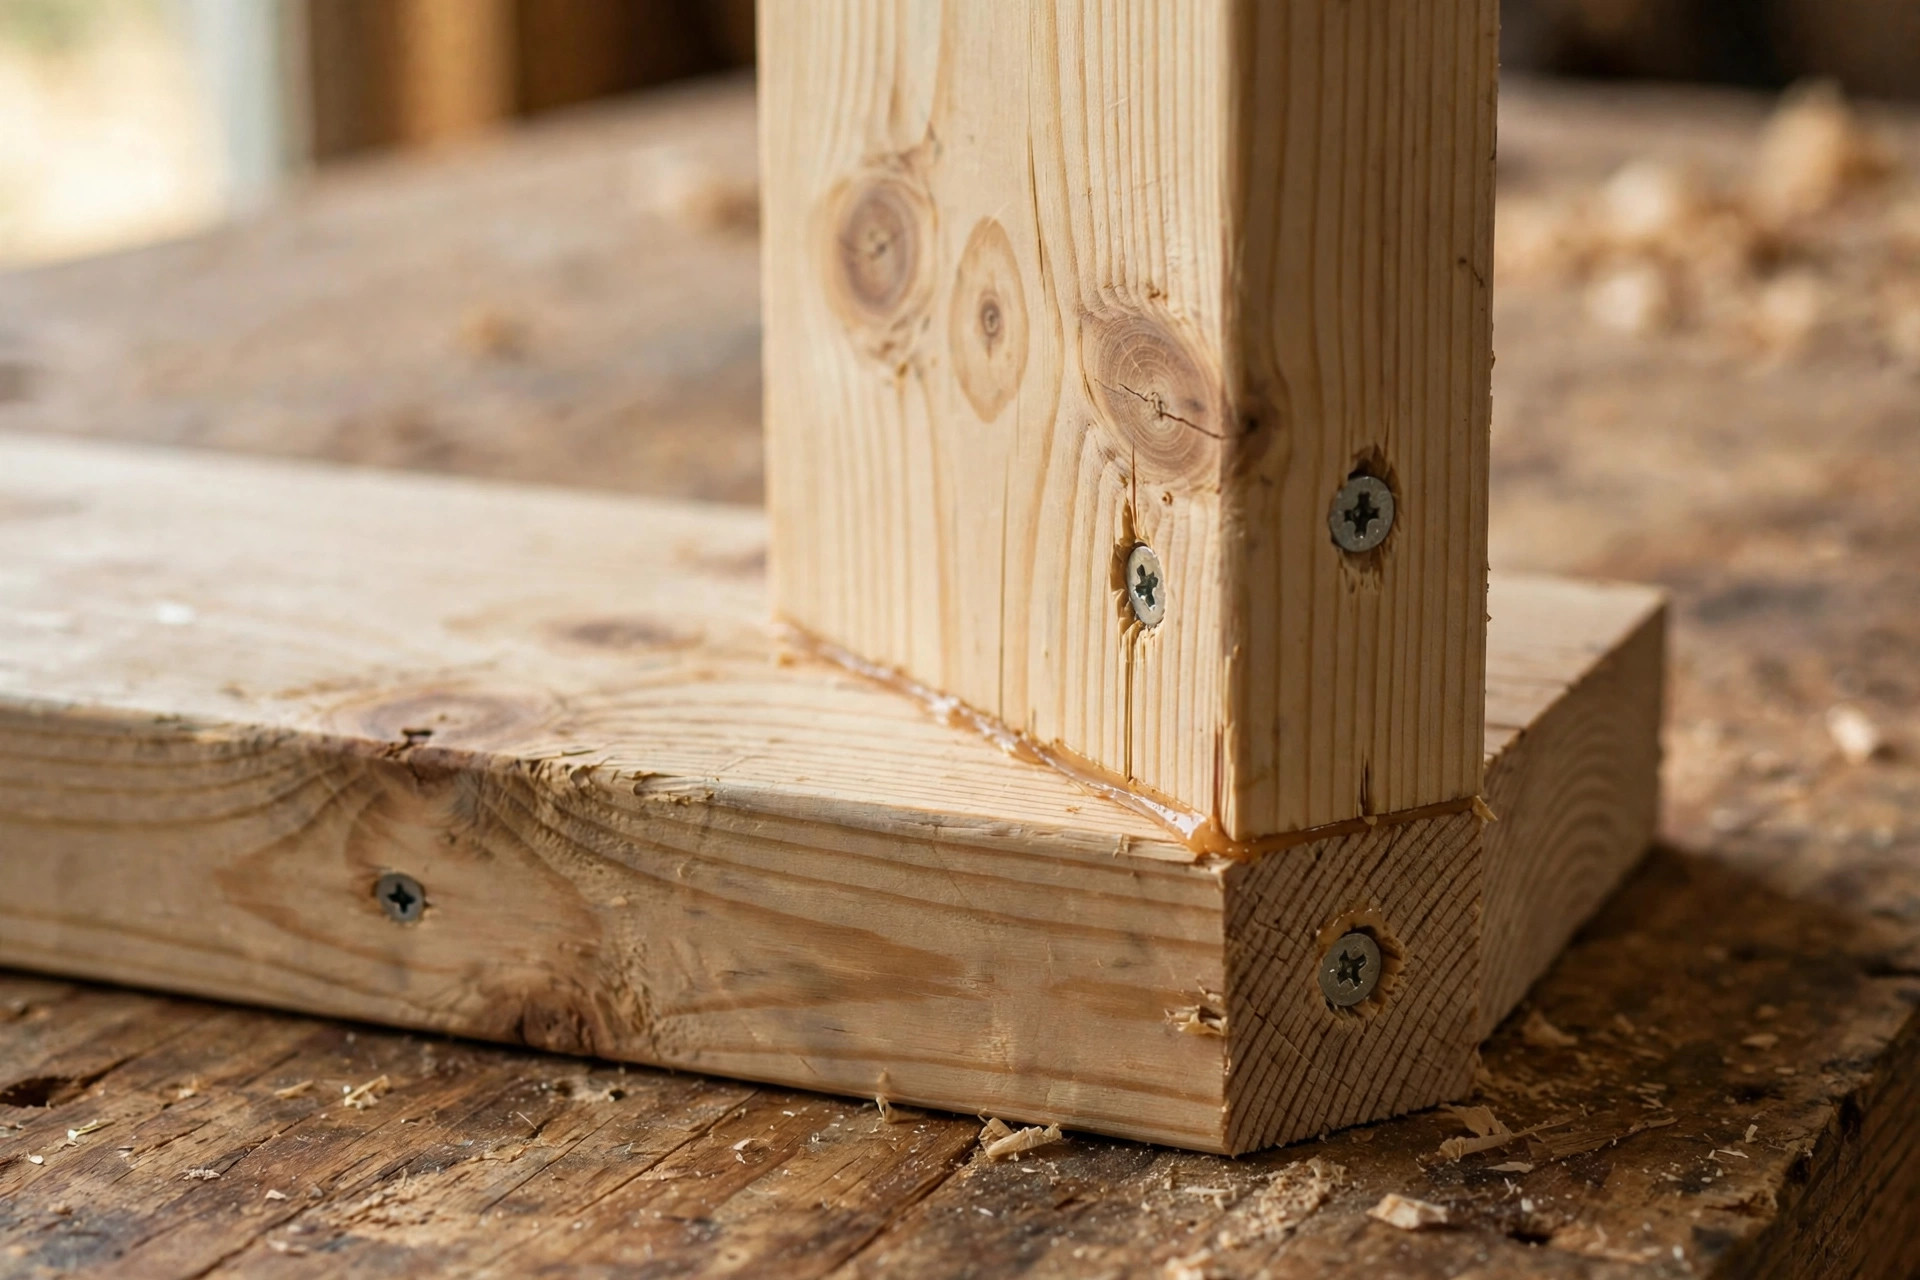
The butt joint is the simplest joint in all of woodworking: two boards meet end-to-face or end-to-end, and they are held together with glue, screws, nails, or dowels. There is nothing to cut except square ends, which makes it the natural first joint for anyone picking up a saw.
Strength: Low on its own. Gluing end grain to face grain makes a weak bond because the open end grain soaks up glue like a straw. Reinforced with screws or nails plus glue, it becomes perfectly serviceable for light-duty work.
Difficulty: Beginner. If you can cut a board square and drive a screw, you can make a butt joint.
Tools needed: A hand saw, circular saw, or miter saw for square cuts, a drill/driver, wood glue, clamps, and screws or nails.
When to use it: Shop jigs, utility boxes, simple picture frames, lightweight shelving, and practice pieces. It is also the joint you fall back on when a joint will be hidden, painted, or reinforced by other parts of the build.
Beginner tip: Always drill pilot holes before driving screws near the end of a board, especially in softwoods like pine, or the board will split. Apply glue to both faces, clamp the pieces square, and then drive the fasteners while the glue is still wet. That combination of glue plus screws is far stronger than either one alone.
2. Miter Joint
A miter joint is like a butt joint with style. Instead of meeting square, the two boards are cut at complementary angles, usually 45 degrees each, so they form a clean 90-degree corner. The big payoff is appearance: the end grain is hidden and the wood grain appears to wrap continuously around the corner.
Strength: Low to medium. A miter is still end grain meeting end grain, so glue alone will not hold it under stress. It must be reinforced with splines, biscuits, dowels, or pin nails to survive real use.
Difficulty: Beginner to intermediate. Cutting the joint is easy; cutting two miters that close with no gap is the real skill, and it demands an accurately set saw.
Tools needed: A miter saw or miter box, clamps (band clamps are ideal for frames), wood glue, and your chosen reinforcement.
When to use it: Picture frames, decorative trim, box corners, and any visible corner where you want a crisp, professional look instead of exposed end grain.
Beginner tip: Cut your miters a hair long, then sneak up on the perfect fit with light trimming cuts. Always test the corner dry before reaching for the glue, and check the diagonal measurements of a frame to confirm it is square before the glue sets.
3. Lap Joint (Half-Lap)
In a half-lap joint, each board gives up half of its thickness in the overlapping area, and the two thinned sections nest together so the faces sit flush. It is the joint you see holding together old screen doors, garden gates, and countless shop fixtures.
Strength: Medium. Because the two boards share a broad area of face grain, the glue bond is far stronger than a butt joint, and the interlocking shoulders resist twisting.
Difficulty: Beginner. Marking and cutting the notches is straightforward hand-tool work.
Tools needed: A saw, a sharp chisel, a marking gauge or knife, clamps, and glue. A router with a straight bit speeds up the waste removal.
When to use it: Frames, table aprons, gate and door braces, workbench stretchers, and any crossed members where you want the faces flush and the connection stronger than a plain butt joint.
Beginner tip: Mark the shoulder lines with a marking knife rather than a pencil. The knife line gives your chisel a crisp edge to register against, which makes paring to the line dramatically easier and cleaner.
4. Pocket-Hole Joint
The pocket-hole joint is the beginner’s secret weapon. A special stepped drill bit bores an angled pocket into the back face of one board, and a self-tapping pocket screw pulls the two pieces together from the inside. From the front, the joint is nearly invisible. It is fast, forgiving, and surprisingly strong.
Strength: Medium. The screw acts like a built-in clamp, pulling the joint tight and holding it there while the glue cures. It will not match a dovetail, but it easily handles the loads in cabinets and light furniture.
Difficulty: Beginner. The jig controls the drilling angle and depth, so repeatable results are almost automatic.
Tools needed: A pocket-hole jig, a drill, pocket-hole screws, clamps, and wood glue.
When to use it: Cabinet face frames, carcass assembly, attaching tabletops to aprons, quick furniture builds, and repairs where you need strength without visible fasteners.
Beginner tip: Use coarse-thread screws for softwood and plywood, and fine-thread screws for hardwoods. Always clamp the pieces in position before driving the screw, because the screw’s angle can shift the parts as it pulls them together. For a deeper comparison of the two most popular beginner-friendly mechanical joints, read our guide on pocket-hole joint vs dowel joint strength.
5. Dowel Joint
A dowel joint uses short wooden pins seated in matching holes to align and strengthen the connection between two boards. Glue on the dowels and in the holes swells the wood slightly as it cures, creating a tight mechanical bond that is completely hidden inside the finished piece.
Strength: Medium. Well-fitted dowels resist shear forces nicely, which makes them dependable for frames and panel glue-ups, though they cannot match the interlocking grip of a dovetail or mortise-and-tenon.
Difficulty: Beginner to intermediate. Drilling the holes is easy; getting the holes on both pieces to line up perfectly is the challenge.
Tools needed: A drill, a doweling jig or dowel centers, clamps, wood glue, and dowel pins.
When to use it: Edge-to-edge panel glue-ups, chair and table frames, reinforcing butt joints, and furniture you may want to knock down and reassemble later.
Beginner tip: Drill a hair deeper than half the dowel length so excess glue has somewhere to go instead of hydraulic-locking the dowel halfway in. Always do a dry assembly first to confirm every pin finds its hole before any glue touches the wood.
6. Biscuit Joint
A biscuit joiner, sometimes called a plate joiner, plunges a small crescent-shaped slot into each board, and a compressed beech biscuit goes into the slots with glue. The biscuit swells as it absorbs the glue, locking the joint and pulling the two faces into perfect alignment during assembly.
Strength: Low to medium. Biscuits are primarily an alignment aid. They add some strength to a glued joint, but you should not rely on them alone for structural connections.
Difficulty: Beginner. Mark a centerline across the joint, cut the slots, add glue, and clamp. It is one of the most forgiving power-tool joints you can learn.
Tools needed: A biscuit (plate) joiner, clamps, and wood glue.
When to use it: Aligning boards during tabletop and panel glue-ups, assembling face frames, reinforcing miter joints, and speeding up carcass assembly where other joinery carries the real load.
Beginner tip: Because the slots are hidden, a biscuit joint is very forgiving of slightly imperfect cuts, but it still needs firm clamping pressure. Wipe away glue squeeze-out with a damp cloth before it skins over, or it will interfere with your finish later.
7. Rabbet Joint
A rabbet is an L-shaped step cut along the edge or end of a board, and the mating piece nests into that step. Compared with a plain butt joint, the rabbet doubles the glue surface, adds a mechanical shoulder that resists racking, and creates a neat, finished-looking edge.
Strength: Medium. The shoulder and extra glue surface make it noticeably stronger and more rigid than a butt joint, especially in boxes and small cabinets.
Difficulty: Beginner to intermediate. Cutting a consistent rabbet takes a steady feed and a well-set fence or bit depth.
Tools needed: A table saw, a router with a rabbeting bit, or a hand saw plus chisel for small work. A dado blade set also cuts rabbets quickly.
When to use it: Cabinet backs, drawer bottoms, box lids, inset back panels, and the glazing channels in picture frames.
Beginner tip: Cut the rabbet before trimming the board to its final width, so any small tear-out at the edge gets removed in the final cut. Test the depth on scrap first; a rabbet that is a fraction too deep leaves a visible gap you cannot easily fix.
8. Dado Joint
A dado is a square-bottomed groove cut across the grain of a board, sized to receive the end of another board. If you have ever wondered how bookshelf shelves stay put without a forest of screws, the answer is usually dados. The shelf end sits in the groove, glued on three sides, and the joint resists both downward load and sideways racking.
Strength: Medium to high. It is one of the strongest simple joints because the groove captures the mating board mechanically, not just with glue.
Difficulty: Beginner to intermediate. The only tricky part is matching the groove width exactly to the thickness of the mating board.
Tools needed: A table saw with a dado blade set, or a router with a straight bit and an edge guide. A chisel cleans up stopped dados that do not run through the board’s edge.
When to use it: Bookshelves, cabinet dividers, drawer dividers, wardrobe interiors, and anywhere a horizontal board must carry weight between two uprights. If you want to put dados to work on a real project right away, follow our step-by-step guide on how to build floating shelves for beginners.
Beginner tip: Sneak up on the groove width with multiple light passes rather than trying to nail it in one cut. Plywood thickness varies from sheet to sheet, so always size the dado from an actual offcut of the material you are using.
9. Box (Finger) Joint
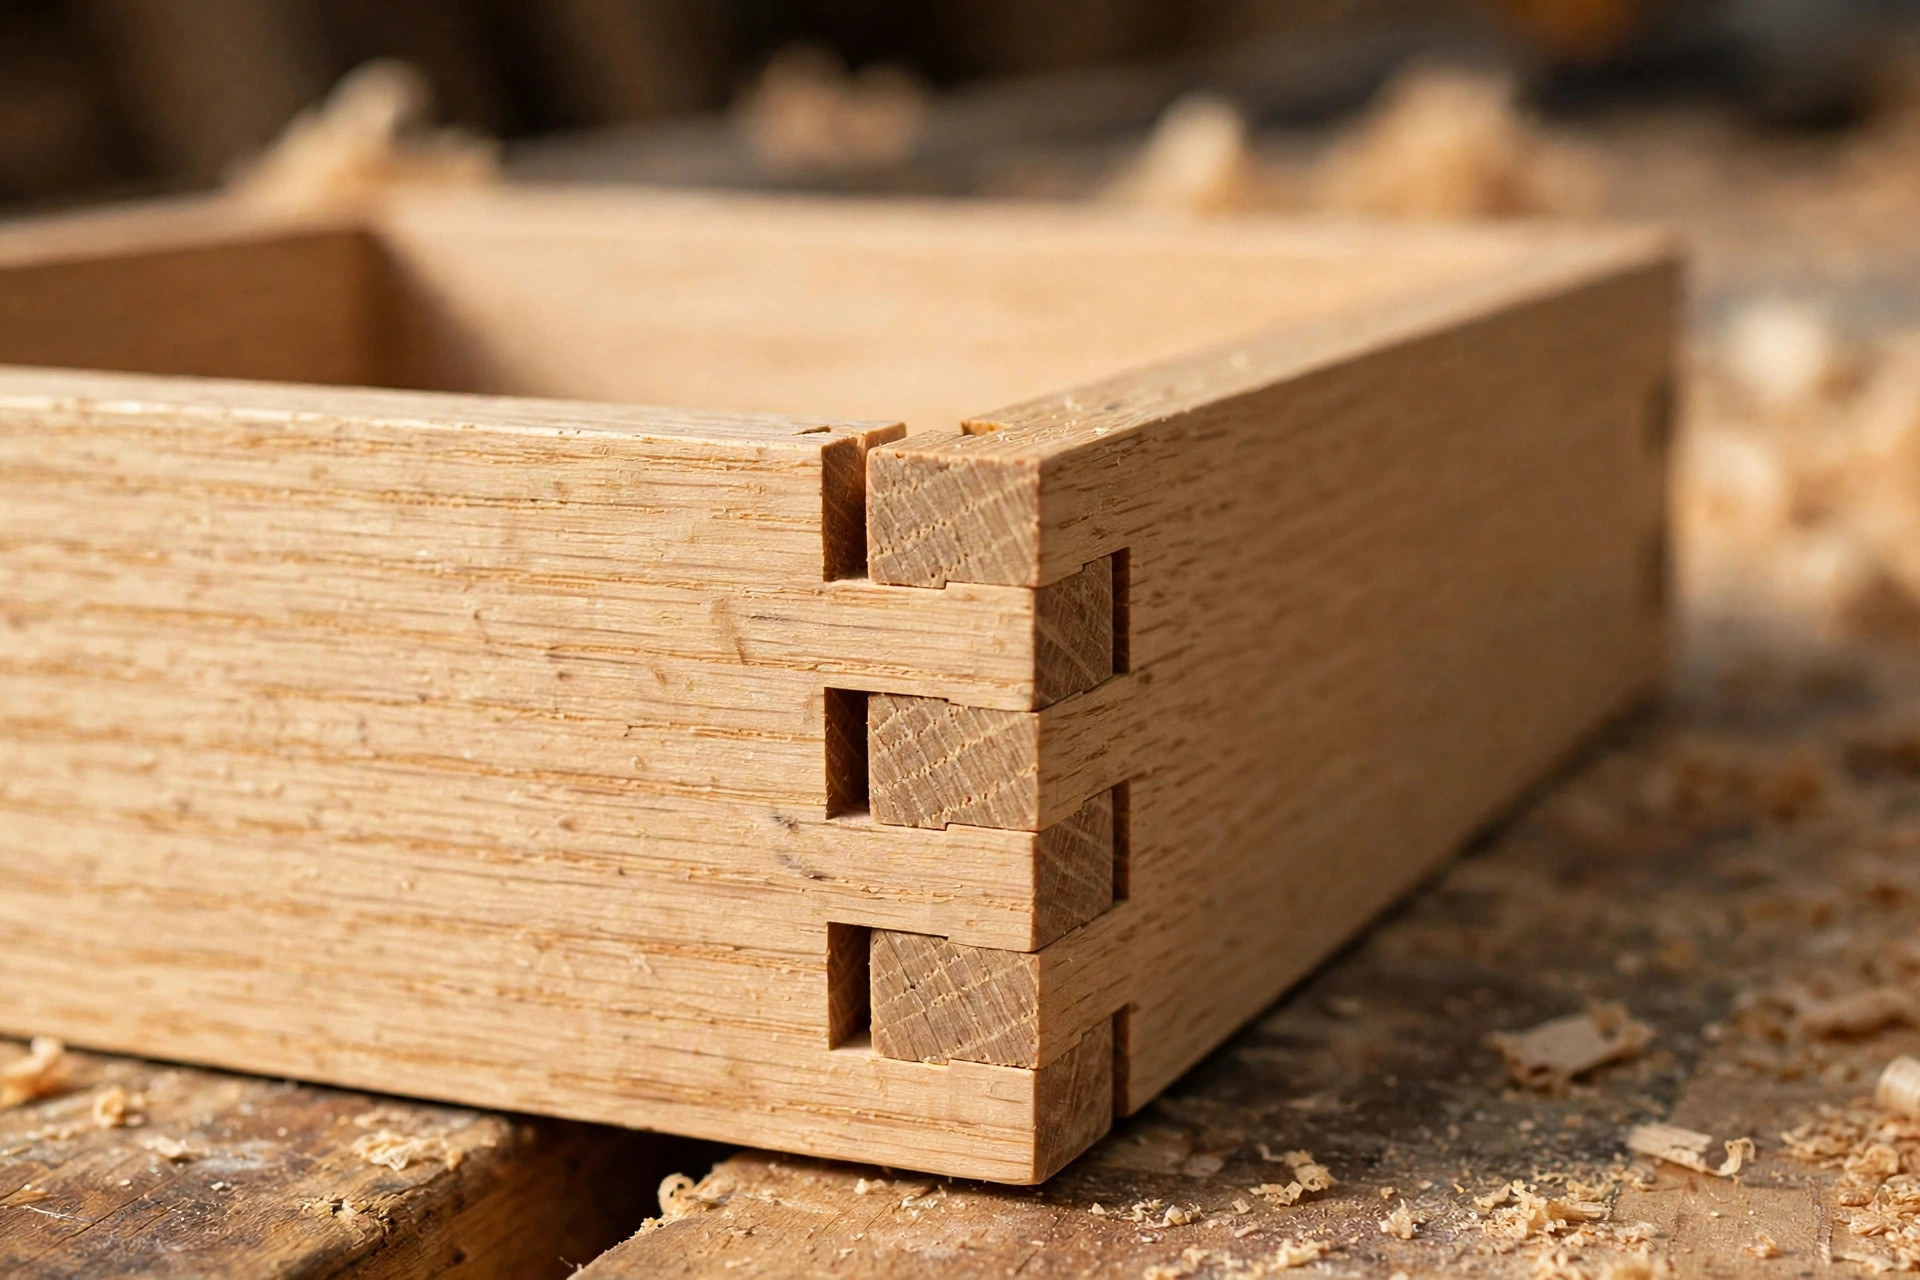
The box joint, also called a finger joint, cuts a series of interlocking square fingers and slots into the ends of two boards. Push them together and the fingers mesh like a zipper, creating a huge amount of glue surface and a corner that looks fantastic. It is like a dovetail’s squarer, more approachable cousin.
Strength: High. All that interlocking face grain makes box joints remarkably strong in boxes and drawers, and they resist twisting far better than butt or miter corners.
Difficulty: Intermediate. Cutting the joint is simple once you build the jig, but the jig itself must be accurate to a fraction of a millimeter, which is a great precision exercise.
Tools needed: A table saw, a shop-made box-joint jig, a dado blade or standard blade, clamps, and glue.
When to use it: Drawers, keepsake boxes, small chests, shop storage, and decorative corners where you want the joinery itself to be part of the look.
Beginner tip: Build the jig once and keep it; it will serve you for years. Always cut a test joint in scrap first and adjust the jig’s key position until the fingers slide together with light hand pressure, snug but not forced.
10. Dovetail Joint
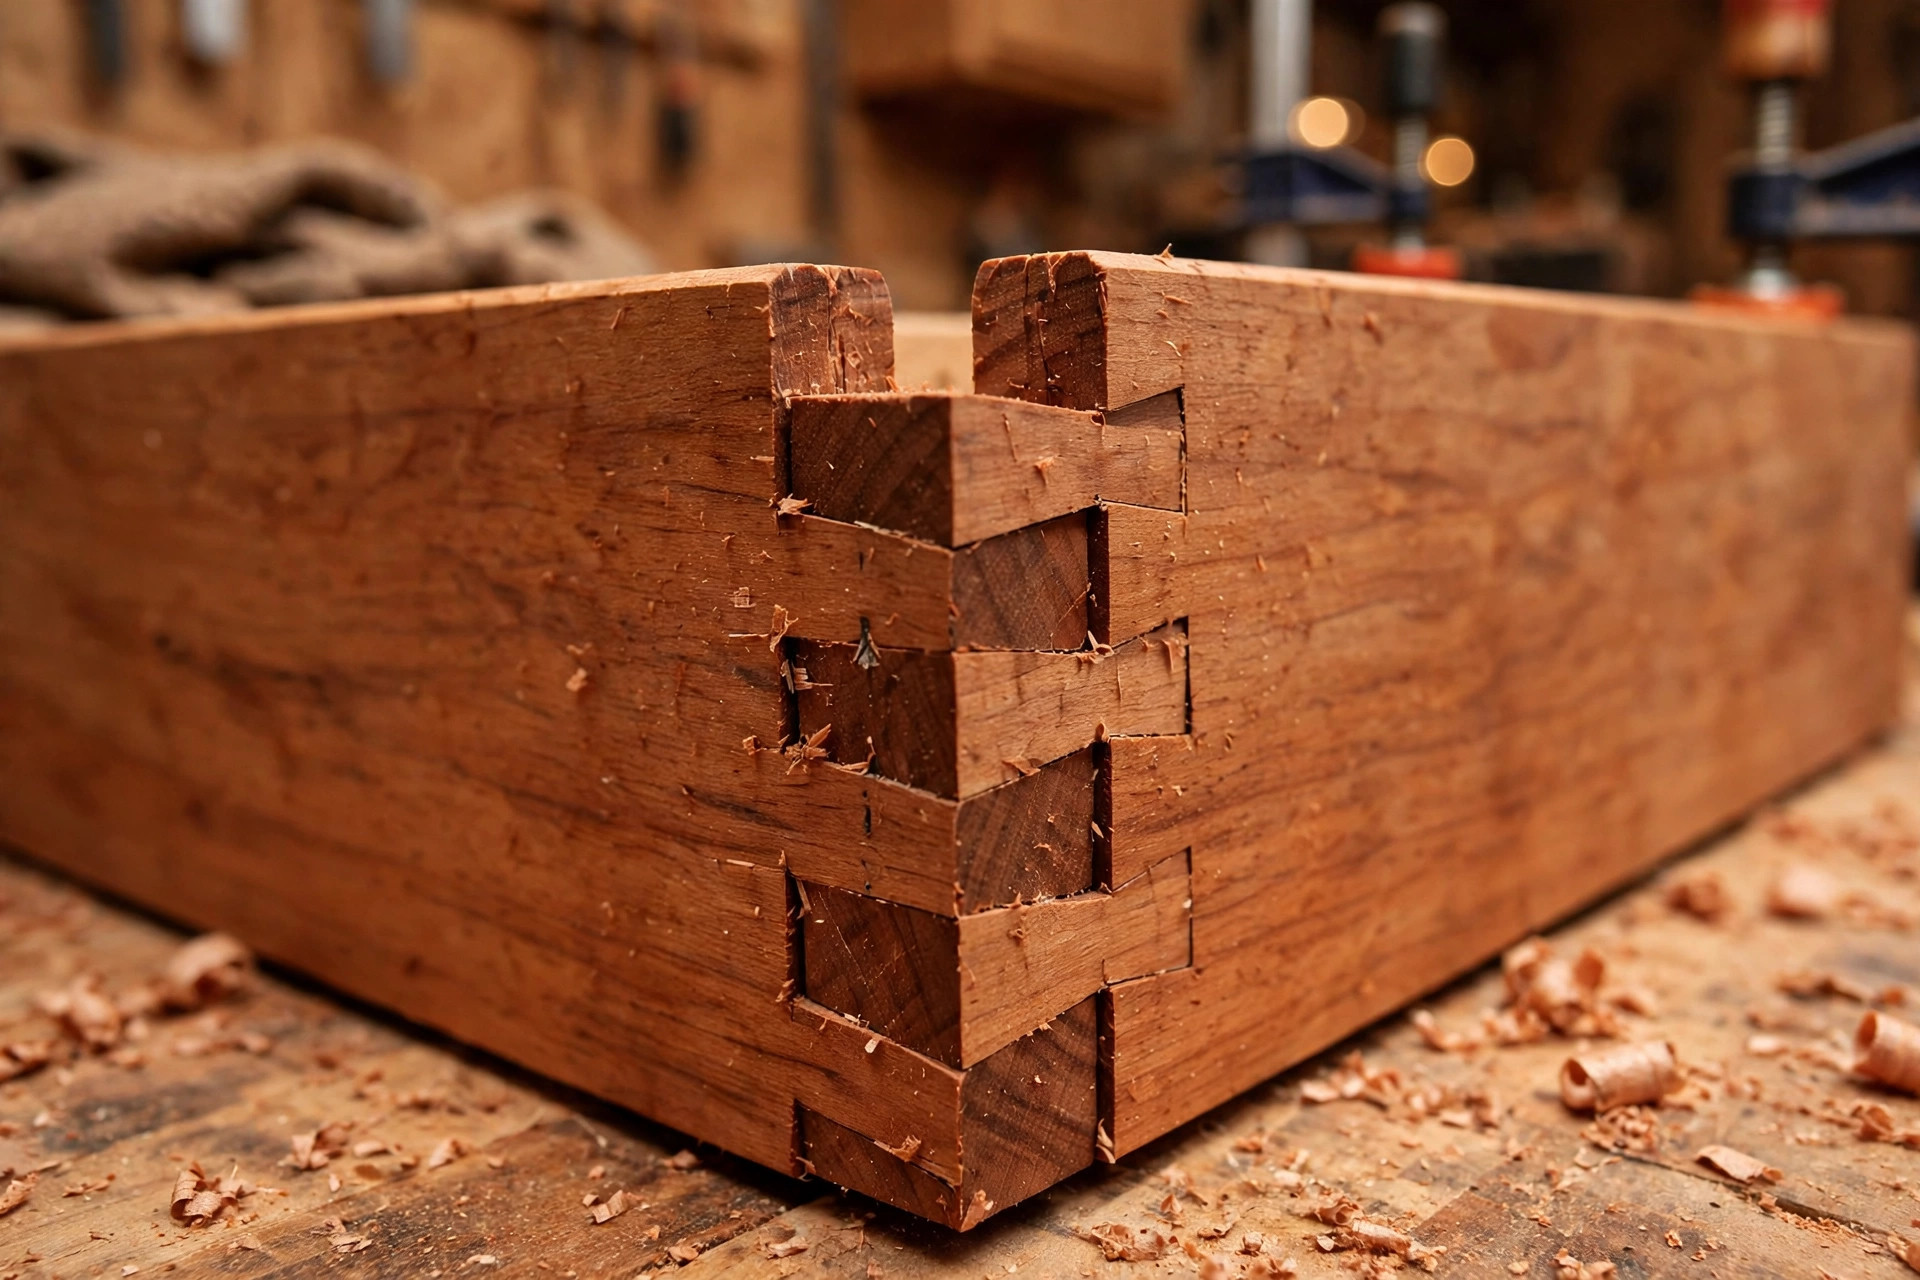
The dovetail is the most famous joint in woodworking for good reason. Its flared, trapezoid-shaped tails and pins interlock so the joint physically cannot pull apart, even before the glue goes on. Through dovetails show the interlocking pattern on both faces, while half-blind dovetails hide it from the front, which is why they are the classic choice for drawer fronts.
Strength: Very high. The mechanical interlock resists tension better than almost any other joint, which is why dovetailed drawers survive a century of daily yanking.
Difficulty: Advanced beginner to intermediate. Hand-cutting dovetails takes practice in sawing and chisel work, but a router with a dovetail jig makes them far more approachable.
Tools needed: A dovetail saw, sharp chisels, a marking gauge, and a mallet for hand-cut work; or a router with a dovetail jig for the power-tool route.
When to use it: Drawers, boxes, chests, and fine furniture where both strength and visible craftsmanship matter.
Beginner tip: Remember the cabinetmaker’s rule: tails on the drawer sides, pins on the drawer front, so daily pulling tightens the joint instead of working it loose. Practice on soft pine before moving to hardwood, and cut your first dovetails oversized so you can pare down to a perfect fit.
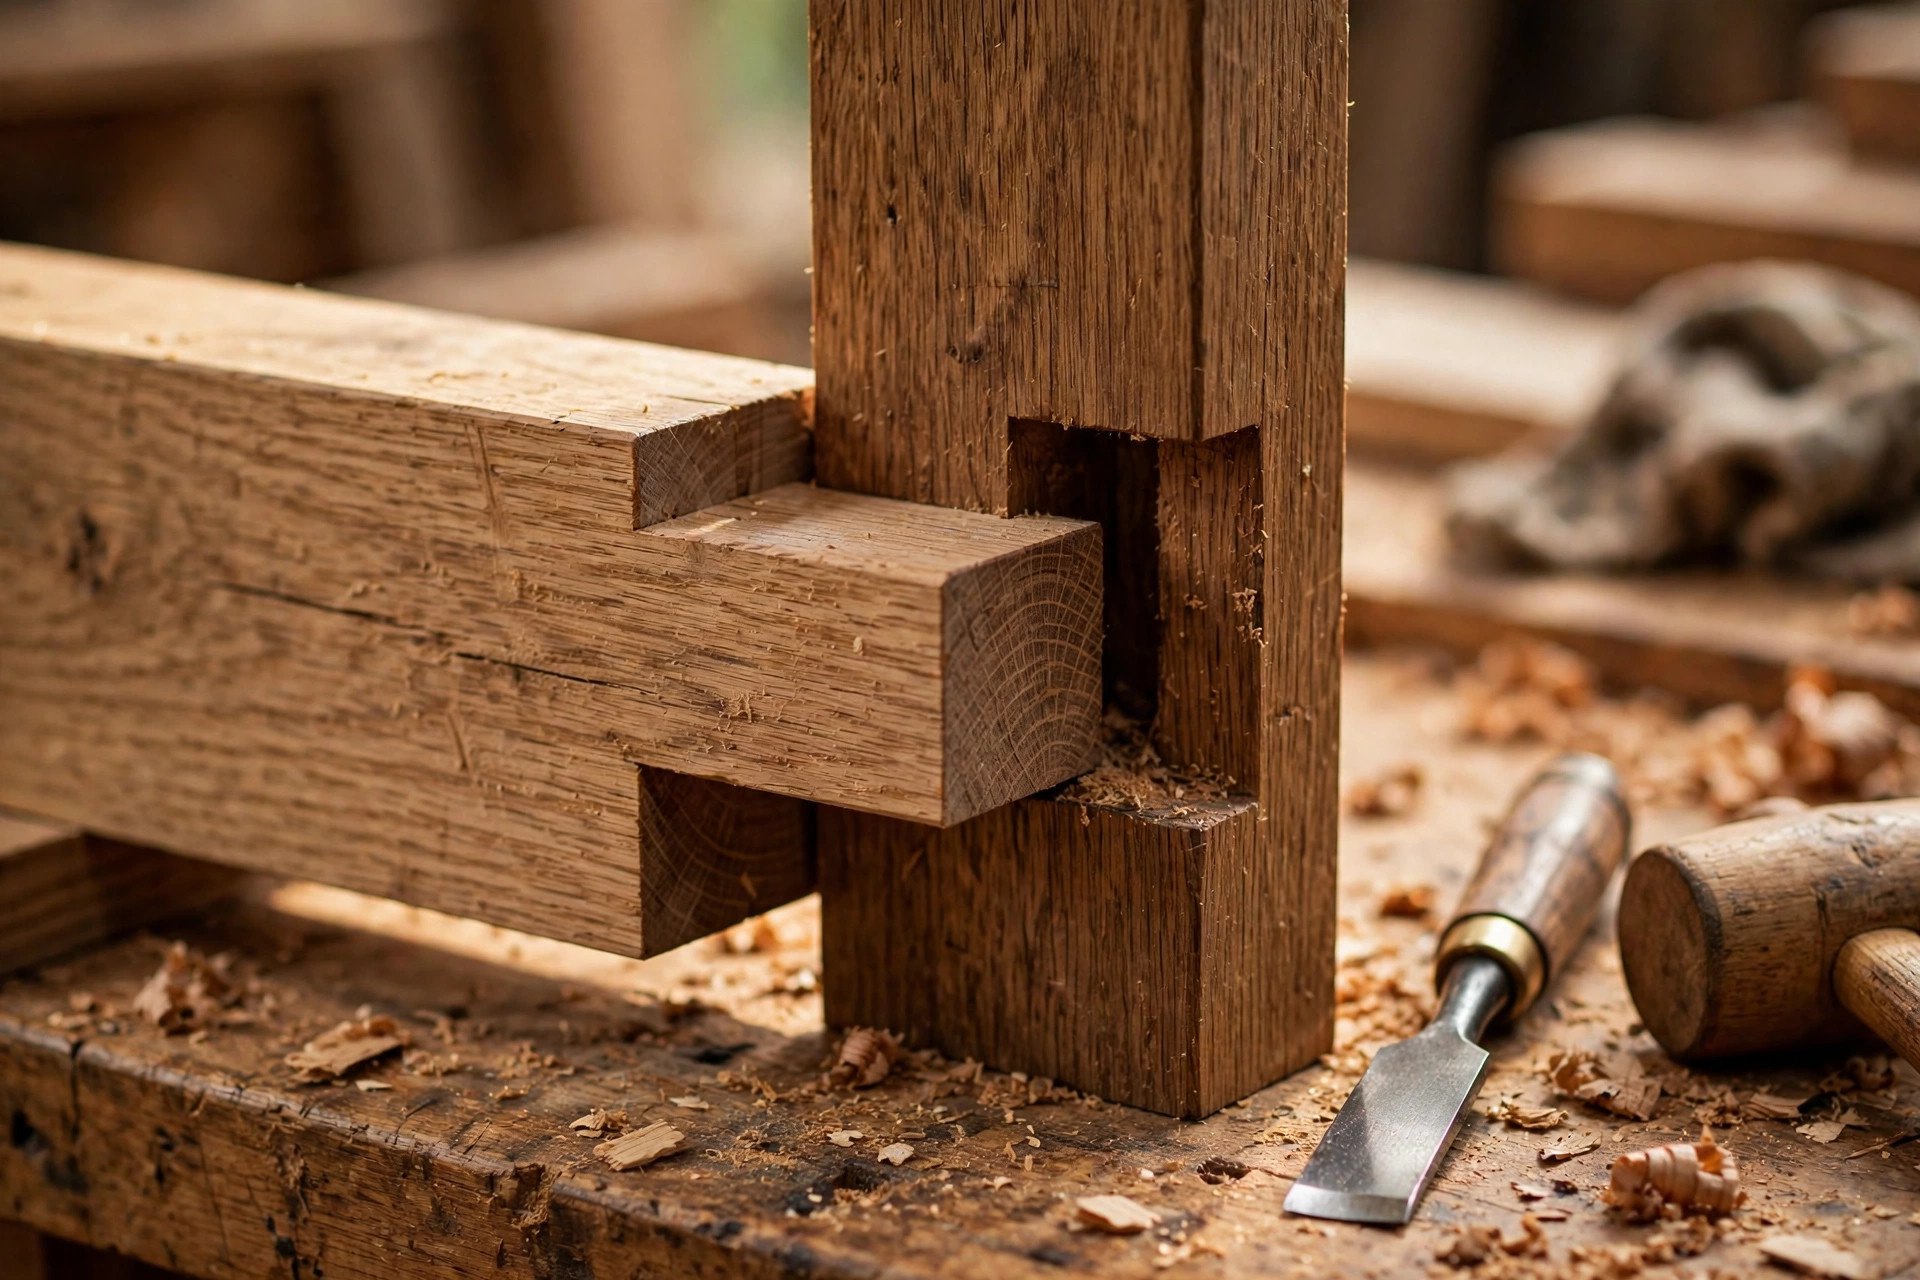
11. Mortise-and-Tenon Joint
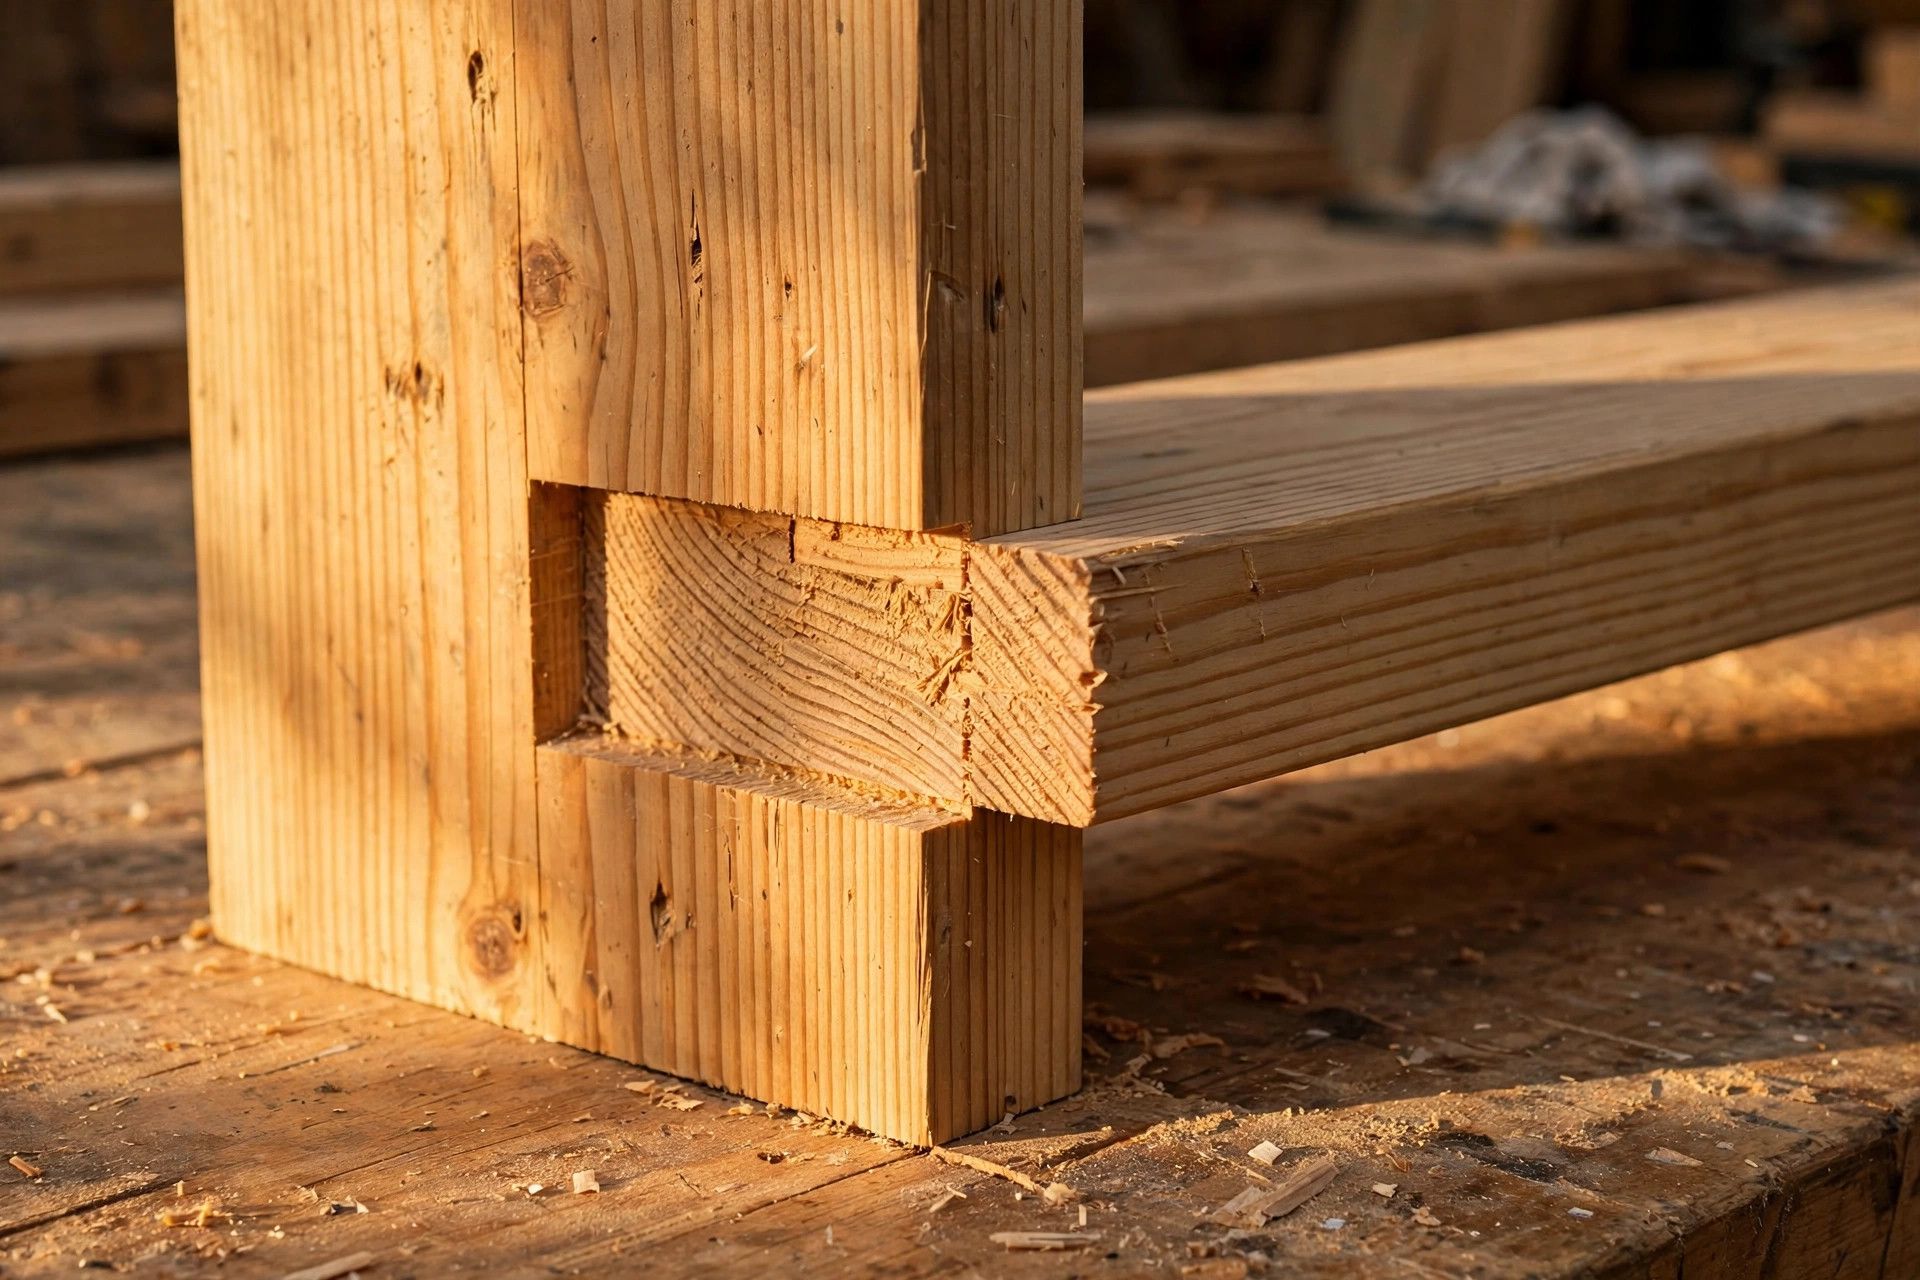
The mortise-and-tenon is the traditional backbone of frame construction: a rectangular tenon cut on the end of one piece fits into a matching mortise, a rectangular hole, in the other. Chairs, tables, and doors have been held together this way for thousands of years, and the joint is still the gold standard for anything with legs.
Strength: Very high. The large glue surface plus the mechanical capture of the tenon makes this one of the strongest joints you can cut, especially when the tenon is pinned or wedged.
Difficulty: Intermediate to advanced. Chopping a clean mortise and fitting a tenon to it demands patience, sharp chisels, and careful measuring.
Tools needed: Chisels, a mallet, a drill or dedicated mortiser for waste removal, a tenon saw or table saw, and marking tools.
When to use it: Table and chair legs, door frames, bed frames, workbench bases, and any frame that must survive racking forces and heavy loads.
Beginner tip: Always cut the mortise first, then fit the tenon to the actual mortise rather than to your measurements. Aim for a fit that goes together with firm hand pressure; if you need a mallet to force it, pare the tenon cheeks slightly and try again.
12. Tongue-and-Groove Joint
Tongue-and-groove runs a centered tongue along the edge of one board and a matching groove along the edge of the next. The boards slide together into a flush surface that stays aligned while still allowing the wood to expand and contract with the seasons, which is exactly what wide surfaces need.
Strength: Medium. It aligns boards beautifully and adds modest strength, but long spans still need support underneath or a glued assembly.
Difficulty: Intermediate. Setting up matched cutters or router bits takes care, but once dialed in, you can mill long runs quickly.
Tools needed: A table saw or a router with matched tongue-and-groove bits, clamps, and optionally glue.
When to use it: Flooring, wall paneling, wainscoting, wide tabletop boards, and cabinet backs where you want a clean, gap-free surface that can move with humidity changes.
Beginner tip: Mill all your boards in one setup without touching the bit height or fence position, because even a tiny change between passes creates a visible step. Leave a whisper of room in the groove so seasonal swelling never splits the joint.
Wood Joinery When-to-Use Chart
Use this chart to pick the right joint in seconds. Match your project’s strength needs and the tools you own to the joint that fits.
| Joint | Strength | Difficulty | Tools Needed | Best For |
|---|---|---|---|---|
| Butt joint | Low | Beginner | Saw, drill, glue, clamps | Utility boxes, shop jigs, first practice projects |
| Miter joint | Low-Medium | Beginner-Intermediate | Miter saw, band clamp, glue | Picture frames, decorative trim, clean corners |
| Lap (half-lap) joint | Medium | Beginner | Saw, chisel, marking gauge | Frames, table aprons, gate braces |
| Pocket-hole joint | Medium | Beginner | Pocket-hole jig, drill, clamps | Face frames, cabinets, quick furniture |
| Dowel joint | Medium | Beginner-Intermediate | Drill, doweling jig, clamps | Panel glue-ups, chair and table frames |
| Biscuit joint | Low-Medium | Beginner | Biscuit joiner, clamps | Aligning tabletops, face frames, miter reinforcement |
| Rabbet joint | Medium | Beginner-Intermediate | Table saw or router, chisel | Cabinet backs, drawer bottoms, box lids |
| Dado joint | Medium-High | Beginner-Intermediate | Table saw with dado set or router | Bookshelves, cabinet and drawer dividers |
| Box (finger) joint | High | Intermediate | Table saw, box-joint jig | Drawers, boxes, small chests |
| Dovetail joint | Very High | Advanced Beginner | Dovetail saw, chisels or router jig | Drawers, fine boxes, heirloom furniture |
| Mortise-and-tenon | Very High | Intermediate-Advanced | Chisels, mallet, drill or mortiser | Table and chair legs, doors, bed frames |
| Tongue-and-groove | Medium | Intermediate | Table saw or router with matched bits | Flooring, paneling, wide tabletops |
Beginner Joinery Progression: What to Learn First
Twelve joints can feel like a lot, so here is the order that builds your skills without frustration. Each stage teaches you something the next stage depends on, and every stage is enough to build real projects with.
Stage 1, your first weekend: Start with the butt joint and the pocket-hole joint. These two alone let you build boxes, simple shelves, and basic furniture. You will practice the fundamentals that matter everywhere: cutting square, drilling straight, clamping, and gluing.
Stage 2, adding accuracy: Move on to the miter joint, the half-lap, the dowel joint, and the biscuit joint. This stage is all about layout and alignment. Miters teach you angle accuracy, laps teach you marking and chisel control, and dowels and biscuits teach you to register two pieces precisely.
Stage 3, grooves and shoulders: Learn the rabbet and the dado. These introduce you to cutting across and along the grain with a router or table saw, and they unlock serious storage projects like bookshelves and cabinets.
Stage 4, interlocking joints: Tackle the box joint and tongue-and-groove. Both reward jig-making and machine setup skills, and they produce joints that look impressive while being very strong.
Stage 5, the classics: Finish with the mortise-and-tenon and the dovetail. By now your sawing, chiseling, and fitting skills are ready, and these two joints will take your furniture from sturdy to heirloom quality.
The table below summarizes the full learning order with a suggested practice project for each stage.
| Stage | Joints to Learn | Skills You Build | Practice Project |
|---|---|---|---|
| 1 | Butt, pocket-hole | Square cuts, drilling, clamping, gluing | Simple storage box or crate |
| 2 | Miter, half-lap, dowel, biscuit | Angles, layout, chisel control, alignment | Picture frame and small table |
| 3 | Rabbet, dado | Grooves, router and table saw setup | Bookshelf or wall cabinet |
| 4 | Box joint, tongue-and-groove | Jig making, machine accuracy | Keepsake box or paneled lid |
| 5 | Mortise-and-tenon, dovetail | Hand fitting, precision joinery | Stool, drawer, or small side table |
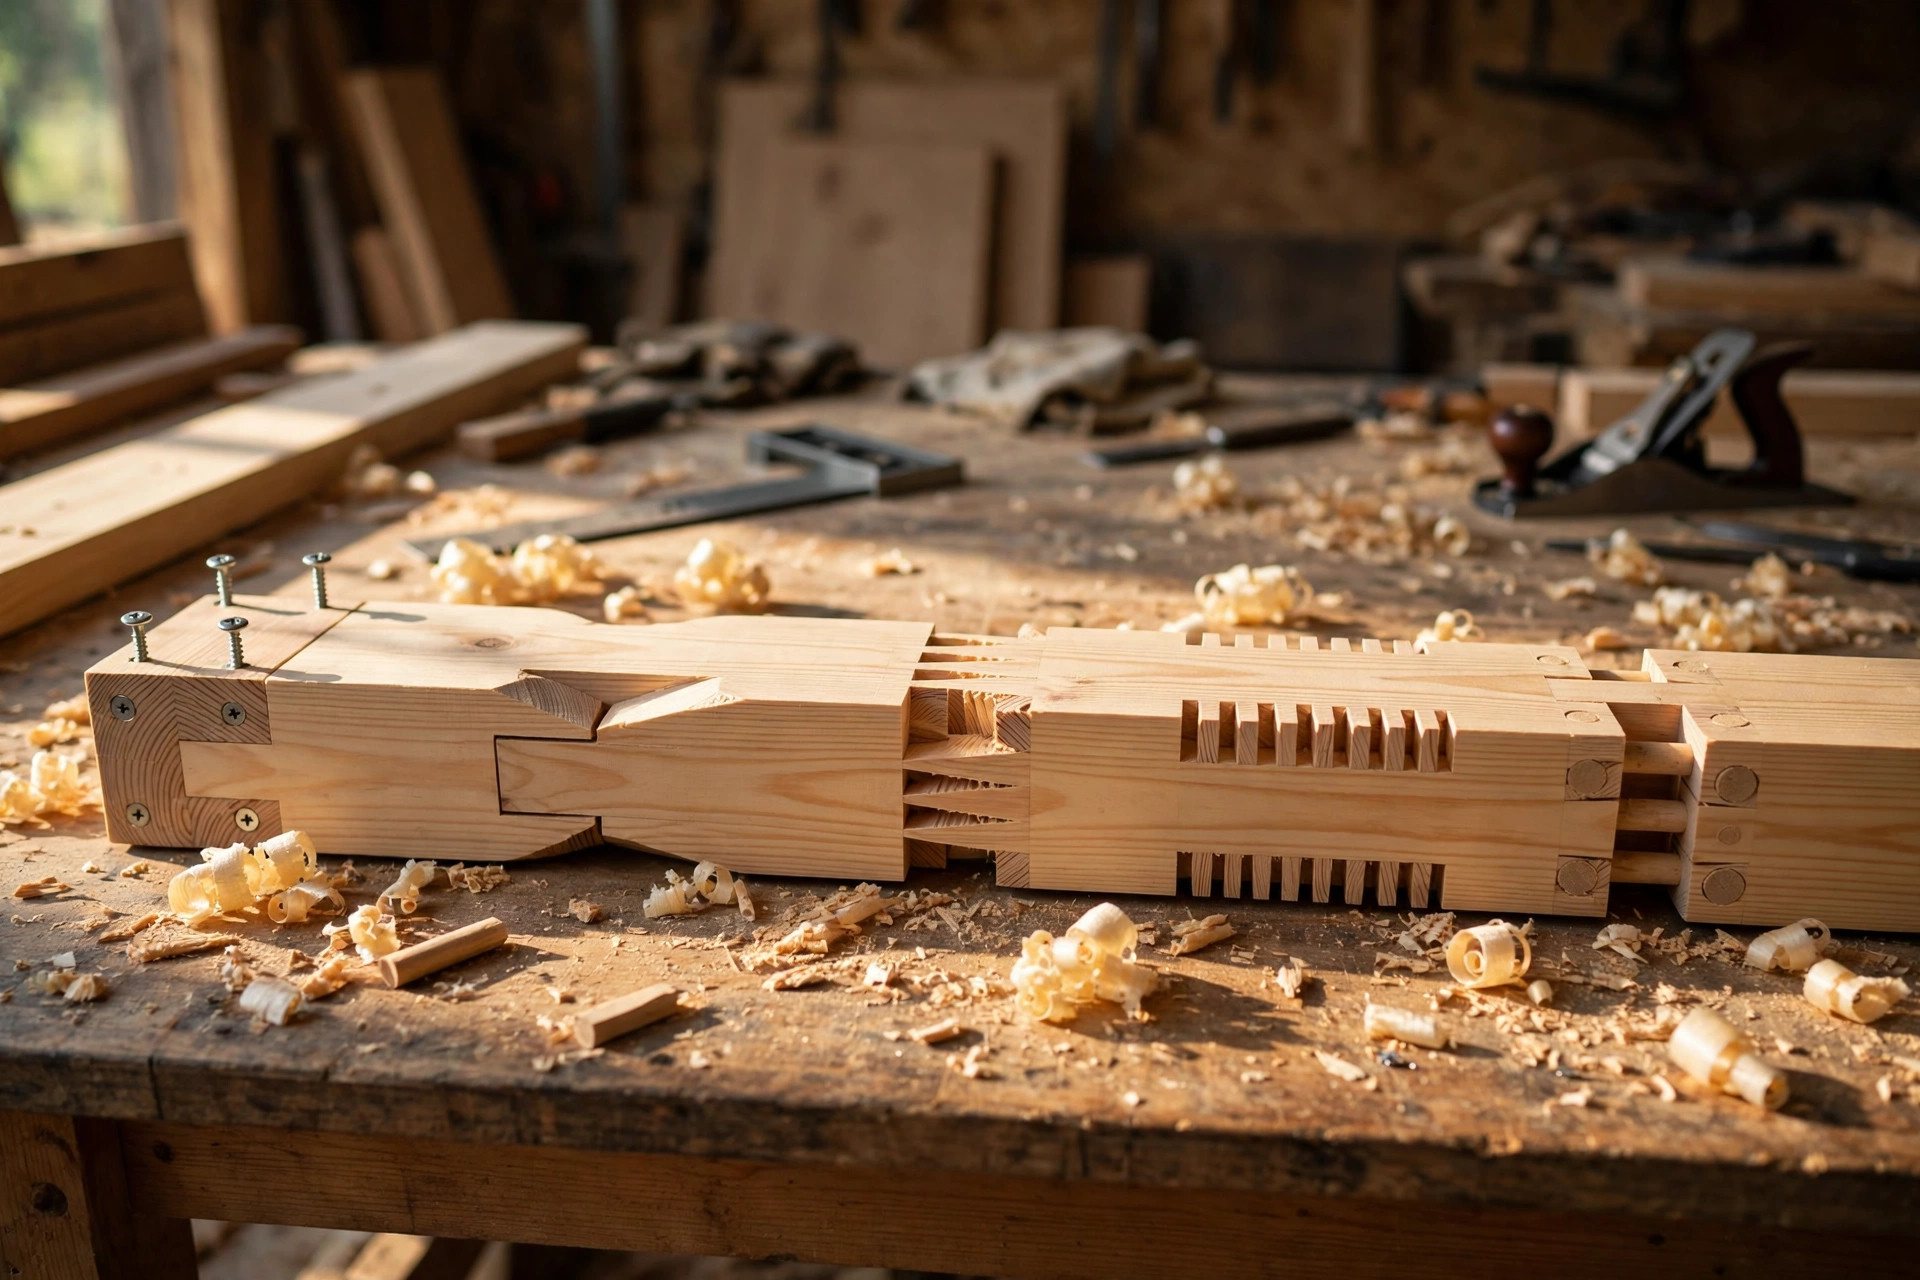
One more habit will multiply everything you learn here: build a joinery sample board. Take one long piece of inexpensive pine and cut every joint you practice into it, labeling nothing but keeping the order. Within a few months you will own a physical reference of your progress, and testing a new joint on the sample board before committing it to a real project will save you from ruining good lumber. Speaking of lumber, pairing the right wood with the right joint matters too, so check our guide to the best wood for beginner woodworking projects before you buy stock for your next build.
Frequently Asked Questions
What is the easiest wood joint for a beginner to learn?
The butt joint is the easiest, since it only requires square cuts and glue plus screws. If you want the strongest joint you can make on day one with minimal skill, choose the pocket-hole joint instead: the jig handles the tricky drilling angle for you, and the screw pulls everything tight automatically.
What is the strongest wood joint?
The dovetail and the mortise-and-tenon share the crown. Dovetails resist being pulled apart thanks to their interlocking flared shape, while the mortise-and-tenon offers massive glue surface and mechanical capture, making it the traditional choice for chairs, tables, and doors. Among beginner-friendly options, the pocket-hole joint is the strongest you can cut with just a drill and an inexpensive jig.
Do I need expensive power tools to cut good joinery?
No. Butt, lap, miter, dowel, mortise-and-tenon, and dovetail joints can all be cut with hand tools: a saw, chisels, a mallet, a drill, and clamps. Power tools like a pocket-hole jig, router, or table saw mainly add speed and repeatability. Start with the joints that match the tools you already own, then add tools as your ambitions grow.
Should I use glue, screws, or both in my joints?
Use both whenever you can. Wood glue creates a bond that is often stronger than the wood itself on long-grain surfaces, while screws or dowels add mechanical holding power and act as clamps while the glue cures. The one exception is wide solid-wood panels like tabletops, where glue alone with proper clamping is better because screws can restrict natural wood movement.
Can you join wood without any screws or nails?
Absolutely. Traditional joinery was developed centuries before modern fasteners existed. Dovetails, mortise-and-tenon joints, box joints, and drawbored dowel joints all hold together through their interlocking shapes, with glue adding long-term security. Many fine furniture makers still build this way, leaving no metal anywhere in the piece.
How should I practice joinery without wasting expensive lumber?
Practice on cheap construction-grade pine or offcuts from other projects, and keep every practice joint on a single sample board so you can compare your progress. Cut each new joint three times: once to learn the steps, once to fix your mistakes, and once to prove you can repeat it. Only move to hardwood when the joint fits correctly in pine twice in a row.



Pingback: How to Sharpen Chisels for Beginners (Razor Edge in 15 Min)
Pingback: 25 Easy Woodworking Projects for Beginners That Sell Fast