
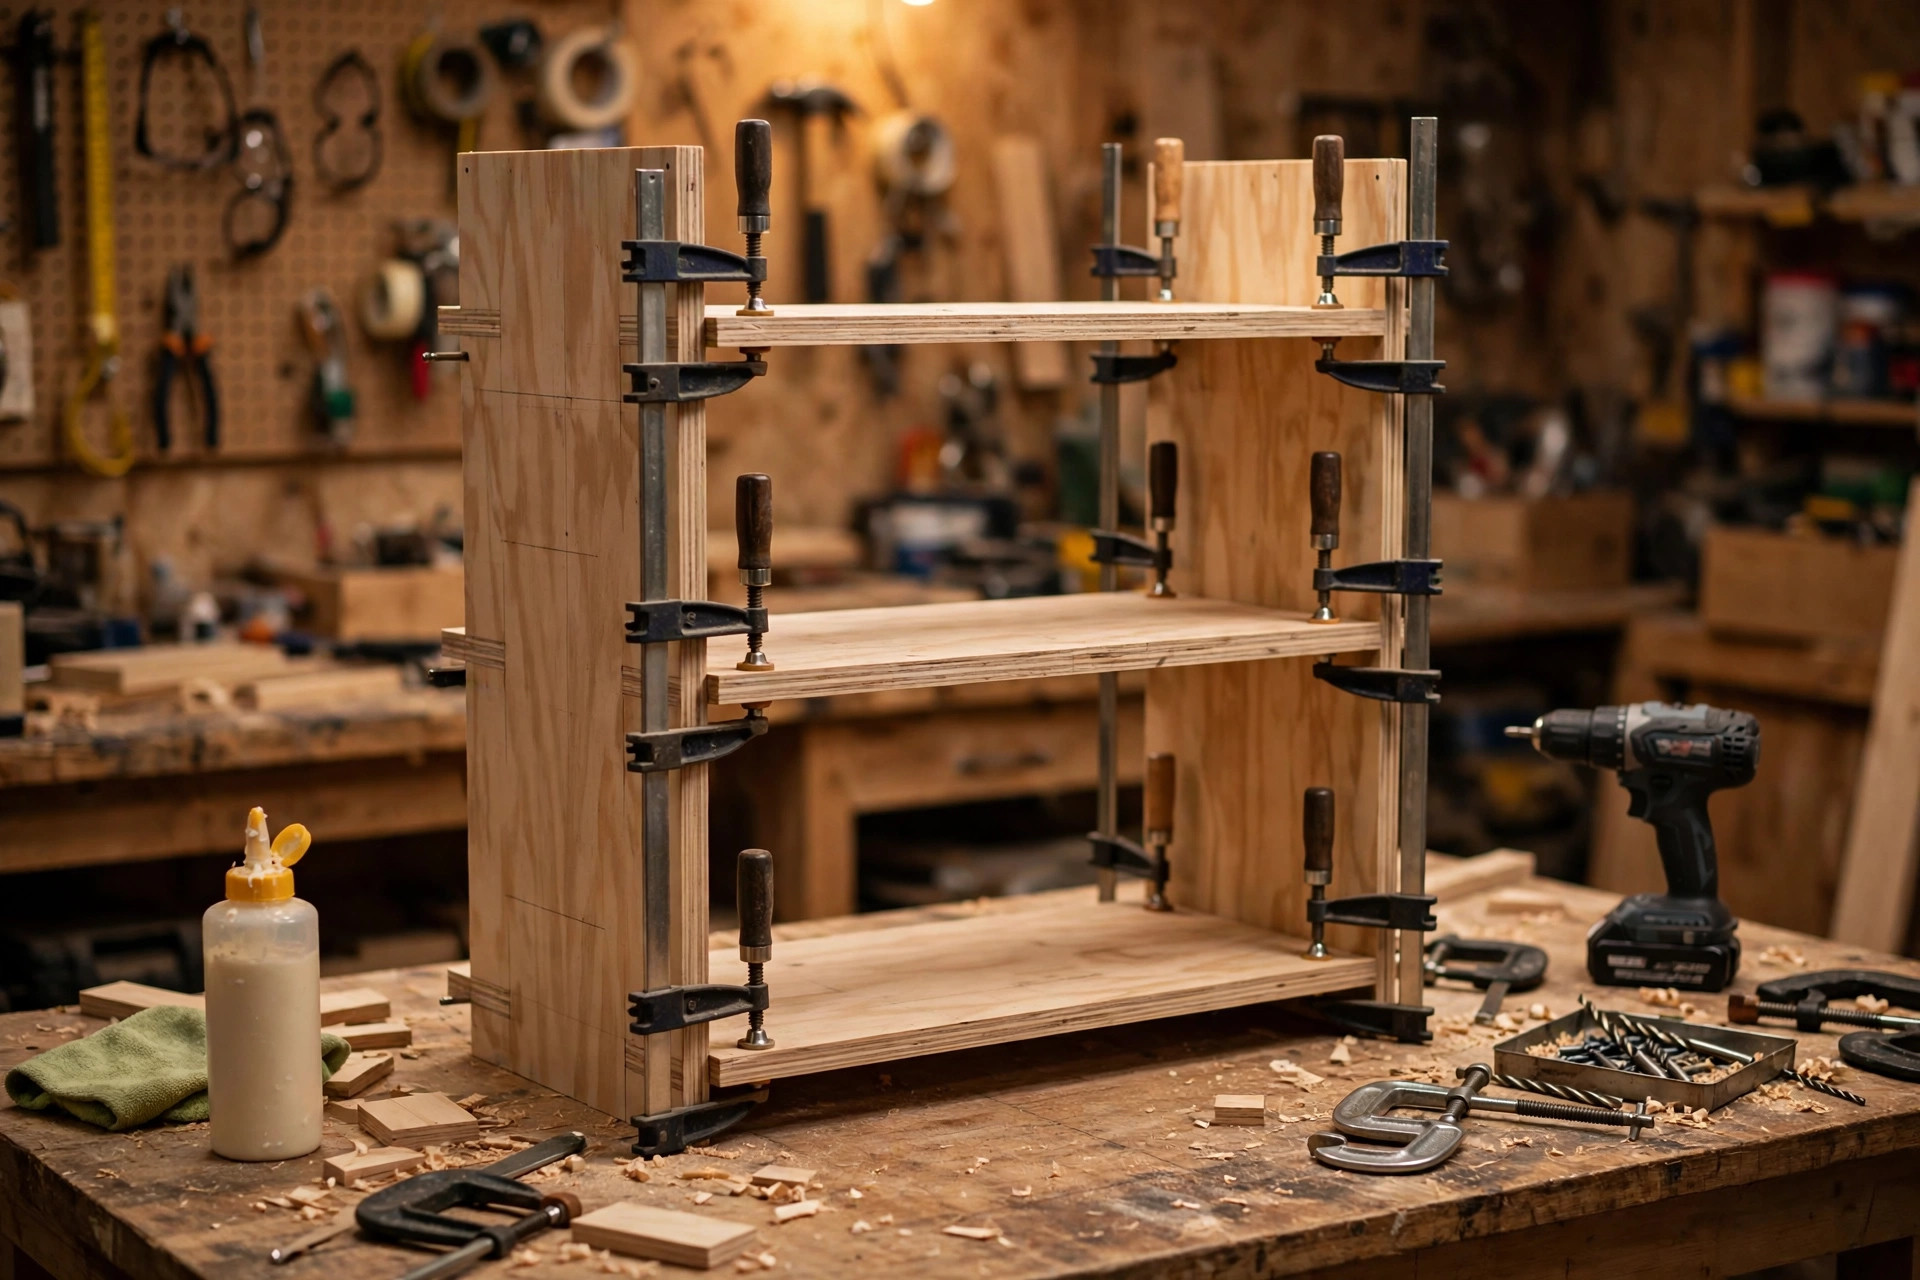
A bookshelf is the perfect first furniture project. It is useful every single day, it forgives small mistakes, it teaches the core skills of measuring, cutting, joining, and finishing, and when it is done you have something solid to show for a weekend of work instead of another practice board gathering dust in the corner. If you have ever wondered how to build a simple bookshelf for beginners, this guide walks you through one proven design from the first measurement to the final wall anchor, with no guesswork and no advanced tools required.
The bookshelf in this guide is a freestanding, three-shelf unit made from 3/4-inch plywood or 1×12 boards. It stands about 36 inches tall and 24 to 30 inches wide, with shelves deep enough for paperbacks, hardcovers, and larger reference books. It is tall enough to be genuinely useful, low enough to stay stable, and small enough to build on a single workbench, carry through a doorway, and finish in a weekend. The shelves are fixed with pocket-hole screws, which are strong, fast, and forgiving for a first build, and a thin back panel keeps the whole case square and rigid. By the end of the build you will understand why bookshelves sag, why some bookshelves rack and wobble, and how to prevent both problems before they start.
Before you pick up a saw, it helps to understand what makes a bookshelf succeed or fail. A good bookshelf is square, so its doors and books sit straight; it is rigid, so it does not sway when you pull a book out; its shelves are supported well enough that they do not bow under a row of heavy books; and it is anchored to the wall, so it cannot tip forward onto a child, a pet, or anyone reaching for the top shelf. Every step in this guide serves one of those four goals. Nothing here is decoration for its own sake. If you follow the cut list, drill the pocket holes carefully, fit the back panel before you move the case, and anchor it at the end, you will end up with a bookshelf that looks clean, feels solid, and lasts for years.
If you are building your very first piece of furniture, this project also sits nicely alongside other beginner builds. Our pillar guide to easy woodworking projects for beginners that sell shows where a simple bookshelf fits in a wider beginner journey, and if you do not yet have a sturdy surface to build on, our guide to how to build a simple workbench for beginners will get you set up first. A bookshelf built on a wobbly table is much harder to keep square than one built on a flat, stable bench, so sort your workspace before you start cutting.
The Design: A 3-Shelf Bookshelf That Actually Holds Books
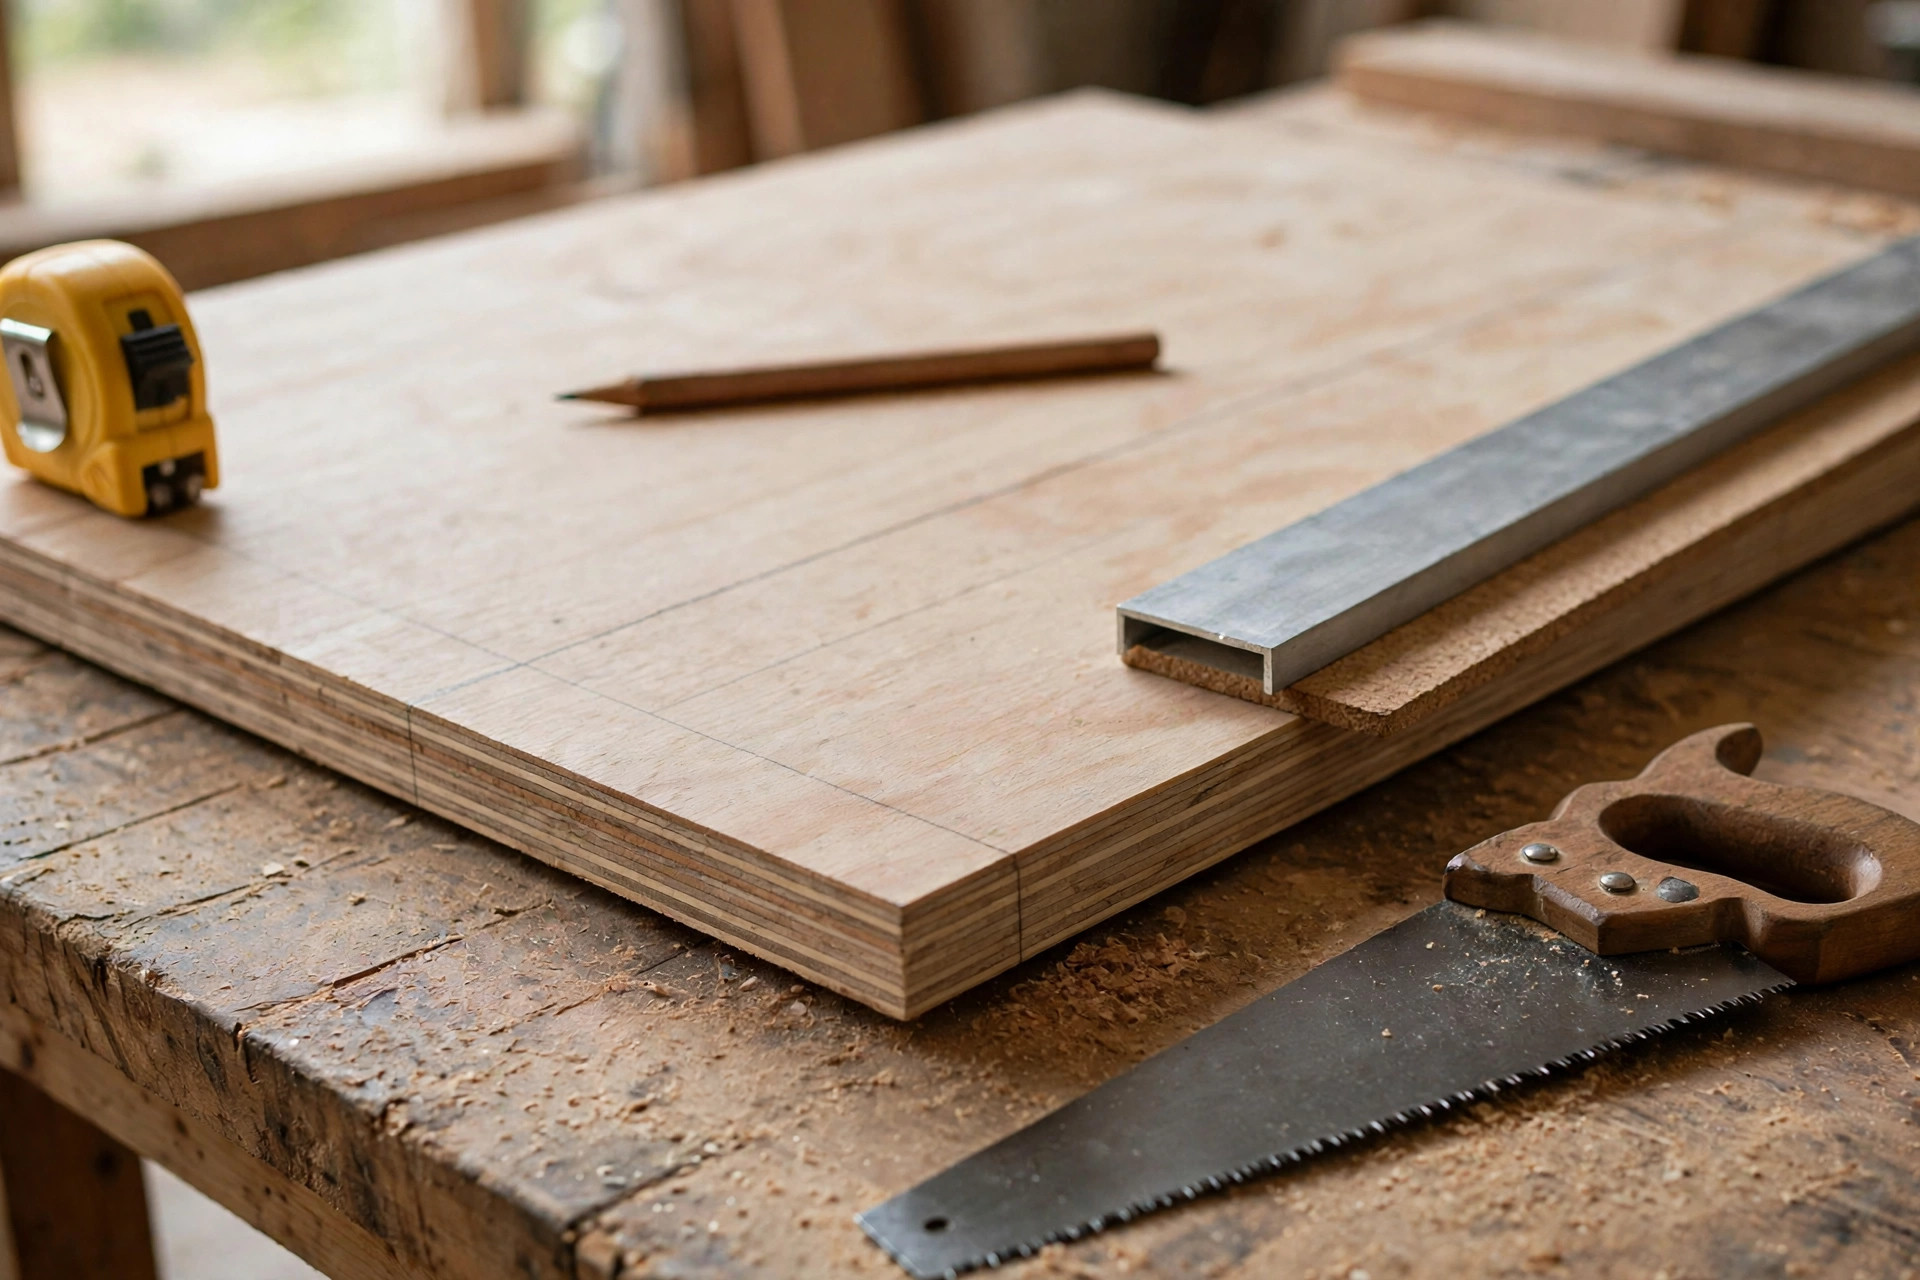
The design is deliberately simple. Two side panels form the uprights, a top and a bottom close the case, and two fixed middle shelves divide the interior into three useful bays. There are no doors, no drawers, and no adjustable shelf pins to complicate the build. Fixed shelves are stronger than adjustable shelves for a beginner, because each shelf acts as a brace that ties the two sides together and stops the case from racking sideways. Once the back panel is on, the whole unit becomes a rigid box that resists twisting in every direction.
Overall dimensions are about 36 inches tall, 24 to 30 inches wide, and 11 to 12 inches deep. The height is a comfortable compromise: tall enough for three rows of books, short enough that the top shelf is easy to reach and the unit stays stable. The width range matters because of shelf sag, which is covered in detail below. At 24 inches wide, a 3/4-inch plywood shelf will carry a full row of books with barely any deflection. At 30 inches wide, the same shelf will still work for most books, but it is approaching the limit for heavy hardcovers, and you should think carefully about what will live on the longest spans. The depth of 11 to 12 inches suits standard books, including larger art and reference books, without wasting space or making the shelf look bulky against the wall.
You have two good material choices, and either one works for this design. The first is 3/4-inch hardwood plywood, such as birch or oak plywood, which is stable, flat, and less likely to warp than solid boards. One half-sheet is usually enough for the whole case, and plywood edges can be covered with iron-on edge banding for a clean, finished look. The second is 1×12 solid pine boards, which are actually 3/4 inch thick and 11-1/4 inches wide, so they match the depth almost exactly and give a warm, traditional look with visible grain. Solid pine is easier to find in many stores, easier to stain attractively, and slightly more forgiving to sand, but check every board for bowing and twisting before you buy it, because a warped side panel will fight you at every step. Whichever material you choose, buy it a few days early if you can and let it acclimatise flat in your workshop, stacked with weight on top, so it settles before you cut it.
A note on proportions will save you from the most common beginner disappointment: a bookshelf that looks right on paper but wrong in the room. Books are heavier than they look, and a shelf full of books is visually heavy too. Keep the shelf spacing generous rather than cramped. In this design, the bottom bay is the tallest, which suits large books and storage boxes, while the two upper bays suit standard hardcovers and paperbacks. Measure your own tallest books before you finalise the shelf positions, and leave at least an inch of clearance above them so you can tilt a book out without scraping the shelf above. A bookshelf that fits your actual books will always look better than one built to a generic diagram.
Tools and Materials You Will Need
You do not need a full workshop for this project. A circular saw with a straightedge guide, or a table saw if you have one, will handle every cut. A pocket-hole jig and a drill/driver handle the joinery. A random-orbit sander, a tape measure, a speed square, clamps, wood glue, and a pencil cover the rest. If you do not own a pocket-hole jig yet, a basic single-hole jig is inexpensive and perfectly adequate for this build, and you will use it again on almost every beginner furniture project that follows.
For materials, plan on one half-sheet of 3/4-inch plywood or about 24 feet of 1×12 pine boards, one sheet of 1/4-inch plywood or hardboard for the back, a bottle of wood glue, 1-1/4-inch pocket-hole screws for 3/4-inch material, 3/4-inch brad nails or short screws for the back panel, edge banding if you are using plywood, sandpaper in 120-grit and 220-grit, and your chosen finish. Add a wall-anchoring kit, which usually includes a strap or cable, screws, and a wall anchor rated for your wall type. Do not treat the anchor as an optional extra. It is part of the project, and it costs very little compared with the safety it provides.
Safety comes before speed on every step. Wear eye protection and hearing protection when sawing and drilling, keep your hands clear of the blade path, support offcuts so they do not fall and bind the blade, and work in a ventilated space when sanding and finishing. A bookshelf is a forgiving project, but a saw is not a forgiving tool. Measure twice, cut once, and if a cut feels awkward or unsafe, stop and reposition the board and the guide rather than forcing it through.
Full Cut List for the 3-Shelf Bookshelf
The cut list below is for the 30-inch-wide version, which is the most versatile size. If you prefer the 24-inch-wide version, simply shorten every horizontal piece by 6 inches. All parts are cut from 3/4-inch material, so the finished width includes the thickness of both side panels. Double-check every measurement against your actual material thickness before cutting, because plywood labelled 3/4 inch is sometimes slightly thinner, and a small difference across several joints adds up.
| Part | Quantity | Size (inches) | Notes |
|---|---|---|---|
| Side panels | 2 | 36 x 11-1/2 | Full height of the case; grain runs vertically |
| Top | 1 | 28-1/2 x 11-1/2 | Fits between the side panels |
| Bottom | 1 | 28-1/2 x 11-1/2 | Fits between the side panels; sits flush at the base |
| Fixed middle shelves | 2 | 28-1/2 x 11-1/2 | Same size as top and bottom; spacing set below |
| Back panel | 1 | 30 x 36 | 1/4-inch plywood or hardboard; cut to fit inside or over the back |
| Optional top trim | 1 | 30 x 2 | A simple face-frame strip across the top front for a finished look |
| Optional base trim | 1 | 30 x 3 | A simple plinth strip across the bottom front |
For shelf spacing, a practical layout for the 36-inch case is as follows. The bottom shelf sits at the base of the case. The first middle shelf sits about 13 inches above the bottom, leaving a tall bottom bay for large books and boxes. The second middle shelf sits about 11 inches above that, and the top bay is about 10 inches tall under the top panel. These are clear openings, measured between shelf surfaces, not centre-to-centre distances, so measure from the top face of one shelf to the underside of the next. Mark the shelf positions on the inside faces of both side panels before you drill anything, and mark them on the same end of each panel so the two sides mirror each other exactly. A single mis-marked shelf line is the most common reason a bookshelf ends up with shelves that look level from one side and crooked from the other.
Measuring and Cutting: Slow Down Here and the Rest Gets Easy
Good bookshelves are made at the measuring stage, not at the assembly stage. Start by checking that your boards are flat and that your saw cuts square. Make a test cut on scrap, check it with a speed square, and adjust your guide until the cut is true. Then cut the longest pieces first, the side panels, so any small error in the remaining stock does not force you to shorten a side. Label every piece with a pencil as you cut it: left side, right side, top, bottom, shelf one, shelf two. Labels take ten seconds and prevent the classic mistake of drilling pocket holes on the wrong face of a shelf and discovering it only when the holes end up visible on the outside.
When you cut plywood with a circular saw, cut with the good face down if your saw splinters the top surface, and support the sheet fully so it does not sag and pinch the blade. A simple straightedge clamped to the sheet gives a cleaner, straighter cut than a freehand line, and it is worth setting up properly for every long cut. For 1×12 boards, check each board for cupping by sighting along its edge, and if a board is slightly cupped, orient the cup so it faces inward where the back panel and the shelf joints will help hold it flat. Never try to force a badly warped board into a square case; swap it for a straighter one and save yourself an afternoon of frustration.
After cutting, dry-fit the whole case without glue or screws. Stand the sides up, slide the shelves in, and check the diagonals: measure from one corner to the opposite corner, then measure the other diagonal. If the two measurements match, the case is square. If they differ by more than about 1/16 inch, adjust the position of the shelves and sides until they match, and mark the positions before you take it apart again. This dry-fit is the moment to catch a mis-cut or a mis-marked shelf line, while it still costs nothing to fix. If you are learning how to build a simple bookshelf for beginners, this one habit, dry-fitting before glue, will improve every furniture project you build afterwards.
Pocket-Hole Assembly: Strong Joints Without Fancy Tools
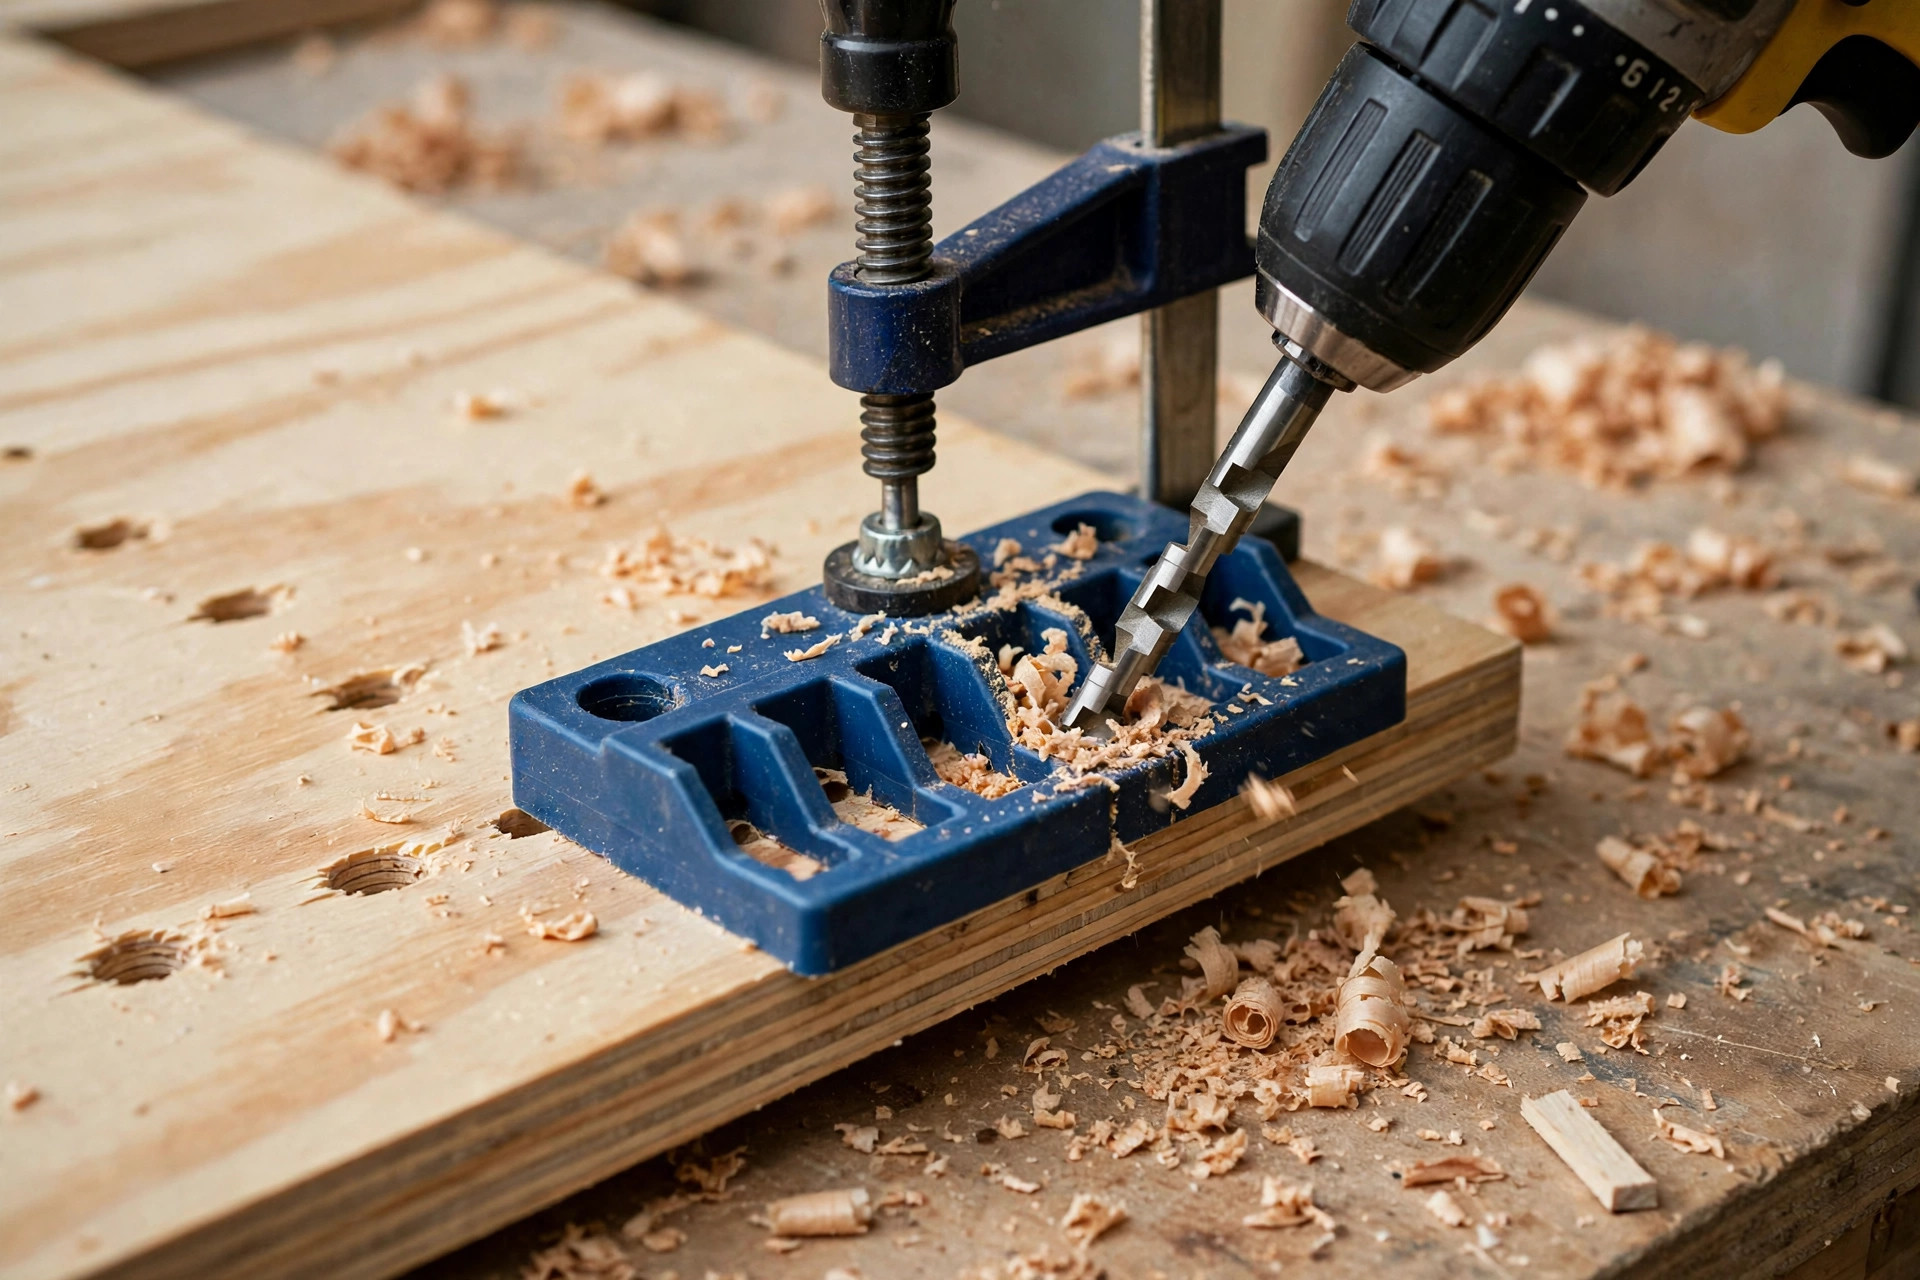
Pocket-hole joinery is ideal for a beginner bookshelf because it is strong, fast, and hides the screws. A pocket hole is an angled hole drilled into the end or edge of a board, and a self-tapping screw driven through it pulls the joint tightly together. The screws sit in the angled pockets on the underside or the back of the shelf, where they are barely visible, and they can be plugged with wooden plugs or covered with filler if you want an invisible finish. The joints are strong enough for a bookshelf full of books, provided the shelves are also glued, and they do not require the precision or the clamping time of traditional mortise-and-tenon joints.
Set your pocket-hole jig for 3/4-inch material, and drill two pocket holes at each end of every horizontal piece: the top, the bottom, and both middle shelves. That is eight holes per shelf end pair, and it is worth drilling them all before assembly so you are not stopping to reset the jig halfway through. Drill on the underside face of each shelf, so the pockets face down and away from view, and on the bottom face of the top panel. For the bottom panel, drill the pockets on the underside as well, so they face the floor. Keep the drill speed steady, let the stepped bit do the work, and clear the chips between holes so the depth stop stays accurate.
If you want to understand why pocket holes are a sensible choice here, and where they are weaker than other joints, read our comparison of pocket-hole vs dowel joint strength. The short version is that pocket-hole screws are excellent in shear and in pulling a joint closed, which is exactly what a bookshelf shelf needs, but they are less elegant than dowels or dados for fine furniture. For a first bookshelf, strength, speed, and forgiveness matter more than elegance, and pocket holes deliver all three. If you later build a bookshelf you want to show off as fine furniture, you can graduate to dado joints, but you will still use pocket holes constantly for workshop furniture, storage, and utility builds.
Step-by-Step Assembly
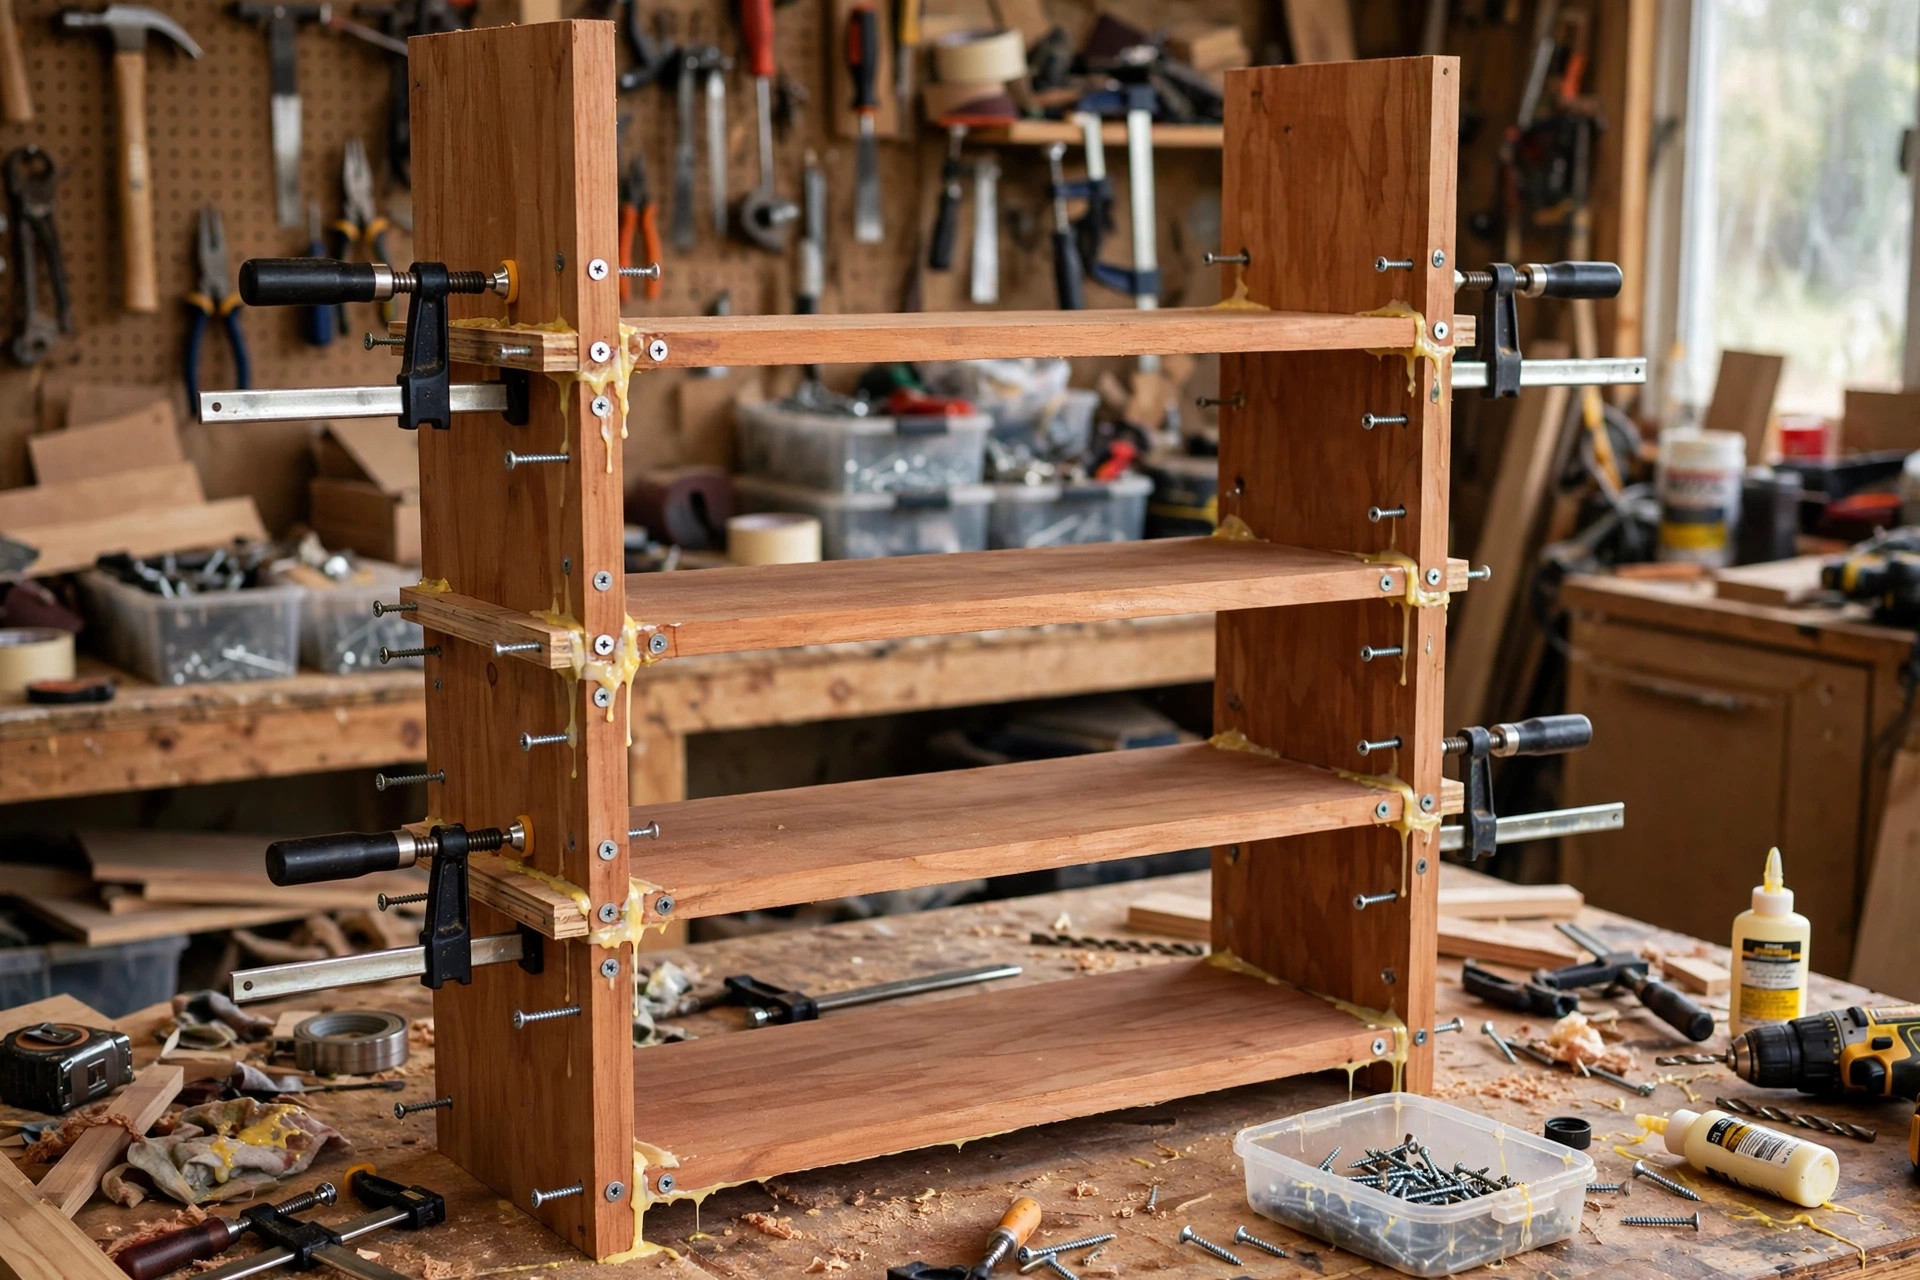
Assembly is best done on a flat surface, with the case lying on its back or on one side, rather than trying to hold it upright while you drive screws. Start with one side panel lying flat, inside face up, with the shelf positions marked. Apply a thin, even bead of wood glue along the end of the bottom panel, set it in position, and drive the pocket-hole screws through the underside pockets into the side panel. Add the two middle shelves in the same way, working from the bottom upward, and finish with the top panel. Then lay the second side panel over the assembly, glue each joint, and drive the remaining screws. Work methodically and check for square after every shelf, because a case that drifts out of square early is much harder to correct once all the shelves are screwed in.
Clamps are your extra pair of hands here. A couple of bar clamps across the case will hold the sides tight against the shelf ends while the screws go in, and they prevent the common problem of a shelf creeping sideways as the screw bites. If a screw strips or the pocket splits, do not panic. Back the screw out, add a dab of glue and a wooden plug or a sliver of wood into the hole, let it set, and re-drill. Pocket-hole mistakes are almost always recoverable, which is another reason they suit beginners so well.
Once all the screws are in, stand the case up and check it again. Sight along the front edges: the shelves should sit flush with the front edges of the sides, with no shelf sticking out or recessed by more than a hair. Check the diagonals again. If the case is square and the shelves are flush, wipe off any glue squeeze-out with a slightly damp cloth before it dries. Dried glue blocks stain and finish, and it shows up as a pale patch under a clear finish, so this small cleanup step matters far more than it seems. If glue has already dried in a spot, sand it off carefully before finishing.
The Back Panel: The Small Part That Makes the Whole Shelf Rigid
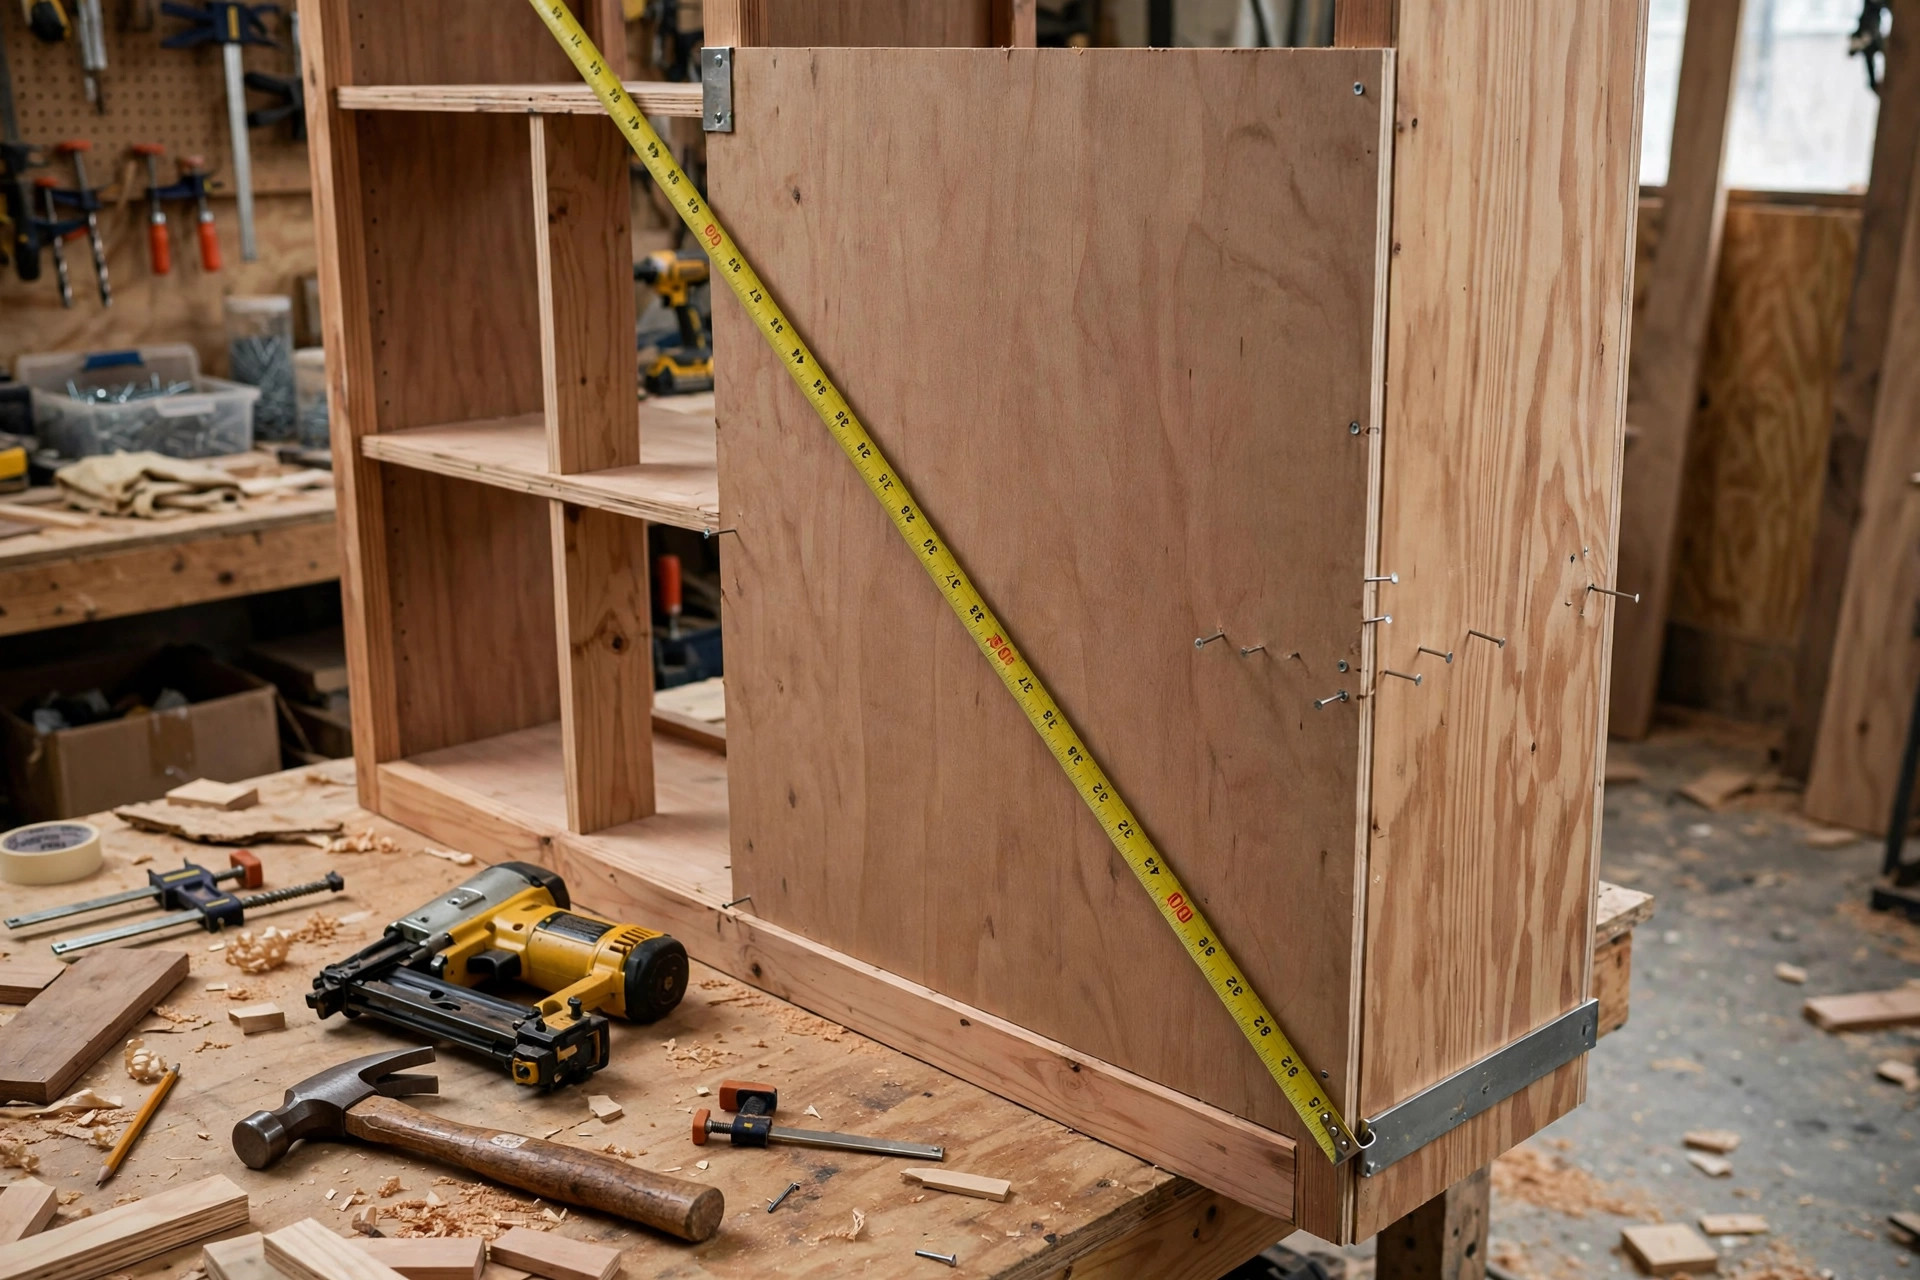
The back panel is the most underrated part of a bookshelf. Beginners sometimes leave it off, thinking it saves time and material, but a bookshelf without a back is a parallelogram waiting to happen: it racks sideways, it wobbles when you pull a book out, and it never feels solid no matter how tight the screws are. A thin back panel, even 1/4-inch plywood or hardboard, turns the open case into a closed box. It locks the diagonals, stops racking, stiffens the shelves, and gives the books a clean backdrop. It also stops books from being pushed through the back and protects the wall behind from scuffs.
Fit the back panel while the case is lying face down on a flat surface. First, confirm the case is square by checking the diagonals one more time. Then lay the back panel over the case, align its edges flush with the outside of the case, and fasten it with brad nails or short screws every 6 to 8 inches around the perimeter, plus a few nails into the back edge of each shelf. If the panel is slightly oversized, trim it to fit; if it is slightly undersized, centre it and accept a small gap rather than forcing a warped panel into place. Drive the nails straight and set them just below the surface so they can be filled later if the back will be visible. The moment the back panel is nailed on, you will feel the difference: the case stops flexing, and it suddenly feels like furniture instead of a loose frame.
A useful tip for a cleaner look is to paint or finish the back panel before you attach it, especially if you plan to paint the bookshelf a different colour inside. It is much easier to finish a flat panel on a bench than to paint the inside back of an assembled case with a brush reaching between shelves. The same applies to the inside faces of the side panels if you are painting: a quick coat before assembly saves awkward brushwork later, as long as you keep finish off the actual glue joints, where it would weaken the bond.
Shelf Sag Control: How Far Is Too Far for a Bookshelf Shelf?
Shelf sag is the slow, quiet failure of many bookshelves. A shelf does not break; it bows gradually under the weight of books until the bow is visible, books lean, and the shelf looks tired. Sag depends on four things: the span between supports, the thickness and stiffness of the shelf material, the weight of the load, and time. You cannot change the weight of books, but you can control the span and the thickness, and the table below shows why the width you choose matters so much. The figures are practical guidance for a full row of books on a 3/4-inch plywood or solid pine shelf, not laboratory measurements, and they assume the shelf is supported at both ends by the side panels.
| Clear span between sides | 3/4-inch plywood shelf | What to expect with a full row of books |
|---|---|---|
| 24 inches | Good | Barely visible deflection; safe for hardcovers |
| 28 inches | Acceptable | Slight deflection over time with heavy books; fine for paperbacks and mixed loads |
| 30 inches | Borderline | Noticeable bow likely over years with heavy hardcovers; keep heavy books low |
| 36 inches | Not recommended | Visible sag expected; needs a centre support or thicker shelf |
| 24 inches with centre support | Excellent | Effectively two 12-inch spans; very stiff, but the support divides the bay |
The lesson is simple: if you want a wide bookshelf, add a centre divider or a front edge strip to stiffen the shelves. A hardwood edge strip glued to the front edge of a shelf, even just 3/4 inch tall, dramatically increases stiffness because it increases the effective depth of the shelf where bending stress is highest. A centre vertical divider, running from the bottom to the top between the shelves, halves the span and almost eliminates sag, at the cost of dividing each bay into two narrower sections. For this 24 to 30-inch design, no extra support is needed for normal book loads, but if you plan to store heavy reference books, vinyl records, or boxes of magazines on a 30-inch shelf, add the front edge strip or keep those heavy items on the bottom shelf, where the span is shortest in practice and the load is closest to the floor.
Also think about how books are loaded. A shelf packed edge to edge with books actually sags less visibly than a half-empty shelf with a heavy stack leaning at one end, because a uniform load spreads the weight. Conversely, a stack of books piled horizontally on one end of a shelf concentrates the load and encourages both sag and tipping. Store books upright, fill shelves reasonably full without cramming them, and put the heaviest books on the lowest shelves. This is not just housekeeping advice; it is structural advice, and it is how librarians keep shelves flat for decades.
Sanding: The Step That Decides How the Finish Looks
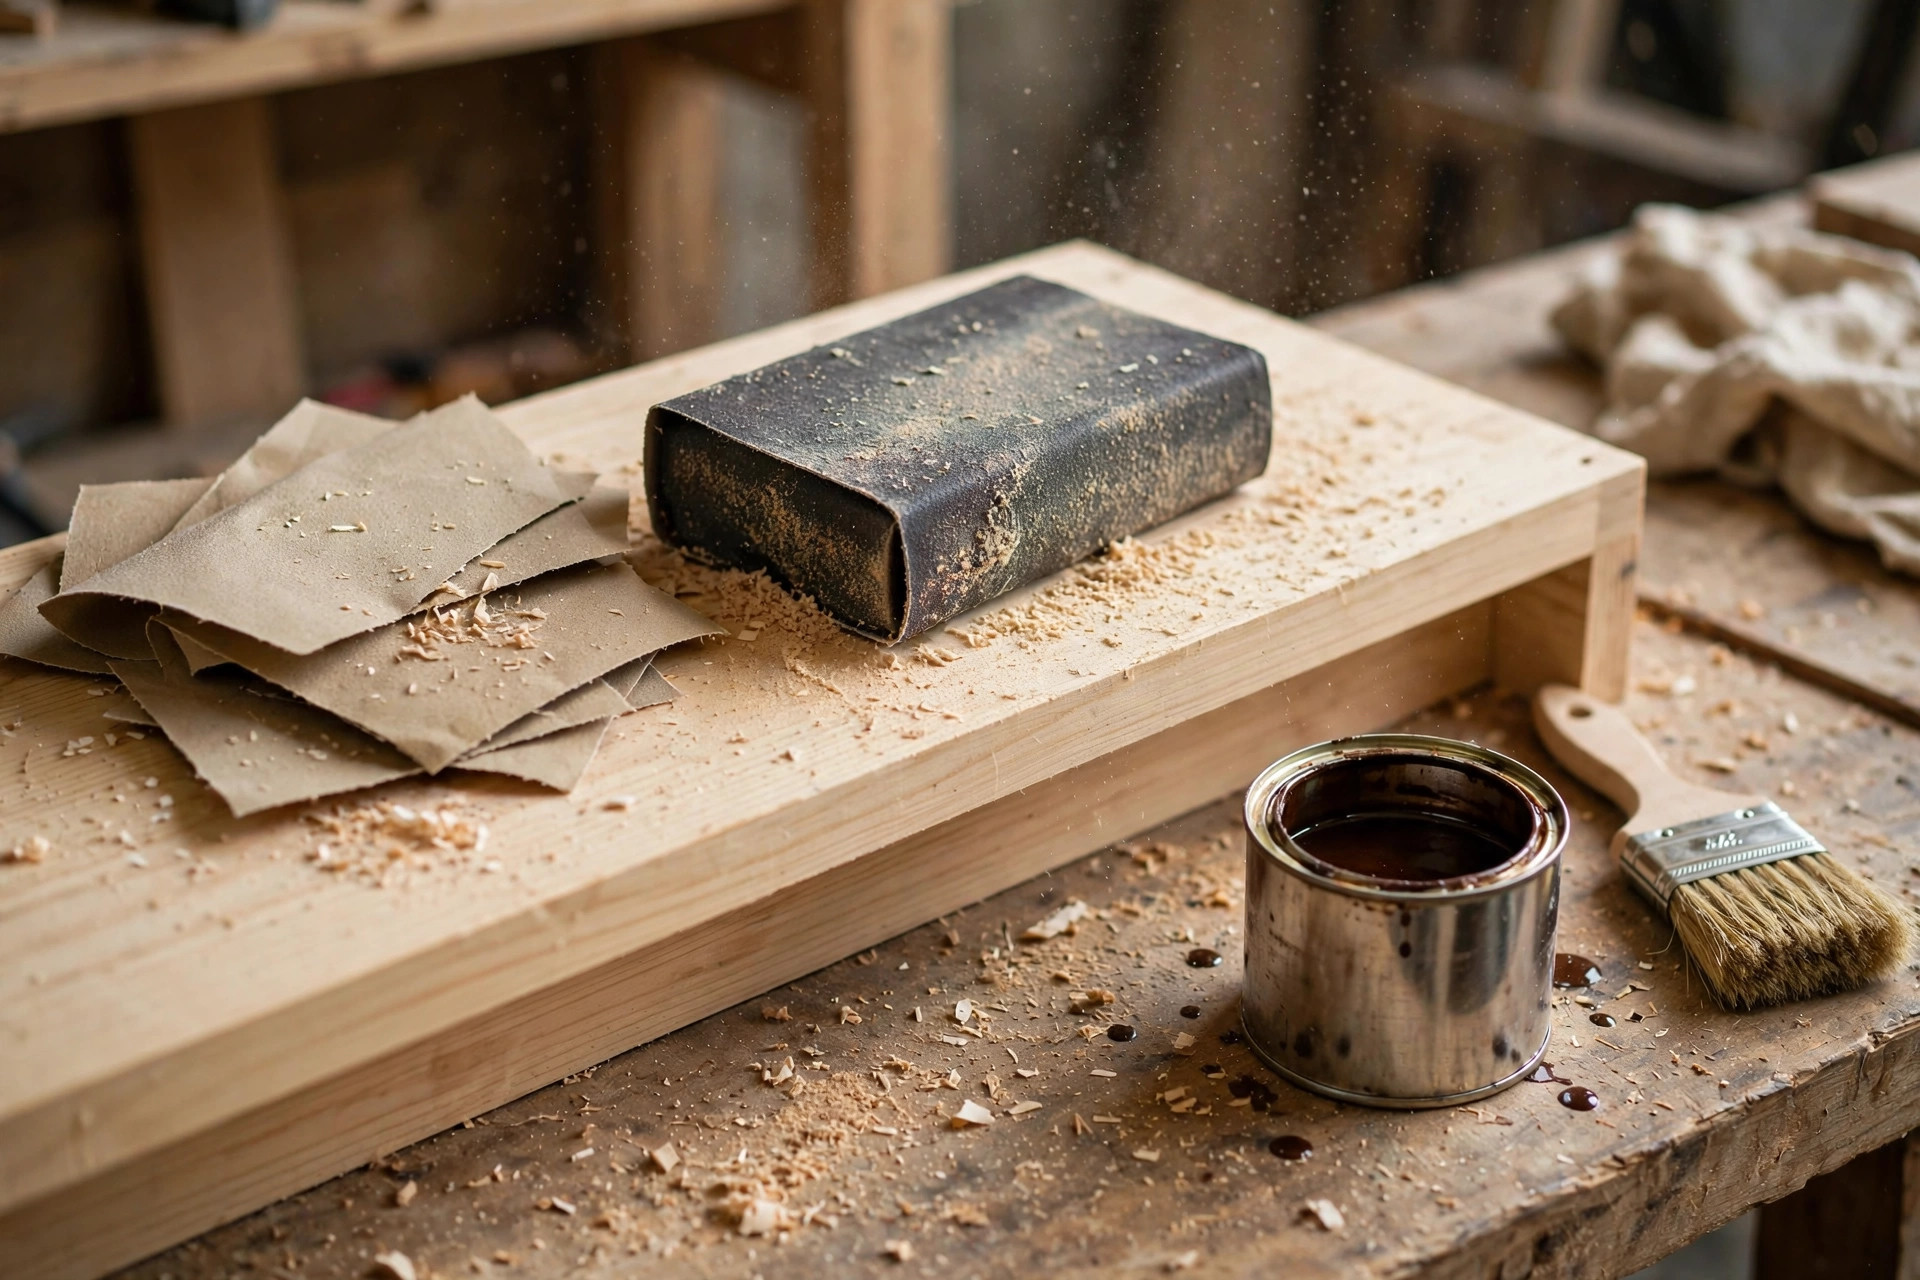
Sanding is where a beginner bookshelf either starts to look like furniture or stays looking like a project. The rule is to sand progressively and to sand with the grain, never across it. Start with 120-grit paper to remove saw marks, pencil lines, and glue spots, then move to 220-grit for a smooth surface ready for finish. Use a sanding block on flat panels so you do not round over edges or create dips, and use a random-orbit sander for the large flat surfaces if you have one, finishing with a light hand-sand in the direction of the grain to remove any swirl marks. Sand the edges lightly to break the sharp corners, just enough that they feel smooth to the touch without looking rounded.
Pay special attention to plywood edges. Plywood edge banding, applied with a household iron and trimmed with a sharp knife or edge trimmer, covers the layered edge and gives the shelf a solid-wood look. Apply it before final sanding, trim it flush, and sand it lightly so the transition is invisible under paint or stain. If you skip edge banding and paint the bookshelf, the plywood edge will still look acceptable under two coats of paint, but under a clear stain it will always look like plywood, so banding is worth the small effort for a stained finish.
Dust control matters as much as grit choice. After each sanding stage, vacuum the case thoroughly and wipe it with a tack cloth or a slightly damp cloth, then let it dry. Run your hand over the surface: if you feel rough patches, scratches, or raised grain, sand those spots lightly and wipe again. A good test is to wipe the surface with a damp cloth and look at it in raking light; the dampness temporarily reveals scratches and glue spots that will show under finish. For a deeper guide to grit choices, see our guide to the best sandpaper grit for beginners, which explains when to stop sanding and why finer is not always better.
Paint vs Stain: Choosing the Finish for Your Bookshelf
A bookshelf can look beautiful painted or stained, and the right choice depends on your material and your room. Paint is the most forgiving finish for plywood and for pine with knots and colour variation, because it hides imperfections, unifies the colour, and gives a clean, modern look. A good painted bookshelf needs a primer coat, two thin topcoats, and light sanding between coats. Use a durable acrylic paint in satin or semi-gloss for shelves, because flat paint marks easily when books slide in and out. Paint the inside back panel before assembly if you can, and paint the shelves before loading them, allowing the full curing time on the can before you put books on them, or the books may stick to a paint film that feels dry but has not fully cured.
Stain plus a clear topcoat is the better choice if you love wood grain and you have used good-quality plywood or clear pine. Stain colours the wood but does not hide it, so surface preparation matters more: every scratch, glue spot, and sanding mark will show. Apply stain evenly with a cloth or brush, wipe off the excess, let it dry fully, and then apply two or three thin coats of a clear topcoat such as polyurethane, sanding lightly between coats. Pine can blotch under stain, so use a pre-stain conditioner on pine, test the colour on scrap from the same boards, and accept that the test piece is the only reliable preview. Our guide to the best wood stain for beginners walks through colour choices and blotch control in detail, and it is worth reading before you open the stain can.
Whichever finish you choose, finish the bookshelf before you load it, and finish all surfaces that will be visible, including the undersides of shelves, which are surprisingly visible when you bend down to reach a low shelf. Do not finish the back of the back panel unless it will be seen, but do seal the top edges and the bottom, because unfinished end grain absorbs moisture from the room and can swell or discolour over time. Allow each coat to dry for the full time on the can, not just until it feels dry to the touch, and give the final coat an extra day before loading heavy books, so the finish hardens properly and does not print the texture of book covers into a soft film.
Wall Anchoring and Anti-Tip Safety: Do Not Skip This Step
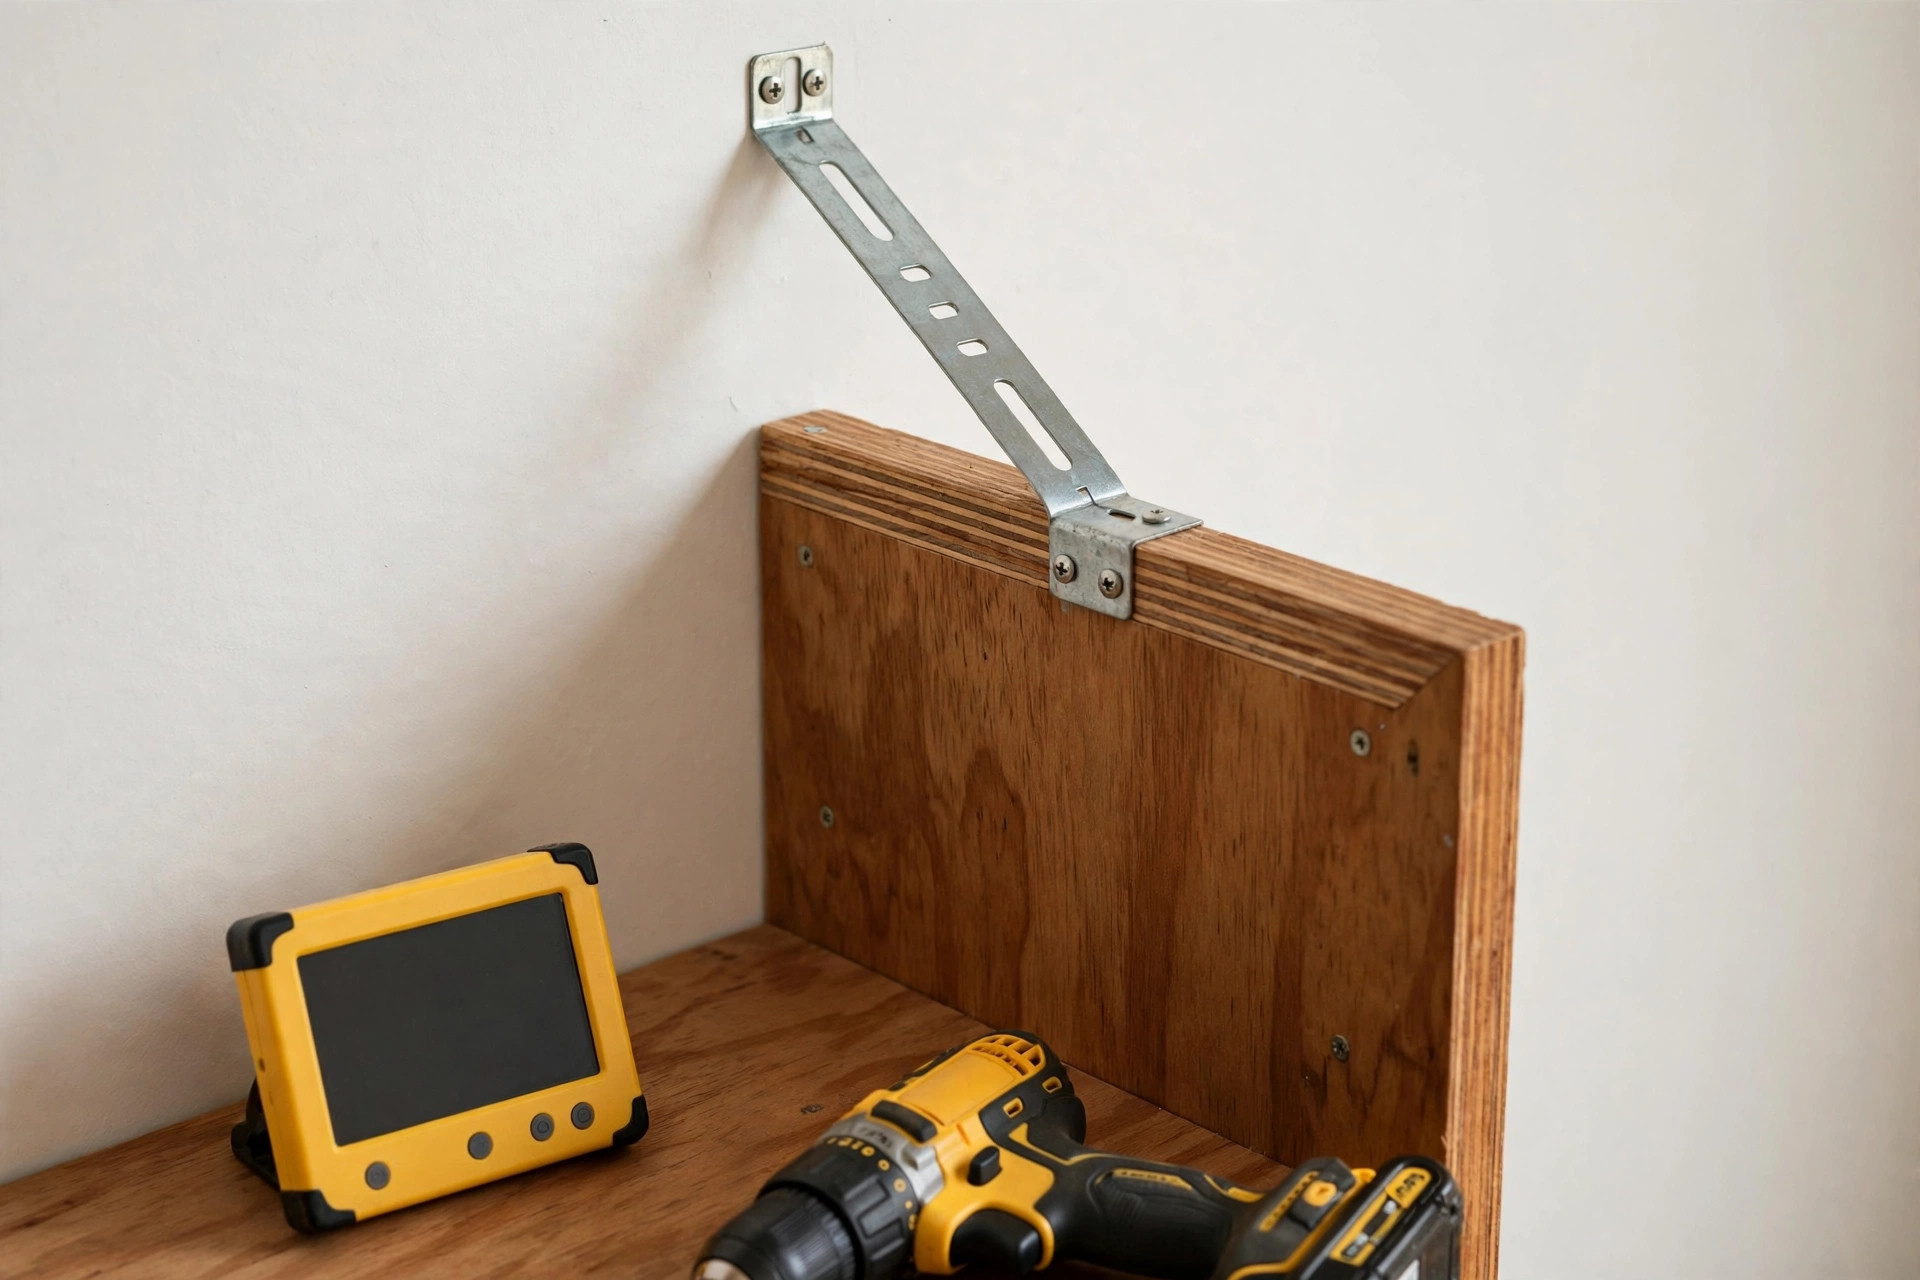
A bookshelf becomes a tipping hazard the moment it is loaded unevenly, climbed on, or pulled forward by someone reaching for a top-shelf book. Freestanding bookshelves, even short ones, can tip forward with surprising force, and children climbing to reach a book are the most common victims. Wall anchoring is not optional, and it is not a finishing touch to add someday. Anchor the bookshelf to the wall as the final step of the build, before you load it with books, and check the anchor every year or whenever you move the shelf.
The best anchor is a strap or cable kit screwed into a wall stud. Find the studs with a stud finder, mark them, and position the bookshelf so at least one anchor lands in solid wood. Drive the wall screw into the stud, not just into plasterboard, and screw the other end into the top rail or the top back edge of the bookshelf, where the frame is thickest. If no stud lines up with the bookshelf position, use a wall anchor rated for heavy furniture in your wall type, and follow the anchor manufacturer’s weight rating, because a light picture hook is not a furniture anchor. Two anchors, one near each end of the top, are better than one in the centre, because they also stop the shelf from twisting.
Also reduce the tipping risk by loading the bookshelf sensibly. Put the heaviest books on the lowest shelves, keep the top shelf light, and do not let children climb the shelves as if they were a ladder. If the bookshelf will stand in a child’s room, anchoring is doubly important, and you should also avoid placing tempting objects on the very top that invite climbing. A bookshelf that is anchored, loaded low, and kept against the wall will stay put even if a child pulls on it, and that peace of mind is worth far more than the ten minutes the anchor takes to fit.
Cost and Time: What This Bookshelf Really Takes
Costs vary by region and by whether you already own the tools, but the shape of the budget is stable. The boards are the largest cost, followed by the back panel and the finish, while screws, glue, and sandpaper are small items that add up less than beginners fear. The table below gives realistic planning bands for the materials alone, excluding tools you may need to buy for the first time.
| Item | Typical planning band | Notes |
|---|---|---|
| 3/4-inch plywood (half-sheet) or 1×12 pine boards | Largest single cost | One half-sheet usually covers the case; check store cutting services |
| 1/4-inch back panel | Low | Hardboard is cheaper; plywood looks better if the back is visible |
| Pocket-hole screws, glue, brad nails | Low | Buy screws matched to 3/4-inch material |
| Edge banding (plywood only) | Low | Iron-on banding; one roll covers many projects |
| Sandpaper, primer/finish, brushes | Moderate | Finish cost depends on paint vs stain and topcoat choice |
| Wall anchor kit | Very low | Do not skip; buy a furniture-rated kit |
In time terms, expect about four to six hours of active work spread over a weekend, plus drying time between finish coats. Cutting and drilling takes one to two hours, assembly takes one to two hours, sanding takes about an hour, and finishing takes another hour of active work spread over two days of drying. If you are building your first bookshelf, allow a full weekend rather than a single afternoon, because rushing the glue-up or the finish is how mistakes happen. The bookshelf will be in your home for years; an extra day of drying time is a small price for a finish that does not peel or stick.
Common Mistakes and How to Fix Them
The most common mistake is skipping the dry-fit and discovering out-of-square shelves only after the glue has set. The fix is patience: dry-fit every time, check the diagonals, and only then reach for the glue. The second mistake is drilling pocket holes on the visible face of a shelf, so the holes show on the front or top. The fix is to plug them with pocket-hole plugs and sand them flush, or to flip the shelf if the mistake is caught early, and to label every board’s hidden face before drilling next time. The third mistake is forgetting the back panel until the shelf is loaded and wobbling; the fix is to fit it before loading, even if it means emptying the shelf and laying it down again, because a back panel fitted late still transforms the rigidity.
Other frequent mistakes include sanding across the grain, which leaves visible scratches under stain; painting before the glue has fully dried, which traps moisture and weakens the joint; and loading the bookshelf before the finish has cured, which leaves book-shaped marks in soft paint. All of these are fixable by sanding back and refinishing, but all of them are easier to prevent than to repair. The final common mistake is building a bookshelf too wide without a centre support and then wondering why the middle shelf sags after a year. If your shelves are already sagging, add a centre divider or a hardwood front edge strip, move heavy books to the bottom, and consider turning the shelf over so the bow faces upward and gradually settles flatter under load, though this is a temporary remedy, not a cure.
Frequently Asked Questions
What is the best wood for a beginner bookshelf?
For most beginners, 3/4-inch birch plywood is the best choice because it is flat, stable, and affordable, and it paints beautifully. Solid 1×12 pine is a close second if you want a stained, traditional look, but check each board for warping before you buy it.
How tall should a beginner bookshelf be?
About 36 inches is ideal for a first bookshelf: tall enough for three useful shelves, short enough to stay stable and to reach the top shelf easily. Taller bookshelves are possible, but they need wider bases, centre supports, and especially careful wall anchoring.
Do I need a pocket-hole jig to build a bookshelf?
No, but it makes the build much faster and stronger for a beginner. Alternatives include screws driven through the side panels into the shelf ends, or simple butt joints reinforced with glue and screws, but those leave visible screw heads on the outside that pocket holes avoid.
How do I stop my bookshelf shelves from sagging?
Keep spans to 30 inches or less for 3/4-inch shelves, add a hardwood front edge strip or a centre divider for wider shelves, and put the heaviest books on the lowest shelves. Fixed shelves also help, because each shelf braces the case against racking.
Should I paint or stain my first bookshelf?
Paint if you are using plywood or knotty pine and want a clean, forgiving finish that hides imperfections. Stain if you have good-quality wood and want to show the grain, but test the colour on scrap first and use a pre-stain conditioner on pine to prevent blotching.
Do I really need to anchor a short bookshelf to the wall?
Yes. Even a 36-inch bookshelf can tip forward when loaded unevenly or climbed on, and anchoring takes about ten minutes with a furniture-rated kit. Anchor into a wall stud where possible, and check the anchor whenever you move the shelf.
Can I build this bookshelf with only a circular saw?
Yes. A circular saw with a straightedge guide can make every cut in this design, including the back panel. A table saw is faster for repeated rip cuts, but it is not required, and many beginners build their first bookshelf entirely with a circular saw and a pocket-hole jig.
The Bottom Line
Learning how to build a simple bookshelf for beginners is really about learning four habits that will serve every furniture project you build afterwards: measure and dry-fit before you glue, join with a method you can execute cleanly, stiffen the case with a back panel and sensible shelf spans, and finish with safety in mind by anchoring the finished piece to the wall. The bookshelf in this guide is small enough to finish in a weekend, useful enough to earn its place in your home, and honest enough to teach you what good furniture feels like: square, rigid, smooth to the touch, and solid when you pull a book from the middle shelf.
Start with straight boards, take your time over the cut list and the pocket holes, and do not skip the back panel or the wall anchor. When the finish has cured and the books are finally on the shelves, step back and look at what you made. It is not just storage. It is proof that you can turn flat boards into furniture, and it is the project that makes the next one, whether it is a workbench, a larger bookcase, or a set of shelves for an entire wall, feel entirely within reach. If you enjoyed this build, return to our pillar guide to easy woodworking projects for beginners that sell for your next project idea, and keep building, one square, well-anchored case at a time.



Pingback: How to Build a Wooden Magazine Holder for Beginners
Pingback: How to Make Wooden Bookends for Beginners